Friday, November 26, 2010

Roasted Garlic


I'm not particularly a fan of shopping, and I'm really not a fan of shopping on the day after Thanksgiving or Christmas Eve. I would not choose to be out at all, but I KNOW from experience I totally prefer to be behind a store counter than in front of it! Somehow it seems safer...


I hate crowds and traffic, and "deals" really aren't much of a draw for me. It's certainly not a good time and I just don't want to play that game. Ugh.


I had to run to the grocery store the day before Thanksgiving just like millions of other people, and it always surprises me when displays look sparse, or they run out of things. I dodged elderly, yet determined women with their shopping carts and was reminded of how much I really prefer empty stores.


After the Thanksgiving feasting, it's nice to have a little something more simple... things that don't take a lot of work or much "hands-on" time.
Some people may balk at the idea of eating whole cloves of garlic. Maybe they feel it's not socially responsible?


Anyway, when garlic cloves are cooked whole they're caramelized, much more delicate, subdued, and sweet than when they're minced. You get more intense garlic flavor when more of the cells in a clove of garlic are broken down. The more oils and juices that are released, the stronger the flavor.


I have an extreme preference for fresh garlic when cooking. I don't like it very much when it's pre-chopped or pickled and jarred.


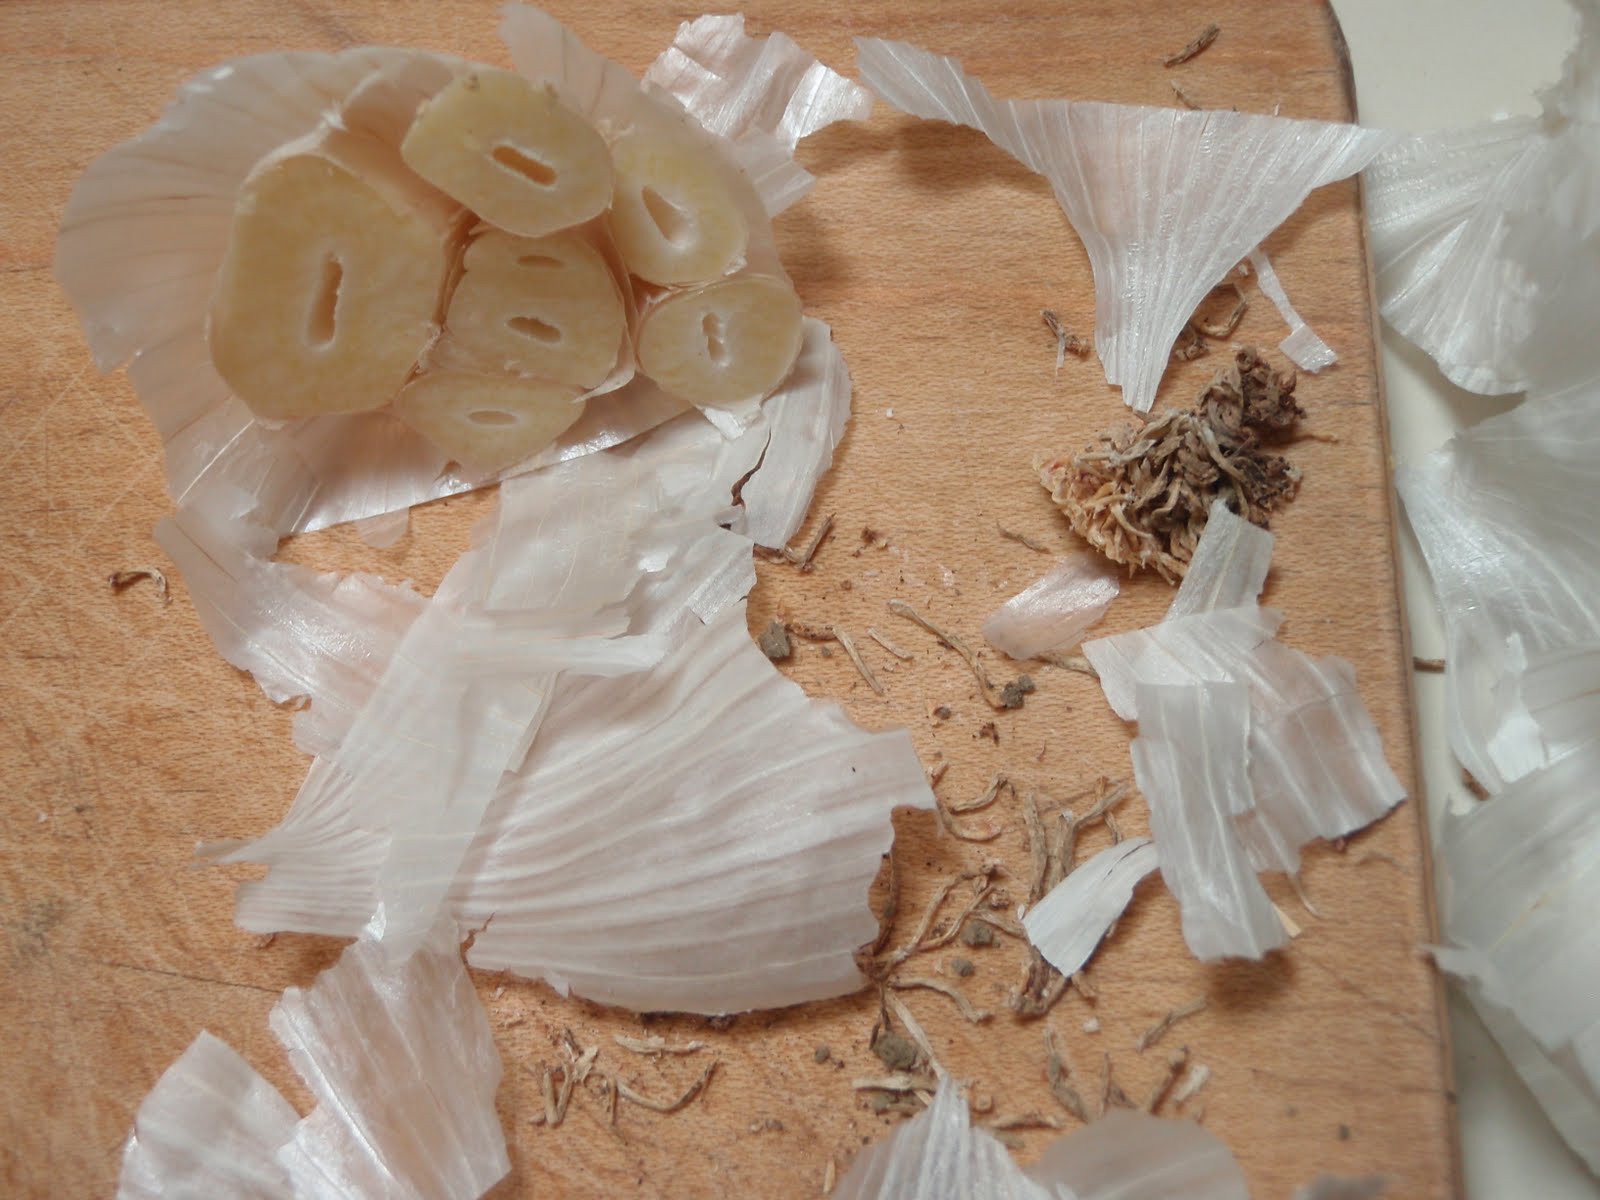
When choosing garlic, make sure it's fresh. You want to pick out bulbs with cloves that are tight, and you want to make sure the papery skin is also fairly tight on the bulb (of course, being papery, it will come off to some extent). Store it in a cool, dry place, but make sure the garlic has space and air circulation.


This is a really simple recipe that can be used spread on crackers or crostini sprinkled with a little salt and pepper and fresh herbs, on pasta, eaten with apples and cheese, mixed with softened butter or mayonnaise, spread on a sandwich, kneaded into bread dough, or mixed into soups or mashed potatoes for a little extra flavor.


If all else fails, you can just make sure to keep strong breath mints handy.
And please be nice to salespeople.

Roasted Garlic

3-6 bulbs of garlic
about 1/4 c olive oil

Preheat oven to 350 degrees F.
Cut off the tops of the garlic bulbs so that each clove is exposed. Place the garlic on a piece of tin foil and pour about a teaspoon of olive oil over each bulb. Let the olive oil soak into and between the cloves of garlic a couple minutes. Drizzle more olive oil over the bulbs of garlic, place another piece of foil over the garlic, and crimp edges of the foil together so that the package is airtight. Put the foil package on a pan or oven-safe dish and place it in the oven for 50 minutes to an hour. Let cool a little then open the foil package. When you are able to handle the bulbs of garlic safely, scoop or squeeze the cloves of garlic out of the papery skin and use as desired.
Roasted garlic should keep a few days refrigerated in an airtight container.

Monday, November 22, 2010

Pumpkin Panna Cotta


Think of this as a pumpkin pie alternative... a crustless, cool and creamy pumpkin (egg-free) custard.


I decided I had to post this before Thanksgiving.


It's not too fussy and not a last-minute dessert. But somehow, it's more elegant than pumpkin pie.
It's served cold.


All cooking is done on the stove top- no oven, no boiling water.
It's gluten-free, and can be dairy free if you make it with coconut milk (but to be honest with you, I made it a few times before getting it the way I wanted, and I really didn't like it when I made it with coconut milk).


I REALLY like it with a drizzle of caramel sauce and a dollop of cinnamon whipped cream... it tastes very "holiday" to me. Holiday with a little kick.


You don't have to use alcohol in your caramel sauce. Instead, you could use a little extra water or maybe some coffee.


One little note on gelatin:
Do not boil the gelatin in the liquid- there's a chance the gelatin won't thicken the panna cotta properly.
Eat within 24 hours for the best consistency.


Pumpkin Panna Cotta
makes about 8-10 6-oz ramekins

1 1/2 c packed pumpkin puree
2 3/4 t gelatin powder
1 c water
1 c heavy cream
1 c whole milk
3/4 c packed brown sugar
1/4 t salt
rounded 1/2 t cinnamon
1/8 t freshly ground nutmeg
1/2 t vanilla extract

Sprinkle the gelatin over 1/2 c water and set aside to soften.
Combine cream, milk, 1/2 c water, brown sugar, salt, and pumpkin in a medium saucepan over medium heat. Whisk together and stir occasionally until it has heated to a simmer. Remove from heat, add softened gelatin, and stir to combine.
Pour the pumpkin mixture into a blender or food processor, and pulse a few times to fully incorporate the gelatin. If you use a smaller food processor or blender you may need to divide the mixture and perform this step in two batches so you don't have an explosion of hot liquids in your kitchen.
Pour the mixture back into the pan, add the nutmeg and cinnamon, and heat again to a simmer, stirring occasionally. Once the mixture has reached a simmer, remove from heat and stir in vanilla.
Divide the mixture among custard cups or ramekins and refrigerate. Cover the dishes with plastic wrap once they are no longer hot and return them to the refrigerator.
Refrigerate at least 4 hours and up to overnight.


They may be eaten directly from the ramekins, or unmolded onto a plate. To unmold, run a thin, sharp knife around the perimeter of the custard, with the knife firmly against the inside of the ramekin, and invert the ramekin onto a plate. Holding the ramekin and plate together with both hands, shake forcefully a few times so that the panna cotta falls out of the ramekin and onto the plate (you may be able to hear and feel it). Pull the ramekin off the plate and garnish as desired before serving.


Bourbon (or Brandy) Caramel Sauce

3/4 c granulated sugar
5 T water
pinch of salt

10 drops lemon juice
6 T water
2 T bourbon or brandy
1/2 t vanilla extract

Mix 10 drops of lemon juice with 6 T water in a small bowl and set aside.
Heat 5 T water, a pinch of salt, and 3/4 c sugar in a medium saucepan over medium heat. Swirl the pan occasionally to help dissolve the sugar, but do not stir it with a spoon or spatula. Once the sugar is dissolved, continue to heat and swirl the syrup. It will thicken, the bubbles will slow down and become larger as it cooks, this may take 20 minutes. Continue heating the syrup while it caramelizes and becomes golden in color- you're looking for a deep golden amber. Watch the caramel carefully as it can suddenly go from perfect to burnt, and swirl the pan so that it caramelizes evenly. Once the caramel reaches the desired doneness carefully pour in the lemon water. Be careful, it will splatter! Swirl and stir the pan until the caramel is fully dissolved. Remove from the heat and let the pan of caramel cool. Stir in the brandy or bourbon and vanilla.
Caramel sauce can be made ahead of time and stored in a glass jar at room temperature. Any extra could be used on top of ice cream, on cheesecake, in coffee...

Saturday, November 20, 2010

Barley and Pine Nut Pilaf


Barley is a nutty-flavored cereal grain with a chewy texture once it's cooked.


I don't think may people use barley for anything other than in soups.
Or beer...


Technically, pilaf is a rice dish cooked in broth, so the flavor is soaked up and permeates the rice. There are many versions with different additions such as onions, garlic, carrot, almonds, pistachios, raisins, apricots, and spices.


This recipe is a little different with the use of barley, but it's a hearty side and a nice addition to fall and winter meals. It's great with roasts and poultry as well as sausages.
Actually, it's pretty good with anything...


The texture is great, as is the flavor.


I've never tried it before, but I think mushrooms and a couple minced cloves of garlic would be a nice addition...

Barley and Pine Nut Pilaf
serves 6

1 c pearl barley, rinsed in cool water and drained
4 T butter
1/3 c pine nuts
1 bunch (1 c) green onions, chopped
1/2 c chopped fresh parsley
1/4 t salt
1/2 t pepper
3 1/3 c chicken broth

Preheat oven to 350 degrees F.
In a 10-inch skillet, heat butter and brown pine nuts. Remove with a slotted spoon and reserve. Saute green onions and barley until lightly toasted. Remove the pan from heat. Stir in toasted nuts, parsley, salt, and pepper. Spoon into ungreased 2 qt. casserole.
Heat the chicken broth to a boil in a saucepan and pour over the barley mixture. Stir to blend well. Bake, uncovered, 1 hour and 10 minutes.
Stir before serving.

Monday, November 15, 2010

Apple and Cheddar Scones


I saw these and had to try them.
They're different, not overly sweet, but very good and very fall-ish.
They're nice for breakfast, or would be good for tea or with soup and salad for a lunch or dinner.


I was thinking about making them to take for a potential car ride "up north"... which is actually just Northern Missouri. I really wanted to go to a maize maze this autumn- the last time I went was in college, and I enjoyed it.


The first time we tried to go we didn't make it since we were rewarded with a flat tire. I had to pull off on a section of road that had just been re-paved. Not cool. Shoes were caked in an inch of tar, oil, and gravel. My face was attractively smeared with oil and tar (it itched, and I touched my face- what can I say?).


Well, the reason for this is that I'd tried to change the tire. I tried to be macho, but it didn't work in my favor. There are some things girls can't do. Changing tires really isn't one of those things, but loosening bolts on a tire whose bolts had been pneumatically tightened in the shop DOES happen to be one of those things.


Can't lie... I wasn't strong enough, I'm not strong enough. It doesn't matter if you know how to change a tire if you can't remove the bolts. It's not going to happen for you.


A nice man in a conversion van with his name tooled into the back of his belt (I wish I could remember what it was... was it Butch?) pulled over to help, and he sprayed our hands with WD-40 so we could clean them. Were there paper towels somewhere, or did we have to wipe our dirty hands on the grass? I can't remember, but I'm thinking we had to use the grass.


We were a motley and very dirty crew walking back into the dorm...

The second time we tried to go was a much more successful endeavor.


Anyway, if you've never been to a corn maze, they're pretty neat. From the sky they look like art in a field. Strangely, I remember there was a soda machine in the middle of this maze. A soda machine in the middle of a corn field. Yes, I thought it was strange at the time. Maybe people got lost and thirsty?


If this road trip happens, I plan to kidnap or cajole (pressure? blackmail?) some people to come with if I can still find one this year.
I'll make coffee too! I promise! This way we don't have to stop at a gas station for disgusting coffee that tastes like erasure and lead! Blech.
Believe me, it's a problem.


Back to scones.
I'm not an advocate for using a mixer when making scones. I think it needs to be done by hand for textural reasons in the finished product. Besides, it's not that much of an inconvenience!
Overmixing a scone dough (easily done with a mixer) will give you something that's much too stiff and of a rubbery/chewy consistency... not the melt-in-your-mouth flakiness you want for a good scone.

Apple and Cheddar Scones
(Slightly adapted from the blog Smitten Kitchen, who adapted them from The Perfect Finish)

Makes 6 generous scones

2 larger or 3 smaller Granny Smith apples (about 1 lb)
1 1/2 c flour
1/4 c sugar, plus extra for sprinkling
1/2 T baking powder
1/2 t salt
6 T cold butter, cut into chunks
1/2 c shredded Cheddar cheese
1/4 c heavy cream
2 large eggs

Position a rack in the center of the oven and preheat to 375 degrees F.
Peel, core, and cut apples into 1/16 chunks (8 slices, halved). Spread on a pan covered with a sheet of parchment paper, and bake about 20 minutes, until softened and a little colored. Remove from oven (leave the oven on!) and let apples cool completely.
In a large bowl, whisk together flour, sugar, baking powder, and salt. Toss in butter chunks and using fingers, knives, or a pastry cutter, incorporate the butter into the flour mixture until it looks like coarse sand.
Mix the cream in a bowl or measuring cup with one slightly beaten egg.
Coarsely chop the apples, and add to the flour mixture along with the cheese, egg, and cream. Lightly fold the ingredients together, being careful not to overmix. The dough will not look or feel completely smooth- in fact, the texture of the baked scones will be better the less you touch, stir, and fold it. If it falls apart or crumbles a little, that's fine!
Pour the dough out onto a lightly floured surface and pat into a 6 inch diameter circle. Cut the circle into 6 triangles and arrange on baking sheet that has either been well greased or is lined with parchment paper. Make sure there is at least 2 inches of space between scones.
Beat the other egg with a pinch of salt and 1 t water. Brush the egg wash over the scones and sprinkle with sugar. Bake 25-30 minutes, until firm and deep golden brown. Remove the scones to a wire rack and let cool 10 minutes before eating.
Scones are best the day they are made.

Thursday, November 11, 2010

"The PERFECT Chocolate Chip Cookies"


One caveat: you have to wait!
If they're going to be "perfect" you have to make the dough and then wait 36 hours before baking it.
Sorry... but hopefully you'll find it's worth the wait. It doesn't happen to be one of those "last minute quick throw together and bake because I need instant satisfaction" recipes.
It's more of a plan-ahead chocolate chip cookie.


Luckily, I didn't have to post any personalized love notes/hate mail on the bowl of cookie dough that spent time in the fridge. It's sort of a dangerous thing since I think some people seem to harbor the belief that the five finger discount may be applied at any time to something like this. The idea is that cookie dough in the fridge = fair game.

But no, no it's not.


This time, a simple "Wednesday AM" written on the plastic wrap seemed to be sufficient.

While resting, the cookie dough soaks up the liquid, the dough dries out, and the flavors develop.
The cookies will be more caramel-y and toffee-flavored.
The other really great thing is the contrast of flavor and texture with the coarse salt sprinkled on top just before baking- like with a chocolate-covered, salted caramel.

If you're a chocolate chip cookie connoisseur, you might find this New York Times article interesting.


The original is based on a Jacques Torres recipe (he's a French pastry chef who specializes in chocolate).

I made a few changes! My apologies, Jacques. I suppose we could say it was out of sheer laziness. I really didn't want to get in the car and go to the store. I wasn't quite that bored (and it's amazing how much driving loses it's sheen as you age... even after only a couple years).
I wasn't willing to use two kinds of flour, I changed the measurement a little, I decided I had enough chocolate chips available to me at the time for the purpose of this recipe.

However, I do think a GOOD chocolate is important, so it's a good thing to have around for those times when you have a cookie making emergency. Jacques prefers the disks for the amount of chocolate, surface area, and final cookie and melted chocolate texture, but I won't make you go out to buy those.


I know, I know. TWO AND A HALF STICKS OF BUTTER? Yes.
However, you can sort of justify it mentally by telling yourself you won't be eating ALL of those cookies. And besides, how often are you really going to make them since you have to wait a forever long time before you get to the finished product? It's ok. Right?


As large as they are, I made my cookies smaller than the "original" recipe says to make them. Mine turned out to be about 4 inches in diameter, which is big enough. Plus, 24 cookies vs. 16? The recipe will go a little further this way.

One of the keys to a crispy outside and a chewy inside is to bake the cookies until golden brown in spots, but it may look a little pale and possibly raw in some of the cracks between the crags that form. It's ok, you definitely want this! They continue to cook and firm up a bit as they cool.


The salt sprinkled on the cookies before they're baked is a nice surprise, and it contrasts nicely with the caramelly/toffee flavor of the cookies. I had a friend when I was in high school who would sprinkle crushed pretzels over her ice cream- it sounded strange to me, but it was actually really good. Same goes for caramels with salt sprinkled on top... it can seem a little strange if you've never had them, but it's a good combination.

The salt is also kind of pretty- it adds a little crystalline sparkle.

So maybe they're not really perfect since cookies, like so many other things, are subject to a little thing known as personal opinion. They're pretty good though!
They're probably more appreciated by adults than kids, and better for people who like to temper their sweet with a little savory.

The Perfect Chocolate Chip Cookies
Yield: 2 dozen 4-inch cookies

Adapted from Jacques Torres

3 1/2 cups AP flour
1 1/4 t baking soda
1 1/2 t baking powder
1 1/2 teaspoons coarse salt (such as kosher)
2 1/2 sticks (1 1/4 cups) unsalted butter
1 1/4 c lightly packed light brown sugar
1 c plus 2 tablespoons granulated sugar
2 large eggs
2 teaspoons vanilla extract
16 oz bittersweet or semi-sweet chocolate chips, disks or fèves, at least 60 percent cacao content (if possible)

Sea salt or kosher salt, for sprinkling

Sift flours, baking soda, baking powder and salt into a bowl and set aside.
Using a mixer fitted with paddle attachment, cream butter and sugars together until very light, about 5 minutes. Add eggs, one at a time, mixing well after each addition. Stir in the vanilla. Reduce speed to low, add dry ingredients and mix until just combined, 5 to 10 seconds. Drop chocolate pieces in and incorporate them, stirring by hand, without breaking them. Transfer the dough to another bowl, press plastic wrap directly against the dough, and refrigerate for 24 to 36 hours. Dough may be used in batches, and can be refrigerated for up to 72 hours.

*Before baking the cookies, it will be easier to deal with the cold dough if you leave the bowl out at room temperature for about 30 minutes. You still want the dough to be cool before baking though!

Preheat oven to 350 degrees. Line a baking sheet with parchment paper or a nonstick baking mat. Set aside.
Scoop mounds of dough onto baking sheet with an ice cream scoop (about 1/4 c of dough, or 4 oz. if you have a scale), making sure to turn horizontally any chocolate pieces that are poking up; it will make for a more attractive cookie. Sprinkle lightly with sea salt or kosher salt and bake until golden brown but still soft, 15 to 18 minutes, rotating the baking sheet front to back halfway through. Transfer the sheet with the cookies to a wire rack for 10 minutes, then slip cookies on the parchment paper onto another rack to cool a bit more. Repeat with remaining dough, or reserve dough, refrigerated, for baking remaining batches the next day. Eat warm, with a big napkin.