Monday, January 17, 2011

Sauteed Mushrooms on Toast


Mushrooms for breakfast?
Yes, sometimes (on English Muffins, of course).
Or as part of a light lunch.
Or dinner.
Or used as an appetizer...


This particular recipe comes from a day when we were trying to figure out what to have for lunch.
It was a let's-see-what-we-can-do-here-with-what-we've-got kind of day.
It was also a Natalie-you'd-better-take-notes-on-what-you-do-and-you'd-better-not-misplace-them kind of a lunch.

Needless to say, the notes were misplaced.
They were re-written from what I could remember and then again re-written when I made the mushrooms another day...

The original recipe came from bill's food, a book a picked up in Australia by Bill Granger. 
You know you have those days when you sort of remember a recipe, but not completely and don't have access to it? It's a bit like the game Telephone where things change little by little with each successive turn. Then you have to go back to the original to check out what's changed (though I'll admit I don't think this is TOO far off it).


The preserved lemon peel was from the stash I made a while back. If you can't get your hands on some, you could potentially use the zest of a lemon and a tablespoon or two of fresh squeezed lemon juice. It won't taste the same as with the preserved lemon, but I'm not going to tell you it'll be bad, either!
The other thing you'd need in addition is some salt to taste... maybe start with 1/2 teaspoon and go up from there. With the preserved lemon, no additional salt is necessary since the lemon is plenty salty having been preserved in salt.


If using the preserved lemon, you'll want to remove the pulpy inside of the lemon and rinse the peel under cool, running water to rid it of excess salt before mincing the whole peel to use in this recipe.


I like to have little bits of lemon peel in my mushrooms (as opposed to completely mashed lemon peel that would melt into the mushrooms) because the lemon pieces add some color as well as an occasional zingy burst of flavor!


Sauteed Mushrooms on Toast

16 oz (1 lb.) mushrooms, sliced thickly
2 T butter
2 T olive oil
2 cloves garlic, minced or pressed through a garlic press
1/2 c white wine
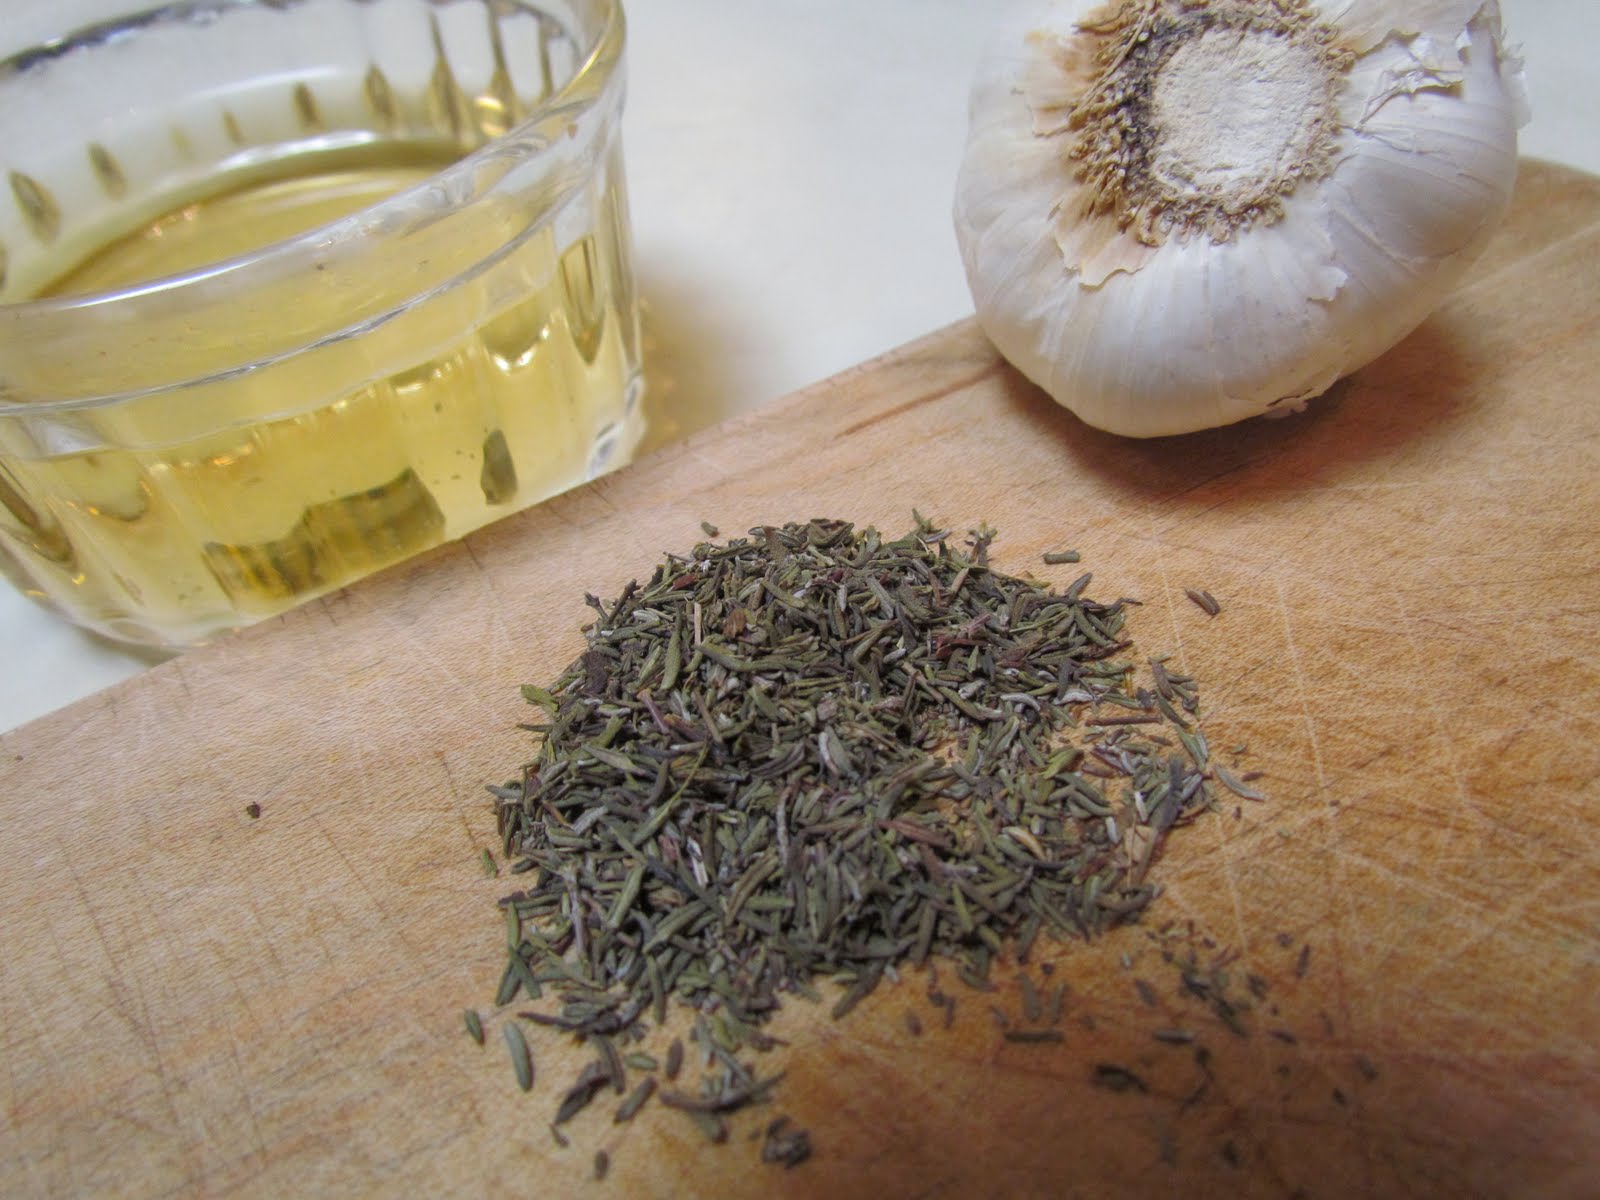
1 1/2 t dried thyme
3/4 preserved lemon peel, minced
1/2 t fresh ground black pepper

Ricotta cheese
Crusty bread (slightly toasted is recommended)
Italian parsley for garnish, if desired

In a medium pot, heat the olive oil and butter over medium heat. When the butter is melted, add the garlic and mushrooms and toss to coat. Cover the pot and braise the mushrooms about 8 minutes until the mushrooms are softened and the juices are released. Uncover the pot, continue cooking, stirring occasionally, until the juices are absorbed/evaporated (about 5 minutes).
Once the juices are absorbed, add the dried thyme and white wine. Continue to cook and stir occasionally, until the white wine is mostly absorbed/evaporated and the mushrooms are left in a little bit of a slightly syrupy sauce, about 5 minutes.
Stir in the minced preserved lemon peel and black pepper and warm through.
Spread a layer of ricotta cheese on the bread (or toast) and top with the mushroom mixture.

Friday, January 14, 2011

Café Brûlot


Café Brûlot is a nice, warming after-dinner coffee drink this time of year.


It comes from the French Quarter of New Orleans.


It's flambéed, too- but at home you're not required to perform the tableside dinner theater that you'd find in a restaurant!


The original recipe comes from Gourmet, October 2008. My contribution? Brown sugar instead of white.


Café Brûlot
serves 6-8

1 orange
3, 2 inch strips of lemon zest
2, 3 inch cinnamon sticks
12 whole cloves
1/3 c Cointreau
1/3 c brandy
1 T packed brown sugar
3 c hot, strong black coffee

Peel the orange zest from the orange in one continuous spiral. Stud the peel with the cloves. Add the orange zest and cloves, lemon zest, cinnamon, Cointreau, brandy, and sugar to a medium saucepan. Cook over meduim heat until the sugar is melted and the mixture is hot. Turn off the heat. With a long match or a long lighter, set the mixture alight. Once the flames have died down a bit, add the hot coffee (this will extinguish the flames). Swirl the pan to mix the coffee in and ladle into demitasse cups or small coffee cups.


Monday, January 10, 2011

Outrageous Brownies


I do love books (they're on my list with pottery and shoes) ... but we have an interesting relationship.


And generally, when I love these books SOOOOO much, I'm very careful with them.
Please don't ask because I am aware there's a term for this.


I had someone question me whether I actually read some of the novels from high school. They looked pristine- no bent pages or smudges, and the binding had no damage.


I used to have an awful time letting a book go to be borrowed because I knew it wouldn't come back in the wonderful condition it had left me.
I never used hi-lighters in my books. It really ruined the look of them, and it seemed wrong to me to deface a book in this manner (I know, it's a little crazy).
Didn't do it in college or grad school either.


If I bought a textbook (preferably used and cheaper), it usually already had hi-lighter in it. The important points were taken care of, and I wasn't the one defacing my book.
Not that I would ever want to keep all of my college textbooks... some I couldn't have been happier to part with.


I used to be this crazy about cookbooks, and will admit to cooking from a book, but leaving it in a room adjacent to the kitchen so it was away from potential damage. You can be sure this is a very safe way to treat cookbooks. They're usually propped up with something under both sides of the cover so that the binding is protected too.


Um, sometimes I still do that. Maybe it's more frequent than occasional.
And yes, there are witnesses.
Over time, however, I have become more lenient with cookbooks on this matter.


A beautiful cookbook isn't necessarily a GOOD cookbook. They're meant to be used.
Torn pages and covers, splatters and stains, water spots from laying them in a puddle on the counter, writing, broken bindings, and even having some poor pages come unattached and fall out of the book.
It's almost book murder, it's sad, but it's meant to be.


This particular book has all of those things, and it will lay completely flat on any chosen page because of the completely shot binding.

The original recipe comes from The Barefoot Contessa Cookbook- which happens to be falling apart. It says that it makes 20 large brownies. However, since the sheet pan is SO big, and the brownies are SO rich and dark, I'd be more inclined to say the recipe makes roughly one million brownies.

When we make them over here, they're either for some type of event where there will be many people to eat them, or we will end up freezing many of them individually and sharing them among a few houses. For example, when I was in school, half a million ended up following me home after a weekend visit at my parents' house. True story.


They're nice either slightly warm, or at room temperature. I like the chocolate chips both soft and gooey as well as solid. Room temperature chocolate chips are fine in a cookie. I don't like them completely cold and flavorless (and with the wonderful ability to stick to teeth) in ice cream.


This post needed a bit more color.


Outrageous Brownies
from The Barefoot Contessa Cookbook
makes one 1/2 sheet pan (roughly 18x13x1 inches)

6 oz. unsweetened chocolate
1 b. plus 12 oz. semi-sweet chocolate chips (however, in a pinch I have just used 2 12 oz bags before and it worked just fine)
1 1b. (4 sticks) unsalted butter
6 XL eggs
3 T instant coffee granules
2 T vanilla extract
2 1/4 c sugar
1 1/4 c flour
1 T baking powder
1 t salt
3 c chopped walnuts

Preheat oven to 350 degrees.
Butter and flour an 18x13 inch sheet pan.
Place 1 lb. chocolate chips, butter, and unsweetened chocolate in a heatproof bowl set over a simmering pan of water on the stove. Stir occasionally until melted. Remove from heat and allow to cool slightly.
In a large bowl, combine the eggs, sugar, coffee, and vanilla. Stir to combine, but do not beat and incorporate air. Stir the warm chocolate mixture into the egg mixture and let cool to room temperature.
In a medium bowl, sift together (or whisk together) 1 c of the flour, baking powder, and salt. Fold the flour mixture into the chocolate mixture and stir until just combined. In another bowl mix the walnuts, the remaining chocolate chips, and the last 1/4 c flour. Fold into the brownie batter, pour into the prepared pan, and spread evenly.
Bake the brownies in the preheated oven about 20 minutes. At this point open the oven and give the pan a few hard whaks against the sides of the oven to release air from between the pan and the brownies. Close the oven and continue baking for about 10 minutes. Check the brownies for doneness with a toothpick inserted near the center, and continue to bake a few minutes longer if necessary. Be careful not to overbake! Allow to cool thoroughly before cutting.

Note: Cutting is much easier if they brownies have been refrigerated.

Sunday, January 2, 2011

Tiramisu


Tiramisu is pretty much a staple on the dessert menus of America's Italian restaurants with it's robust coffee flavor and creamy texture.


I'm sure we've all had at least one that was really good, and at least one that was sadly lacking one thing or another... or multiple somethings. But, they could also have had too much of something...


Depending on just who you happened to be at the age of 10 or so, I suppose tiramisu could elicit a few different responses.
For some, it may have been a simple "ewww."
For others who might have been a little more daring or imaginative, it might have received something more akin to the feeling of doing something slightly illicit.
A scandalous dessert.


If you knew it contained coffee (surely an "adult" drink), and alcohol (even more and "adult" beverage than coffee), this was your chance to be slightly more adult... as adult as a 10-year-old could possibly be.


If you felt yourself to be a fairly chic, slightly forward thinking, cosmopolitan grade schooler, you may have ordered it.


And it wouldn't have mattered if it wasn't the best dessert on the menu because you were doing something rascally, laughing in the face of social norms, taking your life into your own hands by this fearful endeavor.


I'm allowed to order this? I'm allowed to eat something like this?
I'm really not going to get in trouble? Will my parents be in trouble?
Nobody's going to march up to the table to scold or lecture? No one's going to be questioned by the authorities or taken to jail over this?
See... this is where some of the imagination comes into play.


This kind of a combination (youth and illegal confections) could potentially be similar to Prohibition and speakeasies.
It could be downright dangerous if you're caught. This not-too-sweet and slightly boozy, layered concoction could possibly wreak havoc on your social standing depending on who you associate with. It could be a dire situation.


But... the sad thing is that it really wasn't your dessert. You had to share...
All because life is unfair.
That's why people have to share desserts: because life is unfair.
Then again, if you're 10 and you don't pay, you don't really have much of a say in important matters such as this.


Anyhow...

Mascarpone cheese is sort of an Italian version of cream cheese, and can probably be found in most grocery stores in the cheese section or with the dairy products. I will not tell you that it's in ALL grocery stores because someone won't end up finding it and make me out to be a liar. Sorry, I won't guarantee mascarpone cheese's omnipresence.


Ladyfingers are available in some (not all) grocery stores. I have found both Italian and French versions (at least that's the way they were labeled, and there's a picture above). Both work equally well, you just have to use more of the French ladyfingers to cover the pan. For the second row, you will most likely need to cut the cookies a little so that they all fit comfortably (as if anyone is concerned about the comfort of cookies).


The time the tiramisu spends overnight in the refrigerator is important. This way the flavors meld and everything comes together nicely. Plus, it becomes fairly easy to cut into squares for a pretty presentation if you take a little time and are gentle with a spatula. On the other hand, if you're pressed for time and patience, you could also use a spoon to serve.


This dessert DOES contain raw egg yolks. If you're worried about it, this probably isn't the recipe for you. Then again, maybe you could find some chickens you trust.


Tiramisu
serves 8-12

2, 6-7 oz packages savoiardi or ladyfingers (the dry, crispy ones- not the soft, cakey ones)
2 1/2 c espresso or strong black coffee
3/4 c rum
6 extra large egg yolks, at room temperature
1/3 + 2 t sugar
16 oz mascarpone cheese
6 T whipping cream
pinch of salt
1/2 t vanilla extract
cocoa powder

Whisk the egg yolks and 1/3 c sugar on low speed until incorporated. Increase the speed to high and continue to whisk until the yolks are very thick and pale yellow, about 5 minutes. Add the mascarpone cheese, 1/4 c rum, 1/4 c espresso, whipping cream, vanilla and salt, whisking again at low speed until incorporated. Increase the speed to medium and continue to mix until the cheese mixture is quite thick and smooth.
Combine the rest of the rum and espresso in a medium bowl with 2 t sugar. Stir until the sugar is dissolved. Dip and roll each ladyfinger into the coffee mixture so they are saturated and line the bottom of a 9x13 inch pan. Pour about half the cheese mixture over the top of the ladyfingers and spread smoothly and evenly. Sprinkle cocoa powder over the top of the cheese layer.
Repeat the process with another layer of rum and coffee soaked ladyfingers and finish with a final smooth layer of the remaining cheese mixture. Cover the pan with plastic wrap and refrigerate overnight.
Cut the tiramisu into squares and plate (or scoop it out of the pan with a spoon). Dust the top of each serving with cocoa powder.

Thursday, December 23, 2010

Brown Butter and Pine Nut Pasta


There are a variety of pasta shapes out there, and they were created with different purposes in mind...


...or the sauces were paired with the pastas because they were complimentay for one reason or another.


Large shells are meant to be stuffed with a meat or cheese, as are canneloni.
Very small pastas are good as an addition to soups (just like rice or barley might be).
Pastas with ridges "catch" bits of meat and sauce.


Personally, I totally prefer pasta shapes to pastas in a long, thin noodle form. I think I just like the textures.


This is a very nice, simple pasta, and I chose the farfalle because the folds will catch little pools of sauce and a pine nut or two.


Make sure not to overcook the pasta in the boiling water. When the pasta is added to the hot sauce, it will continue to cook a bit and soak up the sauce. In fact, for this reason I tend to undercook the pasta by a couple minutes. I want the texture to be perfectly al dente.


Brown Butter and Pine Nut Pasta
serves 6-8

1 lb. farfalle (bowtie) pasta
kosher salt
2 sticks plus 2 T butter (18 T)
1 c pine nuts
1/2 t freshly grated nutmeg, plus extra for serving
1/2 t freshly ground black pepper
1 bunch fresh parsley, stems removed and roughly chopped
fresh Parmesan cheese for serving

Heat a large pot of well-salted water to boiling.
While water heats, melt the butter in another large pot over medium heat. When the butter is melted, add the pine nuts, stirring often, until they nuts are a deep golden brown (about 10 minutes). Turn off the heat, remove the nuts from the butter with a slotted spoon or sieve and set aside.
When the pasta is "al dente," remove about 1/2 cup of the cooking water to a cup or a bowl, drain the pasta from the water and add it to the brown butter. Add the reserved water, most of the pine nuts, a sprinkling of salt, the pepper, nutmeg, and chopped parsley, and stir to combine.
Serve the pasta with fresh Parmesan cheese and a grating of fresh nutmeg. Sprinkle a few of the reserved pine nuts on top.