Saturday, October 31, 2015

Peanut and Hazelnut Butter


I have been meaning to make homemade nut butter for a while now, thinking about it... but it didn't happen until just recently. I don't know why it took so long. It's relatively simple and you can have some fun with it.


This one has a bit of cinnamon and a hint of sweetness from honey. It's nice with apples, on toast, and it might be great swirled into a bowl of hot oats. Or maybe in the center of a homemade peanut butter cup? Though not really peanut butter...


Since I've made it, I've been imagining other versions I might try. Cashews processed with some coconut oil and spiked with cardamom. Pecans with apple pie inspired spices. And why not a version of Nutella- hazelnuts and cocoa powder? Of course, it might not be a bad idea to go basic and try out some plain peanut butter. I suppose I just went and jumped ahead there.


The point is that there are so many combinations that could be tried... maybe try mixing dried fruit and seeds into nut butter, bits of chocolate, coconut, different spices... start with a base and go from there!


Peanut and Hazelnut Butter
makes about 2 cups (around 500 ml amount)

1 c (130 g) hazelnuts
1 1/2 c (225 g) peanuts, without skins, dry roasted and unsalted
3 T (45 ml) honey
1/4 c (60 ml) peanut, sunflower, or another neutral oil
1 t (3 g) ground cinnamon
1/4 t (large pinch) fine sea salt

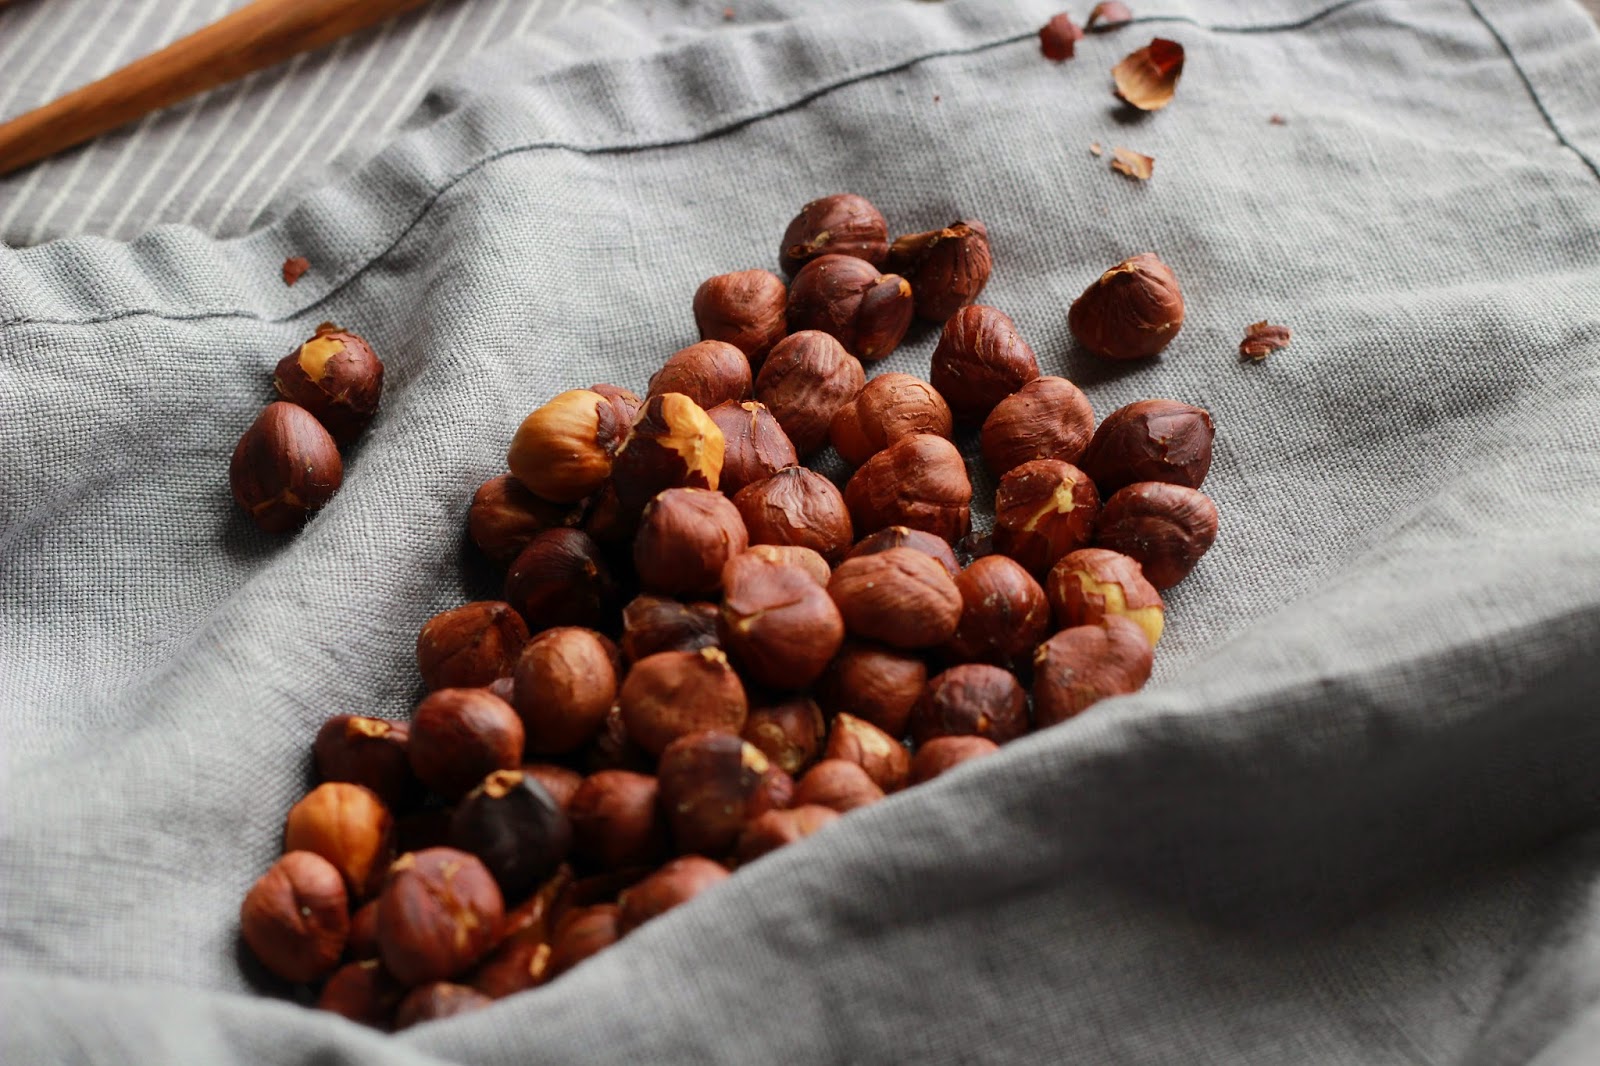
Preheat the oven to 350 F/ 180 C. Place the hazelnuts on a baking sheet and toast 8-10 minutes, shaking the pan a few times during the bake to toast evenly. Remove the pan from the oven and let cool slightly. If the hazelnuts have skins, place the nuts in a kitchen towel and rub them to remove the skins. Let the hazelnuts cool completely.
Place the cooled hazelnuts and peanuts in the bowl of a food processor. Process/pulse until the nuts resemble coarse sand. Add the rest of the ingredients. Continue to process until the mixture resembles nut butter (this will take a while- maybe up to 15 minutes total). Give the food processor a 5 minute break once or twice during this process as this is a lot of work for the machine- you do not want to burn out your food processor.
If you like it a bit smoother, sweeter, or saltier, add extra oil, honey, or salt and process to incorporate.
Remove the nut butter to a covered container and enjoy within a couple weeks.


*Yes, it is drier than standard versions of peanut butter, but I prefer to use less oil. 


Saturday, October 3, 2015

Chocolate Terrine (in a pool of Blackberry-Port Sauce)


Some might say any recipe that starts with a pound of chocolate can't be a bad thing.
I've made this seven or eight times in the last year, each time changing things here and there as it was never quite what I was looking for. The thing is, you can't just keep making one large chocolate terrine after another. No, no, you can, but you shouldn't.
You can't rush these things, you need a break between. So you keep notes on important things like this.
And who knows, maybe it'll change again.


But, the good news is that most people are ok with chocolate in general, as well as assisting in it's dispatch.


A chocolate terrine is in some ways like a mousse, but a bit more stiff and slice-able.
Best sliced cold, though not served directly after, the terrine is creamy melt-in-the-mouth chocolate, not too heavy, but still decadent. I don't know exactly what it is, the more dense a chocolate dessert, the more decadent it seems.
(Although, perhaps strangely, I don't think I would say a piece of solid chocolate is the most decadent of all.)
To me, a thicker pot de creme seems richer than it's not quite so set brother. It's just cooked a little longer, so why is that?
Perhaps one slows down a bit to eat it, maybe it's more likely to be savored... There could be some cue taken unconsciously.


Good reason to make sure the terrine has the time it needs to set completely. In addition to the increased ease of slicing (a function of time and temperature), we'll definitely say upon it's requisite gradual consumption, more enjoyment is gained (and in that case, since you naturally slow your pace, you consequently need less).


The blackberry-Port sauce is a fantastic accompaniment, complimentary and fruity with a slight tannic flair- a little deeper than berries on their own, and so nice for early autumn. There's a certain perfume-y quality in a berry and red wine combination that I love.


Not only is it a make-ahead (save yourself stress day-of and be proactive) dessert, it won't work out or behave properly if not made ahead. Please don't go rogue on this one, folks.
The fact of the matter is that it's an especially important point if you happen to be serving a crowd- save the last minute stress for another time.
(Likewise, souffles are more appropriate to prepare for the more intimate group, and a nightmare for the crowd. Planning is important.)


That said, the recipe certainly does not serve a small group. And though you can work on halving it, it won't be the most straightforward of all time as the recipe does not call for an even number of egg whites. I can say I find that extra chocolate terrine is ok to freeze for a couple weeks to a month, as long as it's properly wrapped and in a covered container. The ingredients are much the same as in ice cream. Just let it warm a bit before you dive in.
But let's face it: yes, you can eat it straight out of the freezer, it can be done.
And sometimes that's just the way it has to be, it's the awful truth (honestly).


Chocolate Terrine
serves a 12-16

(5 cups, about 1500 ml- keep in mind for your mould)

16 oz (454g) good dark chocolate (60-70%), chopped
12 T (171g) unsalted butter
4 large egg yolks
3 large egg whites
1/4 t (2 g) fine sea salt

1/2 c (114g) sugar
1 1/4 c (about 320 ml) heavy cream 


Grease/spray/oil a mould and line with plastic wrap (clingfilm).
The one I like to use may be a bit unconventional, a long and relatively thin loaf pan, but I really prefer it's shape.

Place the chocolate and butter in a large heat safe bowl, and place over the top of a pan of gently simmering water, making sure that the bottom of the bowl does not touch the water. Stir occasionally until the mixture is completely melted and smooth. Remove the bowl from the heat and let cool slightly, 10-15 minutes, stirring occasionally to dissipate the heat.

In a medium bowl, whisk the egg yolks with the salt and about half the sugar until incorporated. Whisk the egg yolk mixture into the warm chocolate. Let cool an additional 10-15 minutes.

Whip the whites in a medium bowl until frothy. Add the remaining sugar, a little at a time, whisking all the while until you have medium peaks. Add about one third of the whites to the chocolate mixture and whisk  gently until homogenous so the mixture is lightened a bit. Put the whisk aside and get a large spatula. Add about half the remaining whites and fold gently. Scoop the remaining whites into the chocolate and fold gently (you don't want lumps of egg whites, but small streaks are alright- you want to keep air in the mixture you gained with the whipped whites, not beat it out).

Whip the cream until medium to stiff texture (using the same bowl as with the whites if you are able). Fold about half the cream into the chocolate, gently but thoroughly, until incorporated. Add the rest of the cream and again, fold gently. Carefully spoon the chocolate into the prepared mould, filling the corners and smoothing the top. Perhaps tap the mould carefully on the counter a couple times so your terrine settles.

Lay the overhanging plastic wrap over the top of the smoothed chocolate.
Refrigerate the terrine 24 hours. 


Blackberry-Port Sauce
makes about 4 cups/1 qt./1 scant liter

12 oz (340 g) blackberries

1/3 c (76 g) sugar
2/3 c (160 ml) water
pinch of salt
10 oz (about 285 ml) blackberry jam
1/2 c (125 ml) Port
lemon juice, to taste, if necessary

Combine the blackberries, sugar, water, and salt in a medium saucepan and bring to a boil. Reduce the heat and simmer about 3 minutes to soften. Remove the pan from the heat, and pour the contents into the bowl of a food processor. Process until the berries are broken down. Add the jam and pulse a few times until incorporated. Add the Port and process until just combined. Taste the sauce and add lemon juice as necessary, a little at a time.
Let cool (at least slightly) before removing to a covered container. Refrigerate until cold and ready to use.


To unmould:
If unable to turn it out directly, place the bottom of the mould in a tray (or sink) of warm water for 10 seconds. Unwrap the top of the mould and place upside-down on a parchment paper lined tray. Tap, if necessary, and lift the mould from the terrine. Remove the plastic and refrigerate the tray until ready to slice. 


Before slicing, warm a sharp knife under running water. Wipe dry and slice the terrine (of course, this will vary depending on the mould used), re-warm and wipe the knife dry between slices.
Slice directly out of the fridge, but let the plated desserts warm a few minutes before serving- just to take a little chill off and soften the texture slightly.

Ladle sauce onto plates and top with slices of terrine. 


Wednesday, September 9, 2015

Rosemary and Olive Oil Ice Cream


Summer is wrapping up, but there is still a variety of things alive out in the garden. Now, normally at the end of summer I see a bounty of herbs. Basil, for instance, is an easy fix as that forest you may find yourself staring at can be made into pesto and saved for those times when you need a burst of fresh flavor (in pasta, on sandwiches, maybe stirred into hummus or mayo, or as a general condiment). But I also like basil as a component in soup sometimes.


Rosemary can also be dispatched fairly easily, as it's really nice with roasted or grilled meats and vegetables.

However, I like to try to use those more savory-inspired herbs for sweet things, such as rosemary infused caramels.

While this recipe won't likely utilize all of the rosemary in your garden, it certainly offers a different purpose for the herb.


A creamy custard ice cream base takes the rosemary flavor well, and the resinous quality doesn't happen to overpower the buttery cream. In fact, the two qualities play quite nicely.


And olive oil... that's another thing that goes well with rosemary.
A good olive oil will add some green and fruity qualities to the flavor of the ice cream as well as silkiness to the finished product. I think it's one of those things that if you don't know it's there, you may not quite be able to put your finger on just exactly what it is taste-wise (especially as people don't normally expect olive oil in their ice cream). But if you do know it's there, it's pretty obvious.


So, GOOD olive oil... NOT the cheapest oil you can find, and certainly not something you'd really want to cook with. Although I wouldn't say it's overpowering, you will taste it and quality is important. You're looking for something more along the lines of a finishing oil, an oil for dressings or for dipping bread, an oil that's a pleasure in and of itself with it's own special qualities.

The finished ice cream can be eaten all by it's lonesome or alongside a nice plain cake, but I would highly recommend serving it with fresh sliced strawberries. I don't know exactly what it is about that particular pairing, but it's a great combination.


Rosemary and Olive Oil Ice Cream
4 1/2 cups (or a generous quart/generous liter) of liquid base prior to freezing


2 c (about 475 ml) whole milk
1 1/2 c (about 355 ml) heavy whipping cream
3 sprigs fresh rosemary
5 large egg yolks
2/3 c (150 g) granulated sugar
a pinch of salt
1/2 c (about 120 ml) good fruity olive oil 


In a medium saucepan, combine the milk and cream. Just bring to a simmer over medium heat, until tiny bubbles appear around the edges. Place the rosemary sprigs into the cream mixture, remove the pan from the heat, cover, and let steep about 15 minutes.

Remove the lid from the saucepan and discard the rosemary. Leave the lid off and allow the infused cream to cool about 15 minutes.

While the cream cools, in a medium bowl whisk together the egg yolks, sugar, and salt until well combined. Continue to whisk while slowly pouring a ladle of the warm cream into the egg mixture to temper it. Continue adding about half of the total cream mixture, whisking well to incorporate everything together. Pour the egg and cream mixture back into the pan with the rest of the cream, whisking to combine. Whisk the olive oil into the cream mixture.

Return the pan to the stove, and stirring constantly over low heat, cook about 15-20 minutes, until the mixture thickens slightly. Strain the ice cream base through a fine mesh strainer into a bowl, and chill the mixture in the refrigerator until cold (at least a couple hours). 


Prior to freezing, you will likely have to re-whisk the chilled base- not a problem.

Churn the ice cream in an ice cream maker per manufacturers instructions. If softly set, remove the ice cream to a container and place in the freezer to firm up (which may take a few hours).

Serve as desired. 

Wednesday, August 19, 2015

Chicken Satay and Peanut Sauce


After a hiatus due to busy-ness and big computer problems (including a tea spill)... here we go!
I guess there's really no solid when/what/how to my whole blogging business, though I can honestly say I wish it could be a bit more consistent.
Though, I don't know, maybe the suspense is fun in some way.
But I found today, to finish the post, I have to go to Starbucks. Apparently it's the only place my computer wants to pick up wifi. I can download photos from camera to computer to external hard drive, but the hard drive doesn't seem to want to work on any other computer. And so, mine has to make it's way to Starbucks so we're all on the same page and cooperating.
Computers and I don't really make the best team, but I suppose at least I now know how we're playing the game.


I think this is an appropriate end-of-summer dish.
For the most part made-ahead, simple and fairly quick-cooking chicken breast can be tossed on the grill close to last minute (or alternatively use the broiler in the oven).

And the sauce...
I think this may be my "I-could-pretty-much-eat-anything-with-this-sauce" sauce.
No joke.


Lots of flavor here.
Any extra sauce can easily be tossed with rice noodles, but it also makes a nice dip for vegetables.


With regards to peanut butter, my preference in this case is a not totally creamy but very slightly chunky peanut butter, like the more artisanal type or the kind that you grind yourself at the store (just peanuts and nothing else).


I like the chicken to be thicker than the more traditional satay as I like meatier pieces of chicken on the grill. The result is a juicier piece of chicken.
And so, I'll take a piece of chicken, maybe flatten it out slightly since the shape isn't quite even, and slice 3 or 4 lengthwise strips (of course, they may certainly be cut thinner).  These then make their way into the marinade to bathe a while.

Accompaniments to finish things off might include rice noodles and/or cucumbers.
You could put together a cucumber salad with sliced cucumbers, a little vinegar and honey, perhaps red pepper flakes. Although plain, stand-alone, cool and crunchy cucumbers are great.
And I like some fresh, green cilantro leaves alongside, too.
Perhaps some lime wedges on the side...


Chicken Satay and Peanut Sauce
serves 3-6 or more (depending on who you have eating and whether it's a meal or an appetizer)

Note: You will need skewers- metal or bamboo.


For the marinade:
3/4 c (about 180 ml) coconut milk
1 T (15 ml) fish sauce
1 T (15 ml) Thai red curry paste
1 1/2 t (8 g) kosher salt
2 lb. (about 1 kg) chicken breasts


For the peanut sauce:
3/4 c (about 180 ml) coconut milk
1/4 c (80 g) peanut butter
1 T (15 ml) fish sauce
1 T (13 g) brown sugar, packed
1 T (15 ml) Thai red curry paste
2 t (10 ml) chile-garlic paste
1 T (15 ml) fresh lime juice

In a large bowl, whisk together the coconut milk, fish sauce, curry paste, and salt. Flatten the breasts slightly so they're more even, and slice the chicken into lengthwise pieces (I like 3 to 4).
Place the chicken pieces in the marinade, cover and refrigerate at least 1 hour and up to overnight.

While the chicken marinates, make the peanut sauce.
In a saucepan, mix together the coconut milk, peanut butter, fish sauce, brown sugar, curry paste, and chile-garlic paste. Bring the mixture to a simmer over medium heat, stirring regularly, and simmer about 3 minutes. Remove the pan from the heat and whisk in the lime juice. Transfer the sauce to a bowl, let cool slightly, then refrigerate until ready to use so the flavors come together.

Several hours before cooking, soak wooden skewers- if using- (one for each piece of chicken) in water.

Heat up the grill!

Thread a piece of chicken on each skewer, lengthwise, and thread back and forth a bit if you can manage so the chicken does not so easily rotate on its stick.
Cook the chicken 6-10 or so minutes, turning at about the halfway point, until they're cooked through. It's nice if they have little char for flavor.

Serve with the sauce and any accompaniments you choose.


(If you use the broiler, maybe place on a broiler pan or a sheet pan covered in aluminum foil for easier cleanup. Cook the chicken a few inches from the element. The chicken will cook in about the same time. Turn after a few minutes.)

Wednesday, May 20, 2015

What to do with a lemony windfall...


Lots of lemons?


Today I worked on a round of preserved lemons. Such a fantastic thing to have waiting for you in the fridge.


It takes a little hands-on time, and then there's about a month of waiting patiently before they can be put to use.  It's like money in the bank, and the flavor is like nothing else. A preserved lemon is intense and lemony, but quite different than a fresh lemon. This variety adds a new dimension to foods such as chicken, fish, or sauteed vegetables that is at once familiar as it's lemon self, yet not.


The original post is here- it's from several years ago but it's well worth mentioning again.


Now to just wait and watch...

Monday, May 11, 2015

Chocolate Hazelnut BrûléeTart


Today was a two tart kind of day.
Only the best intentions, of course.
And really, don't you sometimes need two-tart days?


The initial plan was to make and post a strawberry rhubarb tart. I'd been thinking about it for quite a while as it's the right time of year and one of the best fruit combinations (well, fruit and veg)... but I was very sadly unable to accomplish everything I had a mind to, due to a lack of time and waning light.
Plus the fact that I dropped my camera and had to run out to replace that particular lens- my favored and more useful lens.  The worst part was that it wasn't even an impressive fall- only 12 to 18 inches. I guess the angle was just right to do the job.
It wasn't the glass of the lens that broke, it was something on the inside.


I finally had a chance to work on a blog post, with an attempt to squeeze more than one in for today to get some things done, and to have something to put away for another day.
Maybe it was haste that caused the little mishap. Admittedly, any time gained certainly didn't end up helping in the long run.


(As a side note, and on the nicer end of things, today the peonies are beginning to bloom. And they smell like lovely lemony roses.)


The chocolate-hazelnut tart was begun and finished first. Photos and all.
There was, however, a break during refrigeration to make the lens switch.
I suppose that was the way things went as I knew the tart had to be chilled several hours before it could be finished and plated. Best to get that one taken care of earlier.


By the time I got around to the strawberry rhubarb, the lighting wasn't great for my purposes, and it would just keep declining. Although there are no photos for you, I can report that I got a practice round accomplished. Maybe sooner rather than later I'll get a version perfected and photographed, then be able to post it.

I'm not saying this alternative is a bad thing. No way am I saying that.
The chocolatey goodness we have here is much like a candy bar in tart form, though perhaps a bit more refined. It turned out to be a belated Mother's Day treat.


It's nice, but it's rich, and best eaten cold and in smaller slices. Silky chocolate and crispy caramel hazelnuts- what a fantastic combination!
... And a thin crunch on top.


I guess the other tart was technically the "healthy" one.
And being that two tart kind of day, though perhaps not the quota, everyone DID get some fruit and vegetables.

Chocolate Hazelnut Brûlée Tart
(based on a recipe by Maja Vase at www.chocolat.dk)
serves 10-12, or more

1 large egg white
1/2 c (50 g) confectioner's sugar
1 2/3 c (175 g) hazelnut meal 
3/4 c (100 g) whole hazelnuts
1/3 c plus 2 T (100 g) granulated sugar
large pinch of salt, plus a little extra fine sea salt
8.8 oz (250 g) good semi-sweet chocolate
1 c (250 ml) heavy cream
2 T (50 g) glucose syrup or corn syrup
2-3 T (30-45 g) granulated sugar, for caramelizing top of the tart

In a medium bowl, whisk the egg white until frothy. Add the confectioner's sugar and whisk again a couple minutes until slightly thickened and well blended. Stir in the hazelnut meal until fully combined. Tip the crust mixture out into a 9 inch tart pan with a removable bottom  (you may want to spray or butter the bottom and line it with a round of parchment paper for later ease in serving). Carefully and evenly press the dough out across the bottom and up the sides of the tart pan.
Refrigerate the prepared tart pan about 10 minutes.

Preheat the oven to 375 F/190 C. 
Dock the bottom of the tart crust all over with a fork. 
Place the tart pan on a sheet pan and bake 15-20 minutes, until completely set and lightly browned. Set the pan aside on a rack to cool completely.
While the tart shell bakes (or cools), prepare the hazelnuts. Place the hazelnuts on a pan in a 400 F/ 200 C preheated oven. Toast the hazelnuts 5-7 minutes, shaking the pan once or twice to toast evenly. Remove the pan from the oven and let the nuts cool slightly. When the hazelnuts are cool enough to handle, place them in a dishtowel and rub them with the towel to remove most of the skins. 
Place the skinned nuts on a cutting board and chop coarsely. Let cool completely.

In a saucepan or small frying pan, melt the sugar with the large pinch of salt over medium heat. Shake the pan occasionally, and if you must, use a spatula to redistribute the sugar so that it melts and caramelizes evenly. When the sugar is a deep amber, remove the pan from the heat and add in the chopped hazelnuts. Quickly stir the nuts and caramel, so that everything is coated evenly. Tip the caramelized hazelnuts onto a sheet pan lined with parchment paper. Cool completely, then chop coarsely. If you choose, sprinkle with a little fine sea salt and toss to combine.

In a heatproof bowl, place the chocolate, cream, and syrup, and set the bowl over a pan of simmering water, making sure the water does not touch the bottom of the bowl. Stir occasionally until everything is melted, smooth, and well-combined. Remove the pan from the heat and very carefully remove the bowl from over the simmering water. 

Scatter the chopped, caramelized hazelnuts evenly across the bottom of the tart pan. Pour the warm ganache over the nuts and spread carefully so that the top is relatively smooth, all the crevices are filled, and the nuts are covered. Lightly rap the pan on a counter a few times to dislodge any bubbles. 
Refrigerate the tart at least 3 hours. 

To brûlée:
This step is not strictly necessary, but it certainly adds a nice touch. 
Remove the set and cold tart from the refrigerator and sprinkle the top evenly with 2-3 T granulated sugar. Using a torch, carefully melt and lightly caramelize the sugar. Return the tart pan to the refrigerator 5-10 minutes to set the sugar and re-cool the top of the tart. 

Slice the tart with a sharp knife and serve.

*If you have a 10 inch tart pan instead of 9 inches, you can keep most everything in the recipe the same, however, I recommend increasing the chocolate to 10.8 oz/300 g and the cream to about 1 c plus 3 T/300 ml. And please be a little more ginger when pressing the crust into the pan. It covers the pan just fine, you just need to be a little more gentle with it as it will be a tad thinner.
I've made it both ways, and both turn out well!


Monday, April 20, 2015

Coconut Bites


Sometimes some of us just want coconut.

I'm well aware this does not apply to everyone, but I think for some people there may be an actual need.


Coconut candy can be made at home, it's relatively simple, and can be made well.
All that, plus you know what's in it.
The interior here has four ingredients- that's it- and they're four things you might already have in your pantry. 

As for the outside, it's just dark chocolate.
Now, you can choose to go ahead and temper the chocolate, but if that's too much for you to deal with, you can just melt it and keep these little bites in the fridge. A cold coconut and chocolate combination isn't such a bad thing. In fact, it's quite nice.


Normally, I would say you definitely don't want your chocolate to make it's way to your fridge- this is one of those chocolate caveats as it's not the best way to treat good chocolate. However, an exception (to me, anyway) is when dealing with coconut. At this moment, it's not about the chocolate. It's about the coconut. Certainly, use good chocolate (make no mistake, bad chocolate is a bad thing), but remember that the chocolate is there to elevate the coconut a bit, make it a little more special, and contain all that coconutty goodness.  That chocolate is not the main attraction, it's got a functional job that happily ends up being something more than merely functional.

There are people out there that may balk at that comment about chocolate, but it's true. Chocolate chip cookies in their "regular" form are not chocolate cookies. True, the chocolate may be the purpose and the cookie part just be a vehicle for some. Chocolate and cookie work together.
What a team.


(For some reason this is reminding me of a saying my mother likes to use that never makes sense to me. It's about alligators, a swamp, quick thinking and focus- but frankly, I never understand it. It won't matter how many times I hear it. And then I wonder how often people in Indiana really need to think about alligator confrontations, which I imagine to be almost never. And why discuss it? It doesn't apply so well in the Midwest.
I guess my point was that some people will never be able to make sense of the need for coconut, or the sacrilegious reasoning behind someone feeling the need to discount chocolate.)


Anyway, if you choose to go the tempered chocolate route, you can find some information here.
Just remember that the coconut will be cold and affect the setting of the chocolate somewhat. Tempered chocolate stiffens more quickly than that which is untempered. It will set up even faster on something that is cold, and sometimes this causes the chocolate to crack. 

After being dipped, you may choose to top the coconut bites with a bit of shredded coconut as decoration or to help identify the interior. Fleur de sel is also a nice topping for a little sparkle as well as a contrast and flavor burst. Of course, they're still just fine unadorned


Coconut Bites
(makes about 25, 1 tablespoon/15 ml capacity confections)

14 oz (400 g) shredded coconut
1/2 c plus 1 T (135 ml) maple syrup
1/3 c (75 g) coconut oil
1/4 t (1 g) fine sea salt
12 oz (340 g) dark chocolate, chopped

(*Note: if you have a drier, more natural and without extra sugar type of shredded coconut- my preference here, you may want to add about 1T more each of maple syrup and coconut oil, 15 ml and 20 g, respectively. These can be added after the initial blending after checking the consistency and whether the mixture will be sticky enough.)

In the bowl of a large food processor, place the shredded coconut, maple syrup, coconut oil, and salt. Process in several long pulses until well-combined, but only just so. You don't want the coconut mixture to turn into a paste. Scrape down the sides once or twice and re-process.

Scoop the coconut mixture into tablespoon-sized portions, tightly packed, and place on a parchment paper lined sheet pan. (A cookie scoop or mini ice cream scoop does a great job of this.) Refrigerate the tray about 2 hours before removing to dip the coconut mounds. 

Right before you are ready to dip, place the chopped chocolate in a bowl placed over a simmering pan of water (bain marie). Let the chocolate melt, stirring occasionally until smooth. 
(Alternatively, follow instructions to temper the chocolate.)
Dip each coconut mound into the warm melted chocolate, and using a fork, remove to a parchment paper lined sheet pan.

Refrigerate until the chocolate is stiff, or let set at room temperature (untempered vs. tempered chocolate). Keep the coconut bites refrigerated in a covered container.


(Addendum: If the chocolate is tempered, of course the bites don't need to be stored in the fridge as the chocolate will have completely set. Also, they're best if not served directly out of the fridge- at least a few minutes sitting at room temperature will help. The bites are better if they're given time to take the chill off a bit- if you can wait!)