Showing posts with label mains. Show all posts

Sunday, July 7, 2019

Ginger-Soy Rice Noodle Salad


I saw a rice noodle salad somewhere several days ago I thought looked pretty good, so I thought I'd try to put one together (mostly, I wanted one for lunch, and this is the outcome that worked fairly well).


As far as a meal like this goes, whether it's room temperature or cold, this type of dish can be nice light meal for a warm summer afternoon or evening- that's where I was going with it.
Or you could add shrimp, chicken, or beef to make it a little more robust.


For this recipe, things are left pretty open- it's mostly lists.
Amounts are to taste as the additions to each individual dish, though I'd say maybe 4-5 oz of noodles for 2-3 people, but anything extra is an easy meal the next day.
Vegetables can be raw, blanched, or given a quick saute.

 
(But whatever you do, as is quite often the case, the best part of the salad is the end since all the goodies that aren't tangled up with everything else fall to the bottom of the bowl to be captured at long last.) 
Quite honestly, after photographing I added a bigger mess of herbs, more vegetables, and I stirred in a bit more sauce before devouring.


A word of warning: the amount of dressing will certainly cover more than two salads- more like four or more. But that's ok.
If you're at all wary about any of the ingredients and the amounts, perhaps add what you like, let it sit to blend, then taste. The dressing by itself could potentially be whack-you-in-the-face strong to some, but when tossed with the bland noodles, it's great... I think I could eat it on lots of things so I'm perfectly fine with the leftovers (stored in a jar in the fridge). Again, go easy on certain ingredients and/or the amount you use when dressing the noodles it if you're at all concerned.
(And don't spill any fish sauce on yourself. A wonderful flavor in smaller doses, great as part of a whole, it's pretty rank by itself and if you spill you'll probably have to change your clothes.)


Ginger-Soy Rice Noodle Salad
(Dressing serves at least 4)
Rice noodles (whatever style you choose)

Ginger- Soy Dressing:
1 1/2 T freshly grated ginger
1/4 c (60 ml) tamari or soy sauce
2 t (10 ml) fish sauce
1 1/2 t (8 ml) sriracha (optional if you like a little heat)
1 T plus 1 t (16 g) sugar
2 garlic cloves, minced
Zest of 1/2 lime, plus 1 T (15 ml) juice 

Vegetable options:
cubed avocado
thinly sliced red pepper
sliced sugar snap peas
cucumber batons
grated or julienned carrots

Fresh herbs:
green onion
basil
cilantro
mint

To serve:
chopped peanuts
caramelized shallots
lime wedges
sriracha

Extras:
cooked shrimp, chicken, or beef


*As there are different types of rice noodles, make sure to cook them according to package instructions. Drain, shock under cool running water, drain well again, and set aside.

Stir together the dressing ingredients in a bowl and let sit at least 10 minutes while you prepare the rest of your salad ingredients. 

When ready to put salads together dressing noodles, add enough dressing to moisten and loosen the noodles, and toss well to distribute. 

Place noodles in bowl (or bowls) and add vegetables and herbs as desired.
Top with peanuts and shallots, and add extra dressing, lime, or sriracha if you wish.

Monday, November 26, 2018

Braised Chicken Thighs with Olives, Capers, and Lemon


This was something I threw together over winter last year, but have made many times since then.
It seems nice in those colder months- maybe fall to early spring. Not too heavy, but lots of flavor and a bit of color (just add parsley if you want a pop of green).
However, it’s completely non-seasonal. All the items (to me, anyway) are pantry items, so this is easily put together... perhaps after a run to the store for the chicken.


But it can be a little something more based on what you use, of course. This last round I had some Herbes de Provence olives I'd found at the olive bar at the store, which were a plus.
Just make sure you get a bit of the brine if you pick up olives and capers at the bar in lieu of using a jar.


It's important to make sure you don't use a pan that's too small so that everything is jammed in together- and the chicken ends up being practically covered in the wine. The point is partially to have some space to allow for evaporation so everything is able to reduce...
And reduction is a very good reason to make sure the wine is "nice enough" as far as beverages go. It doesn't have to be dear, just drinkable ("awful" sadly will not improve with concentration).


Also, having made it enough, I can safely say that you do want to make sure the chicken is seasoned. Don't make the mistake of thinking the olives and capers will be salty enough to take care of everything else.


As a suggestion, I think it's nice with a kale salad with a lemon vinaigrette (garlic in the vinaigrette, a shower of Parmesan on top), and served the chicken with roasted cauliflower and quinoa (great for soaking up the juices).
Extra kale, cauli, quinoa, chicken, capers/olives/shallots, jammy lemon and sauce? Leftovers make a great bowl for lunch the next day. Ta-da.


Braised Chicken Thighs with Olives, Capers, and Lemon
serves 6 (... or 3)


6 chicken thighs (skin on and bone in)
kosher salt and freshly ground black pepper
3/4 c (180 ml) white wine
1 c (180 g) pitted green olives
1 1/2 T (22 ml) olive brine
3 large shallots, sliced
1 1/2 lemons, cut into sixths
3 T (45 g) capers in brine
1 1/2 T (22 ml) caper brine
3 T (45 ml) olive oil


Preheat oven to 375 F (190 C).
Trim extra fat and skin from the chicken thighs, then salt and pepper both sides of the chicken as you would normally.
Pour the white wine into a 9x13 inch pan along with the olive and caper brines. Add the chicken, skin side up. Sprinkle the olives, capers, and shallots around and between the chicken pieces. Tuck the lemon slices in among chicken, then drizzle everything with the olive oil. 
Cover the pan with aluminum foil.

Place the pan in the oven and braise the chicken 45 minutes.
Remove the foil and increase the oven temp to 425 F (218 C) for 10 minutes.
Broil 5 minutes or so if the top of the chicken needs a bit of rendering and color. 

Remove the pan from the oven and let stand 5-10 minutes before serving with the braising sauce.

Monday, May 7, 2018

Miso Glazed Salmon


I hadn’t intended to serve a meal constructed on the fly, but a while back I couldn’t get internet access where I was when I needed it.
The general idea of what I wanted was there, but I hadn’t looked into what I was doing beforehand. Admittedly not the smartest move of all time when you're cooking for someone else's get-together. 
However, when this kind of a thing happens, I keep notes. If it turns out well, fabulous. If it needs a bit of work, at least I have a jumping off point and can adjust the areas where I think it’s needed.


I've made it a few times since, and it works, so here you go.


A piece of fattier fish, cooked at a lower temperature will be more tender and akin to a poached piece of fish- as opposed to using a higher heat and leaner (drier) fish.
Obviously, this can easily be halved (note that 1/2 T is 1 and 1/2 teaspoons), but the recipe is written for a group.
The marinade is thick, there's not a huge excess, and the pieces of fish are more or less individually coated rather than bathed in a pool.

Serve with rice and asparagus, or perhaps a bed of zucchini noodles.


A lightish meal, plenty of flavor- and leftovers are great cold as part of a lunch salad.


Miso Glazed Salmon 
serves 10-12

10-12, 6-8 oz pieces of Atlantic salmon (paler, thicker, and fattier than, say, Coho)
1/2 c plus 1T (about 165 g) white miso paste
3 T (45 ml) honey
3 T (45 ml) white wine
1/4 c (60 ml) mirin
2 T (30 ml) tamari (or soy sauce)
2 T (30 ml) dark sesame oil
5 garlic cloves, smashed and given a rough mince
1 T (16 g) freshly grated ginger
Freshly ground black pepper
Optional for serving: toasted white or black sesame seeds, sliced green onion


Mix together miso, honey, white wine, mirin, tamari, sesame oil, garlic, and ginger. Coat the salmon with the marinade and place skin side up in a baking tray (or two). Cover and place the tray in the refrigerator 1 1/2 to 2 hours, moving the salmon a few times to re-distribute the marinade. 

Preheat the oven to 375 F (190 C).
Scrape excess marinade from skin side with a spoon or your finger (if you do this it'll help prevent sticking or burning), and place the salmon skin-side down on an oiled, foil-lined sheet pan.

Roast the salmon 12-15 minutes, then broil 2-5 minutes (watch!)- you're looking for some color and maybe some charred bits.

Let rest a couple minutes on the pan and serve as desired. 


Note: Of the miso pastes I've tried for this recipe, I prefer Miso Master brand 
And, depending on the saltiness of the miso you use, the salmon may do better with a sprinkle of salt... but you won't know until after you've tried it the first time. 

Monday, January 16, 2017

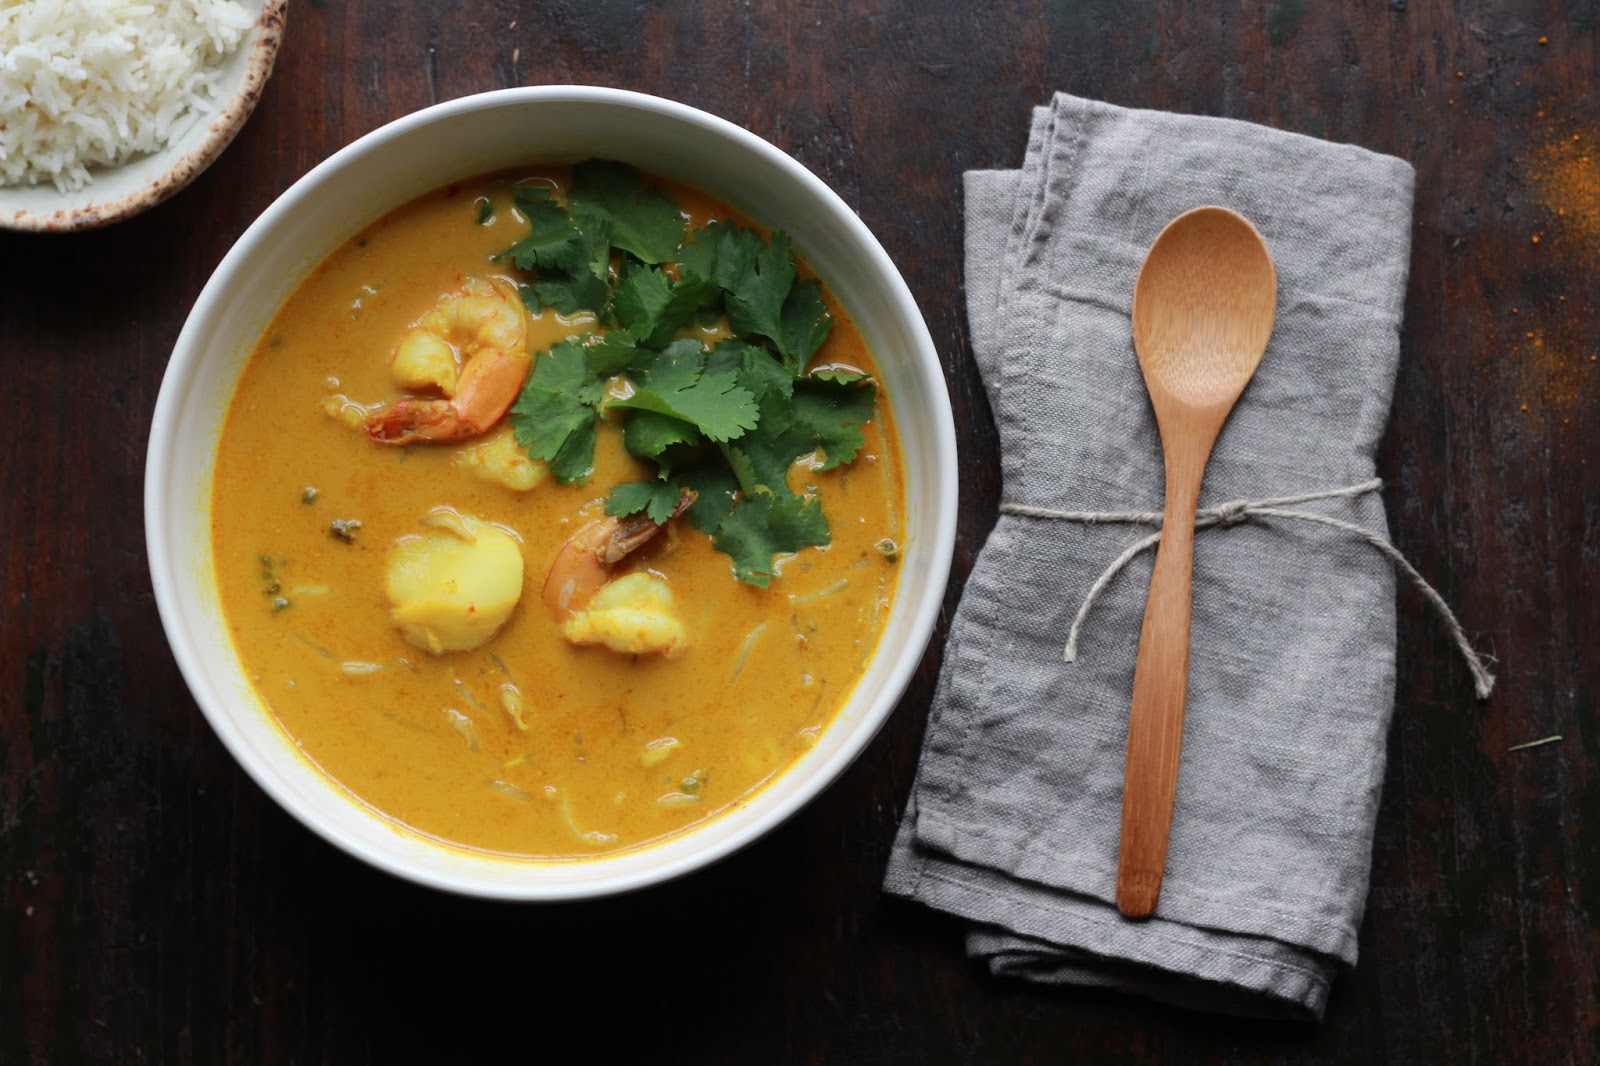
Seafood Laksa


Spicy and creamy, with tons of sweet-salty-sour flavor, and a bit funky, Southeast Asian laksa is pretty much a curry soup.
Think Malaysia, Singapore, and Indonesia on this one.
So nice for a warming dinner on a cold or rainy day, just get yourself a big bowl and you're on your way.
(And I think a tad addictive. Better than takeout?)


The recipe can be halved fairly easily, though I'd encourage anyone to go ahead and make the full recipe for the laksa paste. The half not immediately used can be stored in the freezer in a labeled and zippered bag, all the air removed. It makes for a quicker meal the next time you want it, and you don't have to worry about buying a little of this and a bit of that.


Curry paste, laksa paste (and we could say the same for the likes of pesto)... it's always good to have extra made and on hand. So much amazing flavor packed in there!

Leftovers of the soup are great, but remember that shrimp are much nicer texture-wise immediately after they're cooked. Those day-after, reheated shrimp can be a bit rubbery, so if that's a big problem, make what you need- not an excess.


Rice noodles would be the much more traditional addition to the finished soup, but if you've got rice to use up... plus sometimes noodles in soup can make for messy eating...


And while accompaniments would generally be added at one's discretion, to taste, I think lime and fresh cilantro are requirements. The soup isn't quite the same without the two of them sprinkled over the top just before eating. They add that last layer of fresh, crisp, and sour.


Seafood Laksa
serves 8 or more


3 large shallots, roughly chopped
3 serrano chilis, seeds and ribs removed, roughly chopped
4 fresno chilis, seeds and ribs removed, roughly chopped
3 inches of ginger (about 30 g) peeled and grated
6 cloves of garlic, roughly minced
3 stalks lemongrass, outer leaves and top dry part removed, tender inner white part chopped
1/4 c (about 24 g) cilantro stems
1 T (7 g) ground turmeric
1 T (15 ml) tamarind paste
1 1/2 t (5 g) ground cumin
1 t (4 g) paprika
6 T (90 ml) olive or vegetable oil

2 cans (400 ml each) coconut milk
8 oz (240 ml) clam juice
2 c (480 ml) vegetable stock
3 T (51 g) packed brown sugar
1/4 c (60 ml) fish sauce
4 fresh cod fillets, skinned
40 medium shrimp, peeled and deveined
3 1/2 c packed (290 g) bean sprouts
 
To serve: softened rice noodles or jasmine or basmati rice (cooked), chopped cilantro leaves, lime wedges


To make the laksa paste, combine the shallots, chilis, ginger, garlic, lemongrass, cilantro stems, turmeric, tamarind, cumin and paprika in the bowl of a food processor. Pulse a few times, then process everything to begin breaking it down. Add the oil and continue processing, scrape down the sides as necessary, until the mixture forms a relatively homogeneous paste. 

Heat a large, heavy pot over medium and add the laksa paste. Stir the paste in the hot pot a few minutes until it begins to steam and become fragrant.  To the hot soup base,  add the coconut milk, clam juice, and vegetable stock, along with the brown sugar and fish sauce. Bring the mixture to a simmer, stirring occasionally, and let simmer about 10 minutes.

To the simmering broth, add the whole cod fillets, and cook 3-5 minutes, stirring occasionally, until the cod is cooked through. As it cooks and while you stir, break up the cod fillets into bite-sized pieces that will fit onto a spoon.  Next, add the raw shrimp to the soup, and cook 2-3 minutes, until pink. Lastly, add the bean sprouts to the pot and cook a couple minutes.

Ladle the hot laksa into bowls along with rice noodles (or rice),  add cilantro leaves and a squeeze of lime. 


Tuesday, January 10, 2017

Rösti


I'll start with a disclaimer: yes, the photos show the rösti to be a bit dark, but it wasn't quite as dark as it seems. Though I can cite my biggest problems as a pan that wasn't flat on the bottom (realized too late), which led to some spotty cooking, and an electric burner (of which I am not a fan).
Things are certainly not always perfect (but it still tasted good).  


But, being slightly impatient and unwilling for a do-over (since I've not posted in a while), as well as the fact that light was good and I could get some very welcome reflection off the snow in the yard at the time... I made do.


Then again, I would greatly prefer a darker and obviously crispy version to the soggy alternative.


Rösti is a Swiss fried potato dish, like hash browns or latkes, nice at any time of day and a comforting sort of thing during cold weather.
I generally serve it as a starter myself, along with crème fraîche and smoked salmon,  but one round could easily make the base of a meal for two or three people.

If you want to go all out for a special occasion, perhaps caviar?


I won't say this is a completely authentic dish as I'm certainly no authority on Swiss cooking, and, there's no cheese included in this version (though I don't know if that's a total deal breaker).

The potato mixture could be cooked in ghee, or maybe bacon fat if you have it around and prefer that additional flavor.


Rösti
serves 6-8 as a starter, 2-3 as a main

1 1/2 lb. (24 oz/680 g) Yukon gold potatoes

6 green onions, sliced
1 large egg

1 large egg yolk
1 t (7 g) salt
1/2 t (less than 1 g, but add to taste) freshly ground black pepper
2 T (20 g) cornstarch
4 T (57 g) unsalted butter
1 T (15 g) olive oil

(possible accompaniments include: smoked salmon,
caviar,  bacon, cheese, crème fraîche, dill, lemon, applesauce)


Grate the potatoes and place in a bowl of cold water. Let the potato soak 5 minutes, drain and rinse in a colander. Place the shredded potatoes in a clean kitchen towel and wring out as much liquid as possible (less liquid = crispy).

Transfer the potato to a large bowl and add the green onion. Beat the egg and extra yolk together in a bowl to combine and add to the bowl along with the salt, pepper, and cornstarch.
Stir everything together to combine well.

Heat a 10 inch skillet (well seasoned cast iron, preferably) over medium heat. Add half the butter and half the olive oil. When the butter has melted, swirl the pan to combine the oils and coat the pan. Place the potato mixture in the pan in an even layer and press down slightly to smooth the top. Cover the pan (with a lid or a sheet pan), and cook 10 minutes.

Remove the lid and loosen the potato from around the edge. Turn the rösti out onto the flat (underside) of a sheet pan and place the other half of the butter and olive oil into the hot skillet. When the butter has melted, again swirl the pan and slide the rösti, uncooked side down, back into the pan. Again, cover the pan and let cook 8-10 minutes, until browned and crispy.

Remove the pan from the heat and let set a few minutes. Turn the rösti out onto a cutting board, cut into wedges, and serve as desired. 


Wednesday, April 6, 2016

Salmon Cakes


I wanted a more "fresh" salmon cake, something somewhat simple in flavor, a version that also didn't require a garden's worth of vegetable dicing.
So, this recipe ends up working for me, and I think the flavors are quite nice.
You'll get some freshness from the lemon and parsley. The cooked shallot adds one type of allium note, while the more raw green onion adds a greener, more delicate tone.


Sure, I bet you could use canned salmon if you like, and reduce the steps and time a bit. But most of the time I prefer to do things ALL the way myself- in some ways it can be a skill and practice thing, and in others it's the fact that I know as much as possible about how things are accomplished and cooked- and that's why I start from as scratch as possible. Plus, I have the idea that your salmon cakes will be a bit more tender when you start with raw salmon. Then again, I can't say I've tried it with canned salmon.


If you're cooking salmon anyway, great. Maybe make a little extra and extend that meal a bit into salmon cakes the next day.
And if you'll just be cooking the salmon to flake for salmon cakes, know that the cut doesn't have to be the center- the initial shape certainly won't be there for presentation.

The nice thing is that it's not much extra work to double the recipe, and really, the cakes don't take awfully long to cook. And perhaps to speed the process (if you can handle it for a larger batch), you could have two pans going at once.


The type of salmon is up to you. For example, Sockeye, King, and Coho vary among themselves, but would all have a stonger flavor and deeper color than the more neutral Keta salmon (Sockeye is especially red). Strength of flavor, oil content, and color of salmon vary. All salmon are not the same. If you have a choice and are unsure, talk to the fishmonger before making a decision and then go with what you like.
If I'm making a larger batch, I prefer mix a couple different types to keep things interesting.


I like to serve these with greens alongside, with lemon wedges and sriracha (*please note the ever-important life skill of writing with condiments), though the "unadorned" version certainly works, too.


Salmon Cakes
makes 5

1 lb. (500 g will work) fresh salmon
1/2 c (55 g) shallot, minced
1 T (15 ml) olive oil, plus extra if needed
zest of 1/2 lemon
3 green onions, 4 if small, thinly sliced
2 T (7 g) fresh minced parsley
2 large eggs, lightly beaten
1/2 c (50 g- though weight may vary by type/brand) breadcrumbs (gluten free if preferred)
salt
pepper

To cook the salmon cakes:
1 T (14 g) butter
1 T (15 ml) olive oil

Cook the salmon: Preheat the oven to 350 F (180 C) Place the salmon skin side down on a foil covered pan and season it with salt and pepper. Drizzle with a bit of olive oil.
Bake the salmon 20 minutes, remove the pan from the oven and let the salmon rest 10 minutes. Cover the pan with foil and refrigerate the salmon until cold- at least 30 minutes.
Meanwhile saute the shallots in a pan with the tablespoon of olive oil, just until translucent. Remove from the heat and let cool.

Flake the salmon into a large bowl. Add the cooked and cooled shallot, lemon zest, green onion, parsley, eggs, breadcrumbs, and 1 t (5 g) salt and 1/2 t (1.3 g on a sensitive scale- or add to taste) freshly ground black pepper. Mix gently until everything is fully incorporated, cover, and refrigerate 1 hour (the chilled/rested mixture is easier to form).

At this point you can divide the salmon mixture into 5 portions (a generous 1/2 cup each) and shape into cakes. Place on a tray, cover, and refrigerate if not cooking immediately.

Heat a heavy frying pan over medium heat. Add the butter and olive oil. When melted, swirl the pan to distribute evenly. Depending on your pan size and comfort level, carefully add the salmon cakes one at a time, cooking 2 or 3 to begin with (or all 5). Cook about 4 minutes on each side or until deep golden brown.
Keep the cooked salmon cakes warm on a paper towel lined sheetpan in a 250 F (120 C) oven- especially important if you're doubling the recipe.
(And if doubling, you will likely want to remove the oil/butter mixture from the pan and replenish it after a round or two of cooking)

Saturday, March 19, 2016

Falafel Revival


I try to make falafel at least once a year, preferably more (for the obvious reason of their fabulousness).
And well, for the past couple years falafel has been part of the Good Friday dinner over here. The meal that evening is more of a simple appetizer type of affair for us- perhaps cheese, apple slices, a green salad.
I don't know, I just think they're wonderful little bites, fantastic when extremely fresh and just made, but they certainly more than pass muster when baked from frozen.

In a way this is sort of a PSA, if you want to think about it that way. It's something to think about a little ahead of time- especially since dried chickpeas need to soak overnight.

Especially for this purpose, I make falafel several days before and freeze them. They're easy to throw into the oven- reheat however many you want or need when you're ready.
Besides, I'd much rather have a stash of homemade in the freezer (as insurance, of course) than a store bought frozen version.
(And I may end up having to make another batch before they're needed next week...)


The full recipe for falafel can be found here.

(No, they're not cooked in these photos- time to go fry them up!)

Wednesday, August 19, 2015

Chicken Satay and Peanut Sauce


After a hiatus due to busy-ness and big computer problems (including a tea spill)... here we go!
I guess there's really no solid when/what/how to my whole blogging business, though I can honestly say I wish it could be a bit more consistent.
Though, I don't know, maybe the suspense is fun in some way.
But I found today, to finish the post, I have to go to Starbucks. Apparently it's the only place my computer wants to pick up wifi. I can download photos from camera to computer to external hard drive, but the hard drive doesn't seem to want to work on any other computer. And so, mine has to make it's way to Starbucks so we're all on the same page and cooperating.
Computers and I don't really make the best team, but I suppose at least I now know how we're playing the game.


I think this is an appropriate end-of-summer dish.
For the most part made-ahead, simple and fairly quick-cooking chicken breast can be tossed on the grill close to last minute (or alternatively use the broiler in the oven).

And the sauce...
I think this may be my "I-could-pretty-much-eat-anything-with-this-sauce" sauce.
No joke.


Lots of flavor here.
Any extra sauce can easily be tossed with rice noodles, but it also makes a nice dip for vegetables.


With regards to peanut butter, my preference in this case is a not totally creamy but very slightly chunky peanut butter, like the more artisanal type or the kind that you grind yourself at the store (just peanuts and nothing else).


I like the chicken to be thicker than the more traditional satay as I like meatier pieces of chicken on the grill. The result is a juicier piece of chicken.
And so, I'll take a piece of chicken, maybe flatten it out slightly since the shape isn't quite even, and slice 3 or 4 lengthwise strips (of course, they may certainly be cut thinner).  These then make their way into the marinade to bathe a while.

Accompaniments to finish things off might include rice noodles and/or cucumbers.
You could put together a cucumber salad with sliced cucumbers, a little vinegar and honey, perhaps red pepper flakes. Although plain, stand-alone, cool and crunchy cucumbers are great.
And I like some fresh, green cilantro leaves alongside, too.
Perhaps some lime wedges on the side...


Chicken Satay and Peanut Sauce
serves 3-6 or more (depending on who you have eating and whether it's a meal or an appetizer)

Note: You will need skewers- metal or bamboo.


For the marinade:
3/4 c (about 180 ml) coconut milk
1 T (15 ml) fish sauce
1 T (15 ml) Thai red curry paste
1 1/2 t (8 g) kosher salt
2 lb. (about 1 kg) chicken breasts


For the peanut sauce:
3/4 c (about 180 ml) coconut milk
1/4 c (80 g) peanut butter
1 T (15 ml) fish sauce
1 T (13 g) brown sugar, packed
1 T (15 ml) Thai red curry paste
2 t (10 ml) chile-garlic paste
1 T (15 ml) fresh lime juice

In a large bowl, whisk together the coconut milk, fish sauce, curry paste, and salt. Flatten the breasts slightly so they're more even, and slice the chicken into lengthwise pieces (I like 3 to 4).
Place the chicken pieces in the marinade, cover and refrigerate at least 1 hour and up to overnight.

While the chicken marinates, make the peanut sauce.
In a saucepan, mix together the coconut milk, peanut butter, fish sauce, brown sugar, curry paste, and chile-garlic paste. Bring the mixture to a simmer over medium heat, stirring regularly, and simmer about 3 minutes. Remove the pan from the heat and whisk in the lime juice. Transfer the sauce to a bowl, let cool slightly, then refrigerate until ready to use so the flavors come together.

Several hours before cooking, soak wooden skewers- if using- (one for each piece of chicken) in water.

Heat up the grill!

Thread a piece of chicken on each skewer, lengthwise, and thread back and forth a bit if you can manage so the chicken does not so easily rotate on its stick.
Cook the chicken 6-10 or so minutes, turning at about the halfway point, until they're cooked through. It's nice if they have little char for flavor.

Serve with the sauce and any accompaniments you choose.


(If you use the broiler, maybe place on a broiler pan or a sheet pan covered in aluminum foil for easier cleanup. Cook the chicken a few inches from the element. The chicken will cook in about the same time. Turn after a few minutes.)

Wednesday, May 20, 2015

What to do with a lemony windfall...


Lots of lemons?


Today I worked on a round of preserved lemons. Such a fantastic thing to have waiting for you in the fridge.


It takes a little hands-on time, and then there's about a month of waiting patiently before they can be put to use.  It's like money in the bank, and the flavor is like nothing else. A preserved lemon is intense and lemony, but quite different than a fresh lemon. This variety adds a new dimension to foods such as chicken, fish, or sauteed vegetables that is at once familiar as it's lemon self, yet not.


The original post is here- it's from several years ago but it's well worth mentioning again.


Now to just wait and watch...