Showing posts with label confections. Show all posts

Wednesday, August 7, 2019

Honeyed Walnut Cake


Ok, so, this one was a bit difficult to name.
It's not a "cake" in the baked-and-eaten-with-a-cup-of-tea dessert-y, cake-y texture sense of the word.
I mean it more as a shape, a configuration, the tight togetherness of the ingredients.
While going through potential words in English to describe the form, they sounded so inelegant: brick, log, block, slab, chunk... bleh.
Sometimes the English language is decidedly lacking in charm.
Then I thought about other, more strictly fruit and nut confections- pressed date and almond, fig and walnut- and with a slight stretch, even panforte fits the bill. They're cakes. So cake it shall be.

I had found something like this months back, and it was wonderful to nibble with a glass of red wine, or as dessert with a splash of Port. The problem being, ooh, it was pretty expensive.
I thought maybe I could make it myself for much cheaper.
There are four ingredients, just like the other one. Maybe it's not exact proportion or technique-wise, but it's really good and certainly not cost-prohibitive.


I'd recommend it for a wine and cheese party, with appetizers, or for after dinner as part of cheese based dessert board along with that Port, maybe some dark chocolate... go ahead and add fruit, too (though this by itself is perfectly fine).

You're going to use two amber liquids here- one more pale golden, the other a bit deeper- two syrups I'd be willing to bet many, if not most, people have on hand anyway.
Honey and maple syrup, but make it pure maple syrup, real maple syrup, not a thick corn syrup based concoction.
Personally, I think it's good both are included here. Honey alone can be intense at times, not my most favorite ingredient, but it does have it's place. 
The syrups are cooked to reduce a bit and become the cement holding the walnut bits together.
I didn't give a temperature for cooking the syrup... it's a small amount, and it would difficult to get an accurate reading on a thermometer, so in this case it's more sensorial than measurable and exact.


Of course the recipe can be halved for a smaller group, or if you prefer assurance it will disappear.

Test the size of your mould after you've broken up the toasted walnuts. You can use a ring mould, a metal cup measure, something rectangular if you've got it, if you're careful- a metal can with both ends cut out... perhaps even a wide-mouth jar (as long as you'd be able to remove the finised cake). Place the  nuts in the container you plan to use and shake things a bit so the walnuts fall into place, giving you a general idea how things will fit.


A friend had also suggested sprinkling the mould with sesame seeds to help combat the stickiness you may encounter upon serving (at least the bottom, which becomes the top when unmoulded).

I'm going to recommend doing this by weight, at the very least for the walnuts since their shape is so irregular...


Honeyed Walnut Cake 
(6-8 portions?) 

150 g whole walnuts (this comes to about 1 1/2 c in volume)
4 T honey (60 ml)
2 T maple syrup (30 ml)
1/4 t fine sea salt (small for weight, but my measure says 1.2 ml)

Toast the walnuts lightly in a preheated 325 F (163 C) oven 7-10 minutes.
Remove the pan from the oven, and when cool enough to handle, break the walnuts into pieces (I usually do this by hand as I think it gives a nice size with soft edges, just twisting each walnut. Then I rub handfuls of the walnuts a bit between my palms to remove any loose skin.)
Bring the honey, maple syrup, and salt to a simmer in a medium saucepan over medium, then reduce the heat a bit and cook 5 minutes, swirling the pan several times. You'll have to watch it, because the honey mixture can really bubble and expand.
(The syrup can quickly reduce and become stiff, so it's important not to overcook it, likewise it's important not to cook at too high a heat as the sugars can burn. You'll only know it it cooked too much for sure afterwards when the walnut cake is cool... it may be a crispier, stiffer confection to slice, but it's still very edible.)
Turn off the heat and stir the walnuts through for a couple minutes, to warm them again and make sure everything is coated nicely.
Have a mould at the ready, lined with lightly buttered or sprayed parchment or waxed paper. Spoon/pour the walnut mixture into the prepared mould. Fold over the edges of the paper so that everything is contained within the mould and press down so the nuts all find their place and are all tightly packed together.
Let cool completely- it may take a couple hours since it's so dense.
Unmould, unwrap, slice and enjoy with wine and cheese, etc., as an appetizer or a dessert. 

Sunday, February 10, 2019

Meyer Lemon Marmalade


The first I knew of Meyer lemons was more than 20 years ago. My older sister, who was in college in California, would periodically send boxes of them to the rest of the family in Missouri. I don't remember what we did with them, but I do remember thinking them very different than basic lemons. Perhaps even exotic.
(Now she's in Virginia, where they admittedly don't have much in the way of citrus groves, and I'm in California.)


Meyer lemons are more subtle though distinct in flavor, with a more perfume-y quality (maybe a tad grassy) than the zingy Eureka variety we normally associate with lemony-ness.  The Meyer variety, a mandarin orange and lemon hybrid, is pretty common in California.  In addition to being less acidic, Meyer lemons are generally juicier, their skin is thinner, and the segments and juice are a deeper yellow.


I was staying at a very kind and helpful friend's a for few days while she was out of town. She has a Meyer lemon tree in the back that was practically dripping with lemons, as well as a full drawer of them in the fridge, and I was encouraged me to "make some yummy things."
So along with the requisite curd, a dinner main, and some baby cakes (those last two which I HOPE to photograph and post soon), I made a batch of marmalade.
There was some quiet Saturday time in front of me, it was drizzly, and I wasn't going to go on a long exploratory walk. 

But before I got started, I also did a bit of foraging in the yard for the herbs- so interestingly, much of what was used came from right there.


It's sweet, sour, and bitter... sunny, with a tinge of a resinous herbal flavor.
The herbs, of course, are not a requirement, though I would encourage the bundle of seeds because there's pectin in seeds, which obviously will help thicken (though technically lemons in general are high in pectin and would help thicken ANY batch of jam). It can get to the thickness of something more like membrillo.

One little tip: to facilitate *actual* thin slices of lemon, you may want to use a mandoline. 
Next time I make this, I may try adding more mandarin juice- 2/3 to 1 cup maybe.

With butter on toast for breakfast, or maybe something more dense like a bagel along with cream cheese, thinly spread onto a crêpe with a dollop of whipped cream- ditto with poundcake, or as part of a cheese board (to go along with a chèvre or a triple crème brie). Versatility.


Meyer Lemon Marmalade
(makes about 4 cups)

1 3/4 lb. (about 810 g) Meyer Lemons
juice of 2 mandarin oranges (about 1/3 c or 60 ml)
2 c (453 g) sugar
1 c (250 ml) water
1 sprig of lavender
1 sprig of rosemary

Place a small plate in the freezer.
Cut both ends from the the lemons, quarter them lengthwise, and slice thinly. When you get very close to the ends where slicing becomes difficult, if a bit pithy you can slice out the bit of inside and discard the skin and pith if you choose. Remove seeds from the lemons and set aside. Combine the sliced lemons (and any juice you get from cutting), mandarin juice, and water in a medium saucepan over medium heat. Bring to a boil, then reduce to a simmer. Cook about 30 minutes, stirring occasionally, and skimming any foam that rises to the top. Combine the lavender, rosemary, and about 1 T of the lemon seeds (visually about 1/2 of a ping-pong ball) in a few layers of cheesecloth and tie tightly. Set aside.
After the first 30 minutes of cooking the marmalade mixture, add the prepared cheesecloth bundle. Continue simmering, and occasionally stirring gently about 20-30 minutes more.
Test the thickness of the jam to see how it sets by placing a spoonful of the hot liquid marmalade onto the frozen plate. Let it cool a couple minutes, and then run a finger through it to see if the "divided" jam stays separated. If it flows back to cover the space you just cleared, it should cook longer (unless you prefer it a bit runny). If the jam looks like a good set consistency, spoon into hot, sterilized jars and cover with hot lids.
Let the jars cool a bit, then refrigerate.

Thursday, May 19, 2016

Rhubarb Strawberry Jam


When rhubarb season rolls around, I just can't resist.
At the very least I have to make ONE batch of jam to put away (for at least a little while). This way rhubarb can be savored much later in the year (or early the next). One nice thing about jam is that you can get a bit of that great flavor, and it doesn't disappear all at once. A jar of jam theoretically lasts longer than, say, a pie or tart might.
(And yes, I like to reuse certain jam jars for their shape and style.)


I think it's my all-time favorite confiture.
There are just a few ingredients, simple and perfect.
When I make a batch I don't really want to share, but I know its better for several reasons that I do so.


This is an updated version of a rhubarb berry jam I posted years ago.
I have this habit of making lists and notes on Post-its and misplacing them, so it behooves me to write recipes elsewhere ASAP so I don't have to do a frantic search or take the time to figure something out all over again.
Some concepts here are based on The Blue Chair Jam Cookbook by Rachel Saunders- but there is no actual rhubarb strawberry jam listed in the book.


It's a two-day project (or maybe some prep the afternoon or night before, not too much work on Day 1), and I would totally recommend the use of a kitchen scale for a recipe like this that utilizes larger amounts.

I agree that you need to let the rhubarb shine, making it the greater portion of the fruit in the recipe. Rhubarb certainly has it's own flavor, tart and distinctive. As I write, I'm trying to think of ways to describe the flavor, but am having a hard time coming up with anything...
I don't know. To me, there's something amazing about that flavor.


Obviously, as the jam cooks the fruit will break down, so it's a personal preference to have larger pieces of fruit to retain texture and so you really see and taste what's in the finished jam.

But, the jam is nice on plain yogurt, with pound cake, on good vanilla ice cream, as a filling for a tart, crostata, or cookies, and of course toast.


Rhubarb Strawberry Jam
makes about 8, 12 oz jars


Day 1
2 3/4 lbs. (about 1 kg and 247 g) rhubarb (*after being trimmed and sliced)
1 3/4 lbs. (about 794 g) cane sugar
2 oz (1/4 c or 60 ml) lemon juice

To add on Day 2
1 1/2 lbs. (about 680 g) strawberries, sliced if large
1 3/4 lbs. (about 794 g) cane sugar
3 oz (1/4 c plus 2 T or 90 ml) lemon juice, separated


Clean the pieces of rhubarb, cut off the top and bottom ends, and slice into 1-2 inch pieces. Weigh out 2 3/4 lbs. of the rhubarb, place in a glass container, add the sugar and lemon juice and stir to combine.
Cover tightly with plastic wrap and leave in a relatively warm place to macerate for at least 12 hours and up to 24.

When ready to make the jam, place a small plate with several spoons in the freezer (for later, to check the consistency of the jam).

Place the rhubarb along with any juices in an 11-12 qt. copper preserving pan or a nonreactive kettle. Add the strawberries, sugar, and 2 oz of the lemon juice and stir until the sugar is thoroughly combined.

Bring the mixture to a boil over medium-low heat, stirring occasionally with a heatproof rubber spatula about 10 minutes. Raise the heat to medium-high and continue to stir occasionally.  As the jam thickens, stir more frequently, relatively constantly near the end, making sure to scrape the sides and bottom of the pan so it does not scorch. If the jam seems to get too sticky on the sides of the pan, perhaps reduce the heat a bit. Cooking time at the higher heat will take about 20 minutes depending on juiciness of the fruit and evaporation. Add the rest of the lemon juice, stir through, and continue to cook the jam for 2-3 minutes.

Remove the pan from the heat (if it seems a little thin remember that it will continue to thicken as it cools), and place a spoonful of the jam on the frozen plate. Put the plate with the spoon back in the freezer for a few minutes. When the time is up, take the plate and spoon back out of the freezer and lift the spoon to see if the jam is runny. If it's watery and easily falls off the spoon, you'll need to cook it a few minutes longer and re-test the consistency. If the jam is instead thick and wrinkles a bit when you nudge it with your finger, it's finished and ready to place in glass jars.

NOTE ON JARS:
Lids should be clean and jars should be HOT and sterilized. You can use an empty dishwasher on a hot cycle, but you can boil the jars or use your oven.  If using your oven, place clean jars on a pan in a 250 F (120 C) oven for 30 minutes. Place a little jam in one of these jars and see if it bubbles or boils. If so, the jar is a little too hot and should cool off a bit before continuing.

Fill the hot jars with the finished jam, leaving about 1/4 inch space. Wipe the rims with a clean damp cloth, and screw lids on the jars. 


Jam can be left as is, to cool, or placed in that 250 F (120 C) oven for 15 minutes. 
If the oven method is used, the filled jars should be left to cool on a wire rack overnight before storing them.

Jars that have NOT been finished in the oven should be refrigerated.
Any jars that have been finished in the oven which are not completely sealed and whose centers are not convex should also be placed in the refrigerator.

Properly canned jars can last a year or two in a pantry.
Mine don't last that long (I give some away and those I keep, I usually just leave in the fridge). 


Monday, April 20, 2015

Coconut Bites


Sometimes some of us just want coconut.

I'm well aware this does not apply to everyone, but I think for some people there may be an actual need.


Coconut candy can be made at home, it's relatively simple, and can be made well.
All that, plus you know what's in it.
The interior here has four ingredients- that's it- and they're four things you might already have in your pantry. 

As for the outside, it's just dark chocolate.
Now, you can choose to go ahead and temper the chocolate, but if that's too much for you to deal with, you can just melt it and keep these little bites in the fridge. A cold coconut and chocolate combination isn't such a bad thing. In fact, it's quite nice.


Normally, I would say you definitely don't want your chocolate to make it's way to your fridge- this is one of those chocolate caveats as it's not the best way to treat good chocolate. However, an exception (to me, anyway) is when dealing with coconut. At this moment, it's not about the chocolate. It's about the coconut. Certainly, use good chocolate (make no mistake, bad chocolate is a bad thing), but remember that the chocolate is there to elevate the coconut a bit, make it a little more special, and contain all that coconutty goodness.  That chocolate is not the main attraction, it's got a functional job that happily ends up being something more than merely functional.

There are people out there that may balk at that comment about chocolate, but it's true. Chocolate chip cookies in their "regular" form are not chocolate cookies. True, the chocolate may be the purpose and the cookie part just be a vehicle for some. Chocolate and cookie work together.
What a team.


(For some reason this is reminding me of a saying my mother likes to use that never makes sense to me. It's about alligators, a swamp, quick thinking and focus- but frankly, I never understand it. It won't matter how many times I hear it. And then I wonder how often people in Indiana really need to think about alligator confrontations, which I imagine to be almost never. And why discuss it? It doesn't apply so well in the Midwest.
I guess my point was that some people will never be able to make sense of the need for coconut, or the sacrilegious reasoning behind someone feeling the need to discount chocolate.)


Anyway, if you choose to go the tempered chocolate route, you can find some information here.
Just remember that the coconut will be cold and affect the setting of the chocolate somewhat. Tempered chocolate stiffens more quickly than that which is untempered. It will set up even faster on something that is cold, and sometimes this causes the chocolate to crack. 

After being dipped, you may choose to top the coconut bites with a bit of shredded coconut as decoration or to help identify the interior. Fleur de sel is also a nice topping for a little sparkle as well as a contrast and flavor burst. Of course, they're still just fine unadorned


Coconut Bites
(makes about 25, 1 tablespoon/15 ml capacity confections)

14 oz (400 g) shredded coconut
1/2 c plus 1 T (135 ml) maple syrup
1/3 c (75 g) coconut oil
1/4 t (1 g) fine sea salt
12 oz (340 g) dark chocolate, chopped

(*Note: if you have a drier, more natural and without extra sugar type of shredded coconut- my preference here, you may want to add about 1T more each of maple syrup and coconut oil, 15 ml and 20 g, respectively. These can be added after the initial blending after checking the consistency and whether the mixture will be sticky enough.)

In the bowl of a large food processor, place the shredded coconut, maple syrup, coconut oil, and salt. Process in several long pulses until well-combined, but only just so. You don't want the coconut mixture to turn into a paste. Scrape down the sides once or twice and re-process.

Scoop the coconut mixture into tablespoon-sized portions, tightly packed, and place on a parchment paper lined sheet pan. (A cookie scoop or mini ice cream scoop does a great job of this.) Refrigerate the tray about 2 hours before removing to dip the coconut mounds. 

Right before you are ready to dip, place the chopped chocolate in a bowl placed over a simmering pan of water (bain marie). Let the chocolate melt, stirring occasionally until smooth. 
(Alternatively, follow instructions to temper the chocolate.)
Dip each coconut mound into the warm melted chocolate, and using a fork, remove to a parchment paper lined sheet pan.

Refrigerate until the chocolate is stiff, or let set at room temperature (untempered vs. tempered chocolate). Keep the coconut bites refrigerated in a covered container.


(Addendum: If the chocolate is tempered, of course the bites don't need to be stored in the fridge as the chocolate will have completely set. Also, they're best if not served directly out of the fridge- at least a few minutes sitting at room temperature will help. The bites are better if they're given time to take the chill off a bit- if you can wait!)

Thursday, February 19, 2015

Yogurt-Covered Raisins... Or White Chocolate Yogurt Dip


So, I recently saw a little post on Food52's Instagram with yogurt-covered raisins. There it was, and it included ingredients by name, but there were no measurements or instructions, and no recipe on their website either. 

Now, I would never say yogurt-covered raisins are an all-time favorite, but sometimes they might be what you "need"... as you might tell yourself. 
Although, thinking about them right now, they're sort of a strange food.
At the time I thought they sounded really good- especially imagining them with salted peanuts or tossed in as part of a nutty dried fruit trail mix.

Seeing everything covered in winter white might have been an extra inspiration.  


I can't say I crave white chocolate- mostly because it's overly sweet. Although there are times when it's not such a bad thing. It pairs nicely with buttery macadamia nuts, for instance.  Most of the time, I think that if you have white chocolate in a cookie, also having some dark chocolate helps to balance things out.

That said, yes, I am aware that white chocolate isn't chocolate because it doesn't have the cocoa solids. It's a different animal, and used for different purposes than dark chocolate much of the time.


Well, by no means are yogurt-covered raisins a health food. No way.
If someone chooses them over the chocolate-covered variety thinking they have some sort of an advantage, it's far from the truth. 
It's not only yogurt that covers those raisins. There's quite a bit of sugar, too. And there could be plenty of other stuff. 
(For instance, other recipes that I found included gelatin- not something I'm overly interested in for this particular application.)
The reason one really goes for them is their taste: a bit of yogurt-y tang cutting through some of that over-the-top sweetness.

As with that initial inspirational photo, the ingredients here are white chocolate, yogurt, and a touch of cream. While we could say there's plenty of junk in white chocolate, I would recommend when dealing with any type of "chocolate" (white, milk, or dark), look for something with 5 ingredients or less. Sugar, cocoa butter, vanilla, soy or sunflower lecithin (acting as an emulsifier) plus cocoa solids for the dark and milk for the white (well, milk chocolate has both, so in that case it's technically 6 ingredients). There are bean to bar makers that do not include the emulsifier- but I don't know that I would purchase something like that for cooking unless it was something very special, as the expense could potentially be a deterrent. 


White chocolate blended with yogurt helps to make the chocolate more "healthy" perhaps (while cutting some of the sweetness), and the yogurt more decadent.

Not a raisin fan at all?
Maybe dried cranberries could be dipped, or prunes could get half-coated.

If you're looking for something that would be more of an interactive dessert (a version of fondue?) pretzels or strawberries could possibly find their way into warm dip. 

Off camera, there were strawberries consumed with the white chocolate and yogurt.
And they were good. 
Though as a fresh fruit, I can say I would not recommend waiting for the dip to dry. Refrigeration however may be another story. Just make sure everything is dry before dripping. 
The same goes for pretzels: they'll likely become stale more quickly if you try to store them.

Perhaps add a little extra cream to facilitate pouring the dip as a sauce over a bowl of mixed berries? 


Yogurt-White Chocolate Dip
(covers about 2 cups of raisins)

1/3 c (70 g) Greek yogurt
4 oz (114 g) white chocolate
2 T (30 ml) heavy (whipping) cream
small pinch of salt

*Preliminary step
Place the yogurt in a fine mesh strainer or a piece of cheesecloth, suspended above a bowl in the refrigerator at least 2 hours to rid the yogurt of excess whey. The longer it drains, the shorter the time the raisins will require to dry. However, if you don't plan to use the dip as a dried coating, rather fresh and warm, you could probably skip this step completely.

Remove the yogurt from the refrigerator so it warms a bit before proceeding.
In a bowl over a small pan of gently simmering water (bain marie), place chopped pieces of white chocolate, the cream, and salt. Stir until just melted and smooth. Remove the bowl from the heat and let cool slightly, stirring a few times to help the heat dissipate. Add the yogurt and stir until completely incorporated.

If you plan to dip raisins, let the mixture cool a few minutes so that it thickens slightly. If you plan to use the dip with fresh fruit, you can do so at any time. 

To dip raisins:
Place several raisins at a time in the yogurt mixture. Using a fork, scoop the raisins out and remove excess dip by tapping the fork against the side of the bowl. A toothpick also comes in handy to scrape excess chocolate off the bottom of the fork. Place raisins on a parchment paper lined sheet pan, perhaps again using the toothpick to ease them off of the fork.
Let the raisins set and dry, undisturbed. When the tops are no longer tacky, ease the raisins off the paper so that the undersides can dry as well.


From start to finish, the drying time at room temperature took about 20-24 hours (that is, with the minimal 2 hour yogurt draining time). 

Store the dried raisins in an airtight container up to a week.

Sunday, September 7, 2014

Fig and Raspberry Jam


Together figs and raspberries create a perfumey concoction bridging two seasons.
A lovely end of summer/beginning of autumn jam to make and put away for when you might need something a little different and special.

(I just love making jam whenever I get the chance.)


Cooking figs always smell like the woods to me- the woods on a crisp autumn day. There's something about the air and the crunchy leaves that have fallen from the trees that smell like figs.
Combine the fig scent with that of ripe and juicy raspberries and you have an interesting fragrance, an earthy sort of sweetness that permeates the house.


Port added near the end of cooking lends a bit of raisiny depth and helps increase the autumn-ness of this jam. It's bright, but cozy.

As I have said before when speaking of confiture, I do not actually can and process jams as they are for my use/friends/family and they go directly into the refrigerator after the jars are cool enough to handle (NOT into the cabinet to sit at room temperature since they have not been processed).


With both figs and raspberries, and being unstrained, this certainly turns out to be a seeded jam. I don't mind that though, it's real. It is what it is.

Fresh jams are always great on a piece of hearty grainy toast, a crumpet, or a warm scone.
I think this version would be especially nice with cooked with pork or served with turkey- or as part of a cheese board (perhaps along with some chevre, brie, or triple-crème?).
Stir it into yogurt.
Use it as the filling for a crostata...


Some of the technique is taken from the Blue Chair Jam Cookbook.


Fig and Raspberry Jam
makes about 10 pints

2 lb (about 910 g) fresh figs
water
2 1/2 lb (1 kg plus 130 g) raspberries
5 c (1 kg plus about 110 g) sugar 
1/4 c (60 ml) fresh lemon juice
1/2 c (120 ml) Port

Place a small plate and 4-5 spoons in the freezer to later check the jam consistency.

Remove the stems and cut the figs into eights (or into 12 pieces if larger), place in a large saucepan and cover with about 1/4 inch of water. Cover the pan with a lid and heat the figs over medium high heat until the mixture comes to a boil. 

Meanwhile, place the raspberries and sugar in a large bowl to macerate and set aside.

Once the fig mixture boils, stir and reduce the heat to low. Re-cover and let simmer 5 minutes, then mash the figs with a potato masher to reduce everything to a juicy pulp. Cover again and let the mixture cook 20-30 minutes, until the figs develop a soft and mushy consistency and the mixture is relatively uniform (mashing and stirring every 5 minutes or so).

Pour the raspberry and sugar mixture into the pan of fig puree and stir to combine. Add the lemon juice. 

Pour the fruit and sugar mixture into a preserving pan or wide, nonreactive pan.  Bring to a boil over high heat and then reduce the heat to a simmer, stirring every now and then to keep the jam for scorching on the bottom of the pan. After about 10 minutes of simmering, add the Port and stir though. Continue simmering and stirring 15 minutes more, then check the consistency of the jam by taking a spoonful in one of the frozen spoons. Place the spoon and plate back in the freezer about 3 minutes to re-chill, while continuing to cook the jam on the stove. 

Remove the spoon and plate from the freezer and tip the jam from the spoon. If it falls thickly and slowly from the spoon, it's a good jam consistency. If it's still quite liquid, cook longer and check in the same manner every 5 minutes or so. 

When the jam has reached the desired consistency, remove the pan from the heat, fill sterilized jars with hot jam, and screw (or clamp) the lids on. 
*At this point process as desired if you would like you jam to be shelf stable.
  
Let the jars sit at room temperature until you're able to handle them easily then place the jars in the refrigerator.
Jam should last at least a month and up to several if kept refrigerated. 


Monday, December 9, 2013

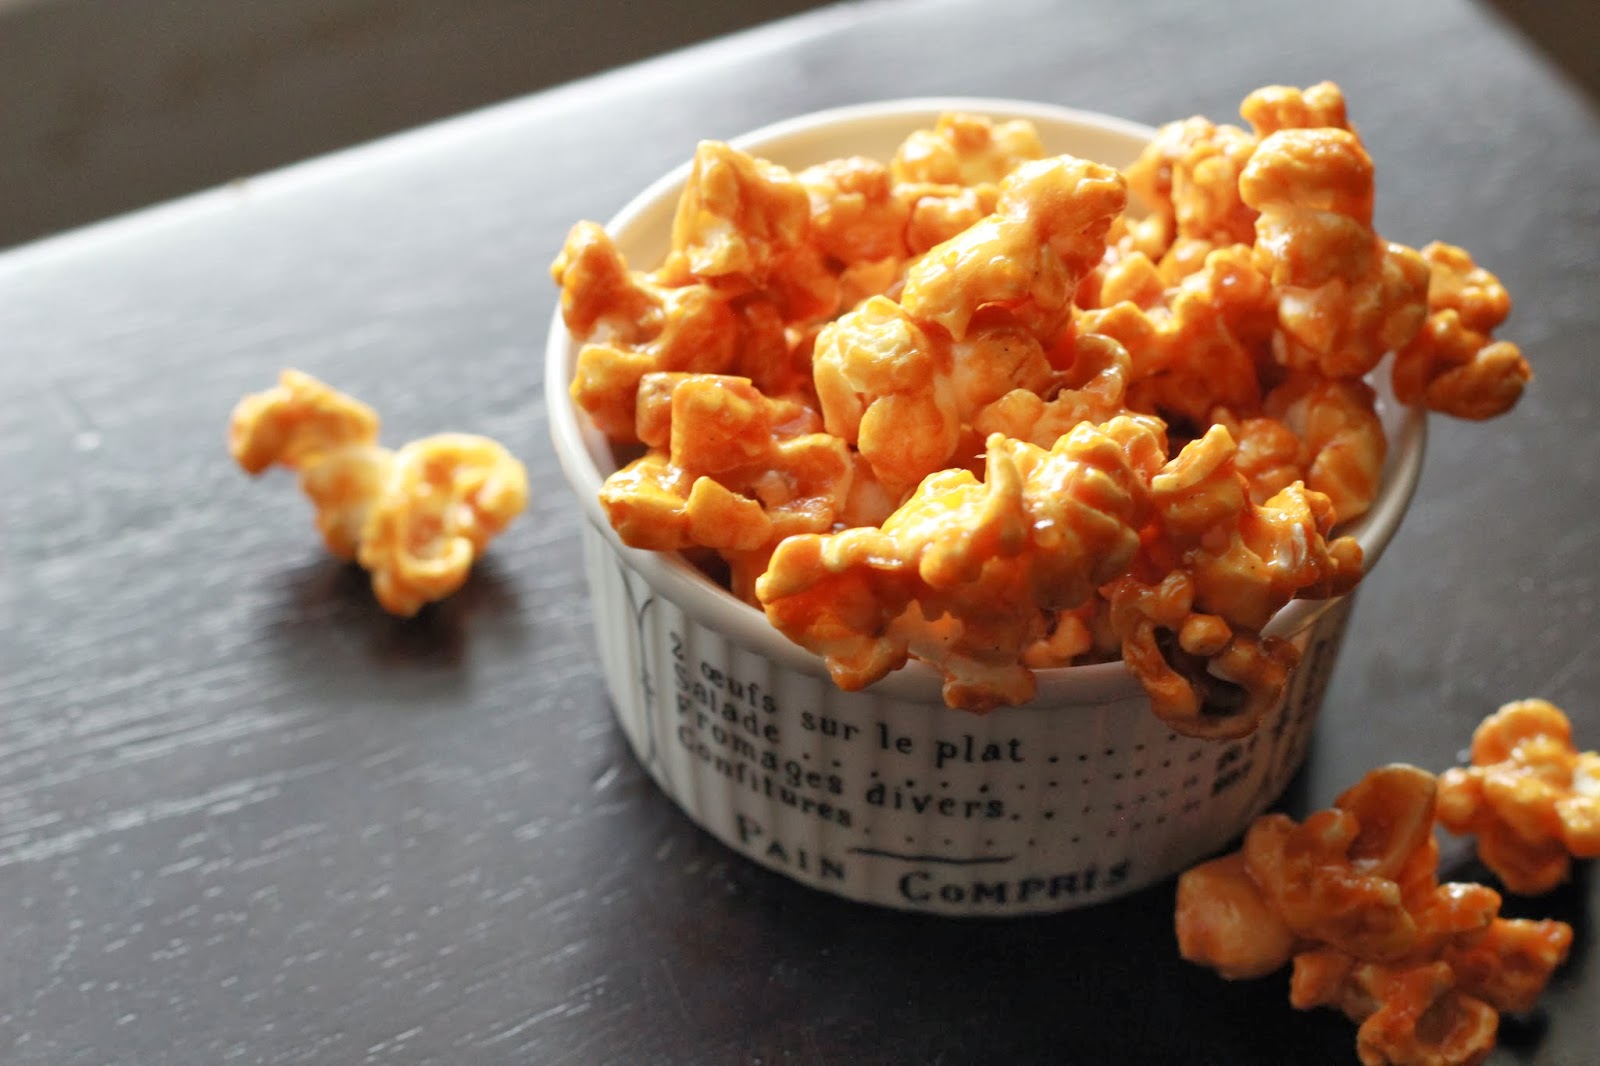
Basics: Popcorn... and Salted Caramel Corn


I thought I would take a little break and insert a simple recipe here, it's been a while. 

Really, basic popcorn is very easy, and I prefer it so much to any bagged microwave popcorn.
You can flavor it however you wish, and more likely than not it'll be less salty and greasy than anything you'd pull out of the microwave.


Here in the US most corn you can find for purchase is GMO. However, popcorn is not; popcorn wouldn't be popcorn if it were modified. It wouldn't pop if it's structure were changed.

Some nights dinner is light and simple over here- a pureed soup and popcorn. Maybe a salad on the side, perhaps apples, pears, cheese, and almonds.


Sometimes I like to use coconut oil and add a little salt and curry powder to the finished popcorn.
Other times, maybe and a different spice blend.
Truffle salt?
Rosemary or garlic infused oil?
Finely shaved Parmesan?
Dill, onion and garlic powders?


I was thinking about making homemade Christmas gifts this year- and making things that are consumable. Things that are generally used, enjoyed and gone. They don't have to be put away, they take up space on a mantle, no one has to wonder, 'now what am I going to do with this?!' and hopefully no one feels the need to re-gift them.


I can't make any promises, but I was hoping to post a few things that might make nice gifts.
Well, other than gifting purposes, caramel corn is also good to have around for a party or if you're expecting people to stop by and visit.

This is a caramel corn version without the use of corn syrup, and I'm happy it worked out.
The idea comes from Alana Chernila's Homemade Pantry, where there's a recipe for maple caramel corn.
I liked that recipe enough initially, thought it wasn't my all time-favorite, and I wanted to make some changes.


The most notable change is the use of golden syrup.
Golden syrup is a gorgeous raw sugar syrup, already caramel-y, a little deep with some molasses notes- really great stuff.

I'd like to tweak the maple syrup recipe to make it more to my liking, but that will have to wait a little bit for sometime down the line.
Maybe I'll try another time with little molasses in the mix, or honey, perhaps different types of sugar.

Also, as an aside, if you're wary, I would recommend starting with less salt than called for. Perhaps go for 1/2 t (3 g) and add more after tasting the caramel but before adding the baking soda. I've used both amounts, I like both but I would say it depends on personal taste. The baking soda adds some semblance of salinity if that helps at all.

And be careful of hot syrups... hot sugar = nasty burn.


Additions for the caramel corn I'd like to try including:
a little cinnamon stirred into the caramel at the end of cooking
maybe a little chili powder
slivered almonds or pecan pieces sprinkled on top before baking
drizzle of melted and tempered chocolate after the popcorn has cooled
dried cranberries stirred in at the end

Basic Popcorn
makes about 9 c (around 2 L)

1/2 c (110 g) popcorn kernels
2 T (30 ml) cooking oil (such as grapeseed, safflower, sunflower, or coconut)
Seasonings, as desired

In a 5 qt (about 5 L), heavy dutch oven heat the oil over medium-high heat until it shimmers. Add the popcorn and shake the pan to distribute evenly. Cover the pan and continue to cook, shaking occasionally at first, then more vigorously when the corn really starts to take off. 
Once the popping starts to diminish, and there are 2-3 seconds between pops, take the pan off the heat. Remove the popcorn to a large bowl, set aside if using for caramel corn, or season as desired.

**************************

Salted Caramel Corn

9 c popcorn (see above recipe)
7 T (100 g) unsalted butter
1/2 c (120 ml) golden syrup (preferably Lyle's)
1/3 c plus 1 T (93 g) raw cane sugar
3/4 t (5 g) fine sea salt 
1/2 t (5 ml) vanilla extract
1/2 t (3 g) baking soda (bicarbonate)

Preheat oven to 225 F/110 C.
Lightly grease a 4-sided sheet pan and set aside. 
In a medium saucepan, combine the butter, syrup, sugar, and salt. Stir over medium heat until the mixture comes to a boil. Stop stirring, and let the caramel cook 5 minutes. Remove the pan from the heat and stir in the vanilla. Add the baking soda, and stir (careful, it will foam up). 
Pour the caramel over the bowl of popped corn and fold quickly but carefully, so as to coat, but not deflate or crush the popcorn too much (don't worry, it doesn't have to be perfect- the caramel will even out a little later). 
Place the pan of popcorn in the oven and bake 1 hour, stirring every 15 minutes. 
Remove the pan from the oven and stir again. Let cool completely, stirring every few minutes until the popcorn no longer adheres to the pan. 
Once cool, store in an airtight container. 
Best within 5 days. 

Friday, August 23, 2013

Pastry and Science


In the pastry realm, one has to be exact for the appropriate outcome. Structure and behavior are determined by the correct ingredients and measurements as well as reactions. It's much more chemistry-oriented than what goes on in the savory side of the kitchen. 
One can add this and that to a soup (or "forget" to add something) to change the flavor and it won't generally change the soup's form.  However, if you forget baking powder or baking soda to your cake, it will probably be hard and flat since the leavener wasn't there to make it rise. 
A chemical reaction takes place to make a cake rise.

Along with seven chefs, a coworker and I recently took part in a class at the Callebaut Academy in Chicago taught by Spanish chef Jordi Puigvert. The content was science-oriented information for plated desserts, confection, and pastry. More specifically, it was what is called modern pastry, molecular gastronomy, or culinary physics.

It's about changing the expected textures, chemical phases (solid/liquid/gas), and tastes into something new, and you end up with something surprising and unexpected on the plate as well as for the palate. Those things one might expect to only be appropriate as a visual garnish and not add much to the flavor aspect of a dish easily change the notion.

Here are some examples of a few things we worked on earlier this week.


Blood orange and mint whipped gels.

You might expect them to be gummy, but they aren't. The texture is very light, and more like a vibrantly flavored sponge cake that melts in the mouth.  The whipped gels are easily cut and added to other deserts. 


A fruit puree mixed with a few other ingredients and dripped from a bottle can create...


Raspberry caviar


Microwave chocolate sponge cake pieces, topped with a quenelle of milk chocolate and macerated semi-sorbet, raspberry flexible ganache, chocolate "clay" coated in raspberry powder, raspberry caviar, and a piped chocolate and blackcurrant frozen foam. Underneath is either a crumbed "dehydrated" peanut paste or hazelnut paste.


Piping the microwave chocolate sponge cake from an N2O charged whipped cream canister to create the light and spongy texture for the cake.


Unmoulded frozen chocolate mint mousse


Dipped into a cocoa glaze while frozen, chocolate mint mousse is placed on a bed of chocolate crumbles and becomes is the center of a dessert flanked by spheres of chocolate and light licorice panna cotta, cubes of whipped mint gel, basil cream, and a cocoa and licorice sauce. 


Spherification of blood orange and passion fruit puree- 
a very thin semi-solid layer holds the puree inside


A squiggle of lime and white chocolate curd, lime crumble, orange juice soaked passion fruit sponge cake, whipped blood orange gel, white chocolate and passion fruit flexible ganache, orange and passion fruit spheres, topped with a lime and white chocolate semi-sorbet and lemon bubbles. 
(Sorbets will eventually melt and bubbles will eventually dissipate... even for chefs.)


Blackcurrant and chocolate marshmallows


The photo above shows piped interiors of mojito truffles, below are the finished truffles on either side of chocolate-coated pina colada dragees with coconut cubes, pineapple and lime flavors. 


Smooth interior sesame and hazelnut truffles coated in chocolate and rolled in caramelized sesame seeds (center)... (apparently you can finish a 1kg bag of the seeds at the cinema- no problem), flanked by vibrant-tasting lime, basil, and yogurt truffles, some chocolate-coated and others left uncoated.


Tartlets with vanilla bean mousse, vacuum-packed pineapple (flavored with simple syrup, rum, lime zest, and vanilla bean with the help of osmosis), soft coconut cubes, and pineapple-rum gel. Coconut caviar was added later.


Chocolate financiers with a heat-resistant raspberry filling. The raspberry slice is like an extremely thick jam, reminiscent of membrillo, that very easily dissipates in the mouth. When the cake is cooked the raspberry will melt, but it solidifies again once the cake cools. 


Frozen green apple mousse being coated in thin fruit glaze


Yogurt foam spooned into a mould and frozen so it can be sliced


Green apple mousse moulded around apple confit cubes, vanilla mousse, and an eggless caramel bavaroise, dipped in apple glaze, placed upon a bed of yogurt and green tea sponge cake, iced apple gel, frozen yogurt bubbles, apple meringue, and sliced fresh green apple.