Showing posts with label desserts. Show all posts

Monday, June 7, 2021

Chèvre Tart


Oftentimes before bed I read, and it's very likely the topic will be food related.
A couple weeks ago I was reading a chapter from The Food and Wine of France: Eating and Drinking from Champagne to Provence by Edward Behr. The particular chapter I had landed on that evening was about a cheesecake made with chèvre. A blackened cheesecake- merely black on the surface but not burnt in flavor, tourteau fromagé, from around Poitou. While Mr. Behr set out on a journey to find and sample versions, they weren’t always made with chèvre, and he found himself slightly disappointed upon biting into a cow’s milk based torte and wishing for the more bold goat’s milk style.

Now, I’ve never personally tasted said cheesecake, and this version I have here is likely nowhere near that which Edward pined after. 
(Poor Edward.)
However, the addition of tangy goat cheese to a “cheesecake” was a very nice thought that gave me a jumping-off point. 


I'm not the biggest fan of cheesecake as it is. Perhaps it's the combination of dense, heavy, and thick.
By that I mean dense in its texture in the mouth, heavy in its richness... and face it, slices of cheesecake aren't exactly short in stature.
Does it sometimes feel like eating an oddly dry-moist wedge of cheese? 


The first round of creating this recipe was fine, but I wanted a bit lighter and creamier.
Good news: round two turned out to be more like what I had imagined.
Maybe it's a bit more custardy than a cheesecake, though definitely not a custard- or it's somewhere between custard and cheesecake on the dairy spectrum (though, yes, closer to the cheesecake side).
The ratio of crust to filling in a tart form would definitely help lighten the dessert- part of the reason I went for this particular iteration of cheesecake. Plus, I guess I just prefer tarts.


It may not look exciting from the outset, and perhaps at a glance it could be easily mistaken for a version of lemon tart due to its initially snow-white filling’s sudden egg-yolk-dyed sunny hue.
The flavor is a bit tangy from the chèvre, crème fraîche, and lemon, though it’s also fresh.
And while the flavor of chèvre is more subtle due to it being cut with cream, that flavor is still present. Quieter, but there.
A pile of fresh berries on top is almost a requirement, but the tart is certainly more than ok on its own.


You can obviously use whatever pastry you choose for your blind baked crust, but THIS RECIPE found at David Lebovitz's site makes things awfully easy. Throw it together, press it into the pan, and bake. No rolling, no resting in the fridge, no pie weights... though you will want to bake it so it’s “done” and golden around the edge since the second bake with the filling isn’t going to do much to cook it further.


As it bakes and rests the filling balloons up,  comes over the edge of the pastry a bit, and becomes gilded on top... then it falls back down and sinks to tart level as it cools.
Like with any cheesecake, slicing and eating while it’s warm isn’t a good idea. 
Just be sure you’ve set aside the time needed for chilling before serving.


Chèvre Tart 
(makes 1, 9-inch tart, serves 10-12)

1, 9-inch blind-baked with golden edges and cooled tart crust (recommended recipe link above if needed)

6 oz (170 g) chèvre
5 oz (142 g) crème fraîche
3/4 c (180 ml) heavy cream
3 large egg yolks 
1/2 c (114 g) sugar
1/4 t (a large pinch) kosher salt
1 1/2 t (7 ml) vanilla extract
zest of 1-2 small lemons (depending on how lemony you like it)


Preheat oven to 325 F (163 C).
In a medium bowl, carefully whisk the chèvre and crème fraîche together until smooth. Stir in the cream, then add the egg yolks and whisk again until blended. Add the sugar, salt, vanilla, and lemon zest and whisk until fully incorporated.

Pour the filling into the prepared crust and place the tart pan on a baking sheet (to catch any possible spills), and place the pan in the center of the oven. Bake 40 minutes.
Turn off the oven and let the tart sit in the hot oven 40 minutes to rest and finish cooking.

Remove the tart from the oven and let cool to just warm, then place it in the refrigerator to chill for several hours, until cold.
At least 15 minutes before serving, pull the tart out of the refrigerator. Slice and serve cool to room temperature with fresh berries.

Wednesday, August 7, 2019

Honeyed Walnut Cake


Ok, so, this one was a bit difficult to name.
It's not a "cake" in the baked-and-eaten-with-a-cup-of-tea dessert-y, cake-y texture sense of the word.
I mean it more as a shape, a configuration, the tight togetherness of the ingredients.
While going through potential words in English to describe the form, they sounded so inelegant: brick, log, block, slab, chunk... bleh.
Sometimes the English language is decidedly lacking in charm.
Then I thought about other, more strictly fruit and nut confections- pressed date and almond, fig and walnut- and with a slight stretch, even panforte fits the bill. They're cakes. So cake it shall be.

I had found something like this months back, and it was wonderful to nibble with a glass of red wine, or as dessert with a splash of Port. The problem being, ooh, it was pretty expensive.
I thought maybe I could make it myself for much cheaper.
There are four ingredients, just like the other one. Maybe it's not exact proportion or technique-wise, but it's really good and certainly not cost-prohibitive.


I'd recommend it for a wine and cheese party, with appetizers, or for after dinner as part of cheese based dessert board along with that Port, maybe some dark chocolate... go ahead and add fruit, too (though this by itself is perfectly fine).

You're going to use two amber liquids here- one more pale golden, the other a bit deeper- two syrups I'd be willing to bet many, if not most, people have on hand anyway.
Honey and maple syrup, but make it pure maple syrup, real maple syrup, not a thick corn syrup based concoction.
Personally, I think it's good both are included here. Honey alone can be intense at times, not my most favorite ingredient, but it does have it's place. 
The syrups are cooked to reduce a bit and become the cement holding the walnut bits together.
I didn't give a temperature for cooking the syrup... it's a small amount, and it would difficult to get an accurate reading on a thermometer, so in this case it's more sensorial than measurable and exact.


Of course the recipe can be halved for a smaller group, or if you prefer assurance it will disappear.

Test the size of your mould after you've broken up the toasted walnuts. You can use a ring mould, a metal cup measure, something rectangular if you've got it, if you're careful- a metal can with both ends cut out... perhaps even a wide-mouth jar (as long as you'd be able to remove the finised cake). Place the  nuts in the container you plan to use and shake things a bit so the walnuts fall into place, giving you a general idea how things will fit.


A friend had also suggested sprinkling the mould with sesame seeds to help combat the stickiness you may encounter upon serving (at least the bottom, which becomes the top when unmoulded).

I'm going to recommend doing this by weight, at the very least for the walnuts since their shape is so irregular...


Honeyed Walnut Cake 
(6-8 portions?) 

150 g whole walnuts (this comes to about 1 1/2 c in volume)
4 T honey (60 ml)
2 T maple syrup (30 ml)
1/4 t fine sea salt (small for weight, but my measure says 1.2 ml)

Toast the walnuts lightly in a preheated 325 F (163 C) oven 7-10 minutes.
Remove the pan from the oven, and when cool enough to handle, break the walnuts into pieces (I usually do this by hand as I think it gives a nice size with soft edges, just twisting each walnut. Then I rub handfuls of the walnuts a bit between my palms to remove any loose skin.)
Bring the honey, maple syrup, and salt to a simmer in a medium saucepan over medium, then reduce the heat a bit and cook 5 minutes, swirling the pan several times. You'll have to watch it, because the honey mixture can really bubble and expand.
(The syrup can quickly reduce and become stiff, so it's important not to overcook it, likewise it's important not to cook at too high a heat as the sugars can burn. You'll only know it it cooked too much for sure afterwards when the walnut cake is cool... it may be a crispier, stiffer confection to slice, but it's still very edible.)
Turn off the heat and stir the walnuts through for a couple minutes, to warm them again and make sure everything is coated nicely.
Have a mould at the ready, lined with lightly buttered or sprayed parchment or waxed paper. Spoon/pour the walnut mixture into the prepared mould. Fold over the edges of the paper so that everything is contained within the mould and press down so the nuts all find their place and are all tightly packed together.
Let cool completely- it may take a couple hours since it's so dense.
Unmould, unwrap, slice and enjoy with wine and cheese, etc., as an appetizer or a dessert. 

Monday, July 15, 2019

Nectarine-Brown Butter Tart


Need a summer fruit dessert?
I'm trying to write things down in a more or less solid place because I keep misplacing my notes...
I first made a version of brown butter nectarine last year (though maybe it was peach at the time), and I can't remember where I found the "jumping off point" recipe- so I can't give credit where credit may be due- but, there were changes made a few times if that makes anyone feel better about the situation.
However, it's also very much like the peach pie we used to have in the summer when I was growing up... which I'm realizing I haven't had in years... so there's that, too.
(For now it is what it is, but I hope to try the pastry out with an oat/rice/cornstarch blend in the near future.)


You can use any stone fruit on this one, wonderful this time of year- as you choose or whatever is available to you. Make sure it's something ripe, though not overly so: nectarines, peaches, plums, apricots--- even cherries.
No matter what, you want to use a type of fruit that is intense and slightly sweet and/or tart with a luscious heavier flesh, a body to it. No flimsy fruit.
And I'd advise to always pick up a bit of extra fruit, a bit more than what is called for- just in case, you never know.
I don’t say this to brag, but the fruit here in California is fantastic... no matter what it happens to be... not that you actually have to DO anything to it, but I'm very grateful I can use it so easily.

Making this tart is not a difficult project, but you'll need to allot some time- though in my opinion it’s well worth it. The longest stint for this recipe would be chilling the brown butter filling before moving on to tart assemblage... at which point it's a very thick but still somewhat spreadable creme (referring to texture here, not content).

Look at the flecks of browned butter and vanilla in there:


You must give yourself time for this one (i.e. start it in the morning if you want to serve it in the evening, OR start it a day ahead and don't spend precious time waiting). Otherwise, if you choose not to wait, things can get a bit messy.


After baking, the filling of the tart will be puffed, browned, and slightly wobbly. But you leave it to cool and then chill. The filling settles and sets to a consistency somewhere between custardy and fudgy so it can be sliced with nice sharp edges.  


It may not be the most drop-dead gorgeous dessert you've ever seen- vibrant color suffers with the heat of baking- and it's a tad rustic... but it tastes pretty nice!
Not too sweet, but caramel-y and sweet-tart fruity with a shortbread-like crust.
It's even great for breakfast (if you do that sort of thing) with some damn fine coffee. Black.
 

You will need an 8 inch tart pan with removable bottom for this...


Nectarine - Brown Butter Tart
Serves 6-8

1/2 c (1 stick, 113 g) unsalted butter
1/2 vanilla bean (OR 1/2 t vanilla bean paste or a teaspoon of vanilla extract)
2/3 c (134 g) sugar
1 1/2 T (13 g) flour
1 extra large egg
a pinch of salt

5 T unsalted butter (71 g), at cool room temperature
3 T (24 g) powdered (confectioner's) sugar
1c plus 2 T (108 g) flour
1/4 t (scant 2 g) salt
1 egg yolk

2-3 ripe nectarines (or peaches, maybe 3-4 plums, 4-6 apricots, a bunch of cherries...)


To make the brown butter filling, melt the butter in a small saucepan over medium heat along with the scraped seeds from the vanilla pod or vanilla paste (throw the empty pod into the butter, for extra flavor). Continue heating until the milk solids begin to brown and become nutty. It'll take maybe 10 mintues- be careful because it may sputter a bit, and it can burn close to the end- so watch it!
While the butter browns, whisk the sugar and flour together in a bowl, then add the egg and whisk to combine (as well as the vanilla extract if you're using it).
When the butter is finished, remove the pan from the heat, fish out the vanilla pod or strain as you pour the warm browned butter and any toasty solids into the bowl with the sugar mixture. Mix well and leave to cool about 20 minutes before covering and chilling in the fridge at least 6 hours.

To make the pastry, blend the butter with the sugar, flour, and salt in a medium-sized bowl until you have a crumbly mass (you can use your hands for this). Add the egg yolk and work it in until you have a uniform dough- though you don't want to over work it (gently, just until it comes together). If it's not coming together very easily- err on the side of caution and undermix in this case- you can add just a sprinkle of water to help get the job done.
Bring the dough together, smash it into a thick disc, wrap in plastic or waxed paper and refrigerate at least an hour to rest.

Preheat the oven to 375 F (190 C). Lightly grease an 8" round tart pan with a removable bottom with butter or baking spray. Roll out the chilled dough between two sheets of plastic wrap or parchment paper so it will fit the pan (it'll be somewhere in the range of a few mm to 1/2 cm thick). Fit the pastry into the pan, pressing into the fluted sides, and cut off the excess with a knife. Freeze about 10 minutes (or if you're still waiting for the browned butter mixture to chill, you could place the prepared tart pan in the fridge for longer).
Prepare the fruit just before assembling. Halve and pit the fruit, and slice into thin pieces (a nectarine or peach- maybe into 12ths, an apricot- maybe 6ths... if using cherries, just pit and halve).
When ready to bake, remove the tart pan from the fridge and pour in the chilled brown butter filling. Smooth it as best you can, hitting the edges- though it doesn't have to be perfect as it will level itself out while baking. Arrange the fruit on top of the tart (I think concentric circles work pretty well) pressing the slices in gently.
Place the prepared tart on a sheet pan to accommodate any overflow and bake about 45 minutes

The tart is done when the edges of the pastry are a light golden brown and the filling is browned everywhere surrounding the fruit. The filling will be a bit wobbly. 
Place the tart on a rack and let cool to warm before placing it in the fridge to chill all the way through and set completely (this will take a couple hours).

Slice and serve the tart at a cool room temperature.

Saturday, December 30, 2017

Lavender Hot Chocolate


A riff on ganache hot chocolate from four or so years ago (just because ganache hot chocolate is the best and I needed some today).
AND it's so cold here right now. I might as well make this and have it for a few days. 
The hot chocolate "mix" can be made vegan/dairy free if you use coconut milk instead of cream. Coconut milk is so-so-so good as a cream replacement, adding that thick and creamy need that would be otherwise sadly missing.  I don't generally think you can detect the coconut either, as chocolate is a pretty strong flavor. Then when you make yourself a cup of chocolate, use you favorite nut/seed/grain milk.
Use another type of sugar if you choose: maple syrup, for instance... or don't use extra sugar at all (really, it's NOT required).


Making another type of ganache is another option. You could forego the lavender and add a touch of peppermint oil. Orange oil might be nice, too... or zest an orange directly into your cup of chocolate. 

My preference for hot chocolate is (usually) thicker, richer, and in smaller portions.  It seems like more of a treat that way, too. An afternoon pick-me-up, or a small evening dessert.

To me, the amount of lavender called for here lends a very mild lavender flavor. Add more lavender if you'd like the flavor more pronounced.


Lavender Hot Chocolate
serves 5-8 (recipe makes about 18 T ganache)

1/2 c plus 2 tsp (130 ml) heavy cream (*coconut milk if vegan)
1 T (3 g) dried lavender buds (food grade)
5 oz (140 g) good dark chocolate (50-60% or so)
2 T (30 g) granulated sugar (optional)
fine sea salt (a pinch)

Hot milk, preferably whole (if you're going all-out... *or your nut/seed/grain milk of choice)

In a small saucepan over medium low heat, bring the cream and lavender flowers to a gentle simmer. Turn off the heat, cover, and let steep 7 minutes. Strain the lavender from the cream and return the cream to the pan along with the chocolate, sugar, and a pinch of salt. Stir over low heat, until the chocolate and sugar are melted and the mixture is blended.

Place 3-4 T (45-60 ml or 60-80 g) chocolate ganache in a cup along with a splash of hot milk. Stir until smooth and add milk to taste (maybe 6-8 oz. or 180-240 ml). 
Alternatively, whisk ganache to taste into a pan of hot milk.

A dollop of whipped cream on top is optional.

Refrigerate any extra ganache in a covered container. Try to use within a week.

Tuesday, August 1, 2017

Lemon Posset


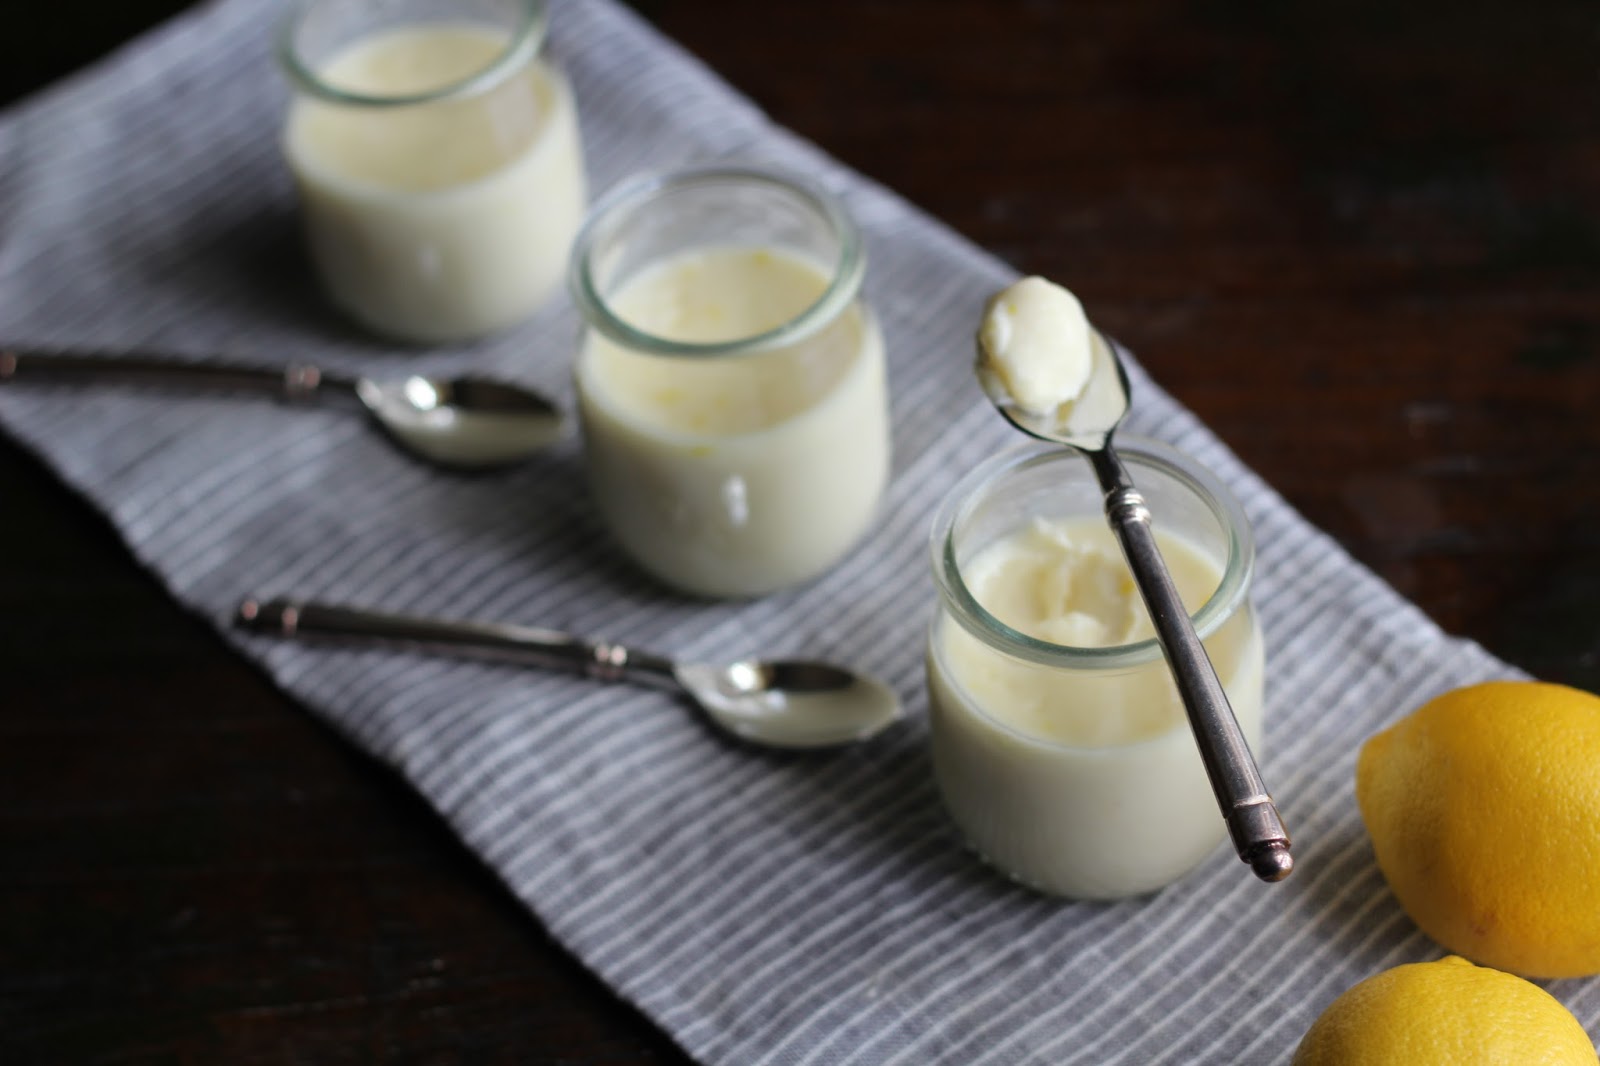
Lemon posset is a simple dessert, no frills but still perfect- especially for summer. You don't have to turn on an oven, just a bit of time on the stove, it's made ahead, and it's served cold.
It contains no egg and no gelatin (yay), but it's still beautifully set.

The posset is incredibly smooth and creamy, and wonderfully lemony without the inclusion of zest, but that zest certainly adds a bit of zing- it's your call, and depends whether you're really a lemon lover. 
Down the line I think I'd like to try it with the addition of rosemary or lavender infused sugar...


Serve the posset as is, with berries, or make the smaller portion size and serve with shortbread or as part of a café gourmand (with tiny demitasse spoons, of course).

So simple, but so perfect.

(*As a side note, it's Tuesday evening, I'll be driving to California on Thursday morning. Job change. I'll be taking the Missouri-Kansas-Colorado-Utah-Nevada-California route. It's a long drive, over 30 hours, but there should be plenty to see. And I just made some pecan and rosemary granola bars for the road- mmmmm!  My plan is to keep this up, blogging recipes every now and then, so I hope that won't change!)


Lemon Posset
Serves 4-6

2 c (473 ml) heavy cream
1/2 c plus 2 T (140 g) granulated sugar
5 T (75 ml) lemon juice
2 t (4 g) finely grated lemon zest (optional)

Optional for serving: fresh berries (blueberries, raspberries, blackberries, or strawberries)

Whisk cream and sugar together in a 3 qt saucepan over low heat, stirring occasionally, until the sugar is fully incorporated. Increase the heat to medium and bring the mixture to a boil. Continue boiling 5 minutes while stirring.  Keep an eye on it- especially closer to the end as it can boil over or scorch- just be careful. Remove the pan from the heat, stir in lemon juice and zest if using. Let cool 10 minutes, then pour into jars or ramekins. Let cool and chill at least a couple hours until set.
Serve as desired. 


Monday, June 12, 2017

Strawberry Truffle Tart


I began working on this recipe in February, I think.
Long story short, I didn't think it would take me quite so long to post it.
(Time seems to be going fast this year though.)
BUT, among other things, I seemed to have a problem with consistency- each time I made it, it tasted just fine, but the texture was a little off (i.e the strawberry filling wasn't stiff enough to hold up to slicing and cooperate in staying in that form), or I ended up with too much of this or that aspect for a single tart...
You know, stuff...


So, keep trying.


The pastry needed to be crisp and cookie-like, the strawberry filling somewhere between jam and a pâte de fruits, the chocolate ganache top slice-able and solid but still a bit soft.
A little more of this here and maybe less of that there.
(And actually, most of the photos come from a "testing" day, not the final recipe day.
"Sliced" view? Soft filling. But good visual effect!)


I'm hoping this is it for good, for ever time.
But I suppose nothing can ever be totally black and white.
I don't control strawberries and their moisture content, for instance. Sad fact, I know.
And I guess that would be one reason why recipes always have variable times for cooking things- there ARE a lot of variables (humidity, elevation, product availability, etc.).
So that's when the cook's experience and perhaps intuition come into play- you need to have an idea of what you're doing or looking for sometimes to make as best as you can.

However, if nothing else, if not absolutely drop-dead gorgeous on the plate, it will taste good!


I think this is a nice nibble for the afternoon, with tea or coffee...


The pan used is a 13 3/4 x 4 1/2 inch (about 35 cm by 11 1/2 cm) rectangular tart pan with a removable bottom

Strawberry Truffle Tart
serves 9


60 g (1/2 c + 2T) hazelnut flour
50 g (1/3 c + 1T) sweet (glutinous) rice flour
40 g (1/3 c + 1T+ 1t) oat flour
45 g (3 T) sugar
3 g (1/4 t) salt
85 g (6 T) butter, cold and cubed
5 ml (1 t) vanilla
30 ml (2 T) cold water

45 g (1/4 c) semi-sweet chocolate chips

8 oz (225 g) strawberries, trimmed and sliced before weighing
45 g (3 T) sugar
30 ml (2 T) water
120 ml (1/2 c) good strawberry jam
3 ml (1/2 t) lemon juice, plus more to taste

95ml (1/3 c plus 1 T) heavy cream
110 g (about 2/3 c) dark chocolate
10 ml (2 t) corn syrup (optional)

Optional for stripes:

30 g (1/4 c) confectioner's sugar
15 ml (1T) cream or milk


Preheat the oven to 400 F/200 C.
In the bowl of a food processor, blend the hazelnut, rice, and oat flours along with the sugar and salt. Add the butter and pulse several times until the mixture is fairly uniform and crumbly or sandy, without visible bits of butter. Sprinkle the vanilla and 2/3 of the water over the flour mixture and pulse several times to incorporate. Pinch a bit of the pastry dough to see if it comes together, if not, add the rest of the water and pulse a few times more to blend.
Tip the dough out into the tart pan and press along the bottom and up the sides of the tin, as uniformly as possible. 

Refrigerate the dough 10-15 minutes until cold and stiff.

Place the prepared tart pan in the oven and reduce the temperature to 350 F/175 C. Bake 25-30 minutes, or until the tart dough is completely set and pale golden.
Sprinkle chocolate chips over the finished pastry shell and let them melt a few minutes. Very gently, with the bowl of a spoon or an offset spatula, spread the melted chocolate over the bottom surface of the tart. Cool the tart and then refrigerate.

While the tart shell rests in the fridge  (or while it bakes), begin working on the strawberry filling. Bring the strawberries, sugar and water to a strong simmer over medium heat. Simmer 7-10 minutes, stirring or shaking the pan occasionally, at which time you should see thick and glossy bubbles and the liquid is somewhat reduced. Add the strawberry jam and puree the mixture in a food processor to break down the strawberries. Place the mixture back in the pan and simmer the mixture a further 7 minutes or so, stirring more frequently closer to the end so the jam doesn't scorch.
Pull the pan off the heat and stir in the lemon juice.
Let the mixture cool in the pan.

When ready to assemble the tart, make the ganache.
Place the chocolate and cream together in a bowl set over a small saucepan of simmering water, set over medium-low heat. Heat the mixture, stirring occasionally, until the chocolate is completely melted and the mixture smooth and homogeneous. Stir in the corn syrup, if using.

While the chocolate is melting for ganache, remove the tart crust from the refrigerator and spoon the strawberry filling over the bottom of the crust. Spread it evenly along the base and set aside.


(OPTIONAL STEP:
Make the white stripe icing by mixing the confectioner's sugar and cream in a small bowl. Place the icing in a small plastic bag (or pastry bag fitted with a very small tip) and set aside until ready to use.)

When the ganache is ready, spoon it carefully over the jam. Spread it gently, smoothly and evenly with an offset spatula, covering all of the jam filling and sealing it off all the way to the edge of the pastry. Cut a small corner off the bag with the icing- if using, and with a steady hand draw stripes across the tart about every inch or so. Using a toothpick, pull a toothpick perpendicularly through the icing stripes, every 1/2 to 1 inch, alternating directions. (After you're finished it should look like the toothpick has been pulled though top to bottom, then bottom to top, top to bottom, etc.) Ganache and icing will both settle a bit and lose some sheen after resting and chilling.

Refrigerate the tart at least a couple hours before slicing and serving.

Wednesday, February 1, 2017

Hazelnut Babycakes


Technically, I suppose these little nibbles would be classified as a version of financiers or friands.


Hazelnut babycakes come together fairly quickly- charming little bites that are as nice to eat as they are simple to make.
They make a sweet little nibble with tea or coffee in the afternoon, crispy on the top and edges, and chewy within.


A treat to be sure, perhaps a little more rare these days if you're trying to be more careful- but they're meant to be shared.
Of course, you could use a different pan if you don't have this particular style. Just keep in mind that you'll be dealing with a different bake time and will likely have to be a bit more attentive at some point.
(Although I think these particular cakes are best in a small size because of their density.)


Hazelnut Babycakes
makes 24

1 c (100 g) hazelnut meal
1/4 c plus 1T (50 g) arrowroot powder
1/4 t (2 g) salt
1/2 t (2 g) baking powder
2 large eggs, plus one egg white- room temperature
10 T butter (about 140 g), melted and slightly cooled
1/2 c (100g) granulated sugar

Options:
raspberries or blackberries (or blackberry or raspberry jam)
chocolate (solid pieces to tuck in the center, or as a ganache to dip the tops)
a bit of espresso powder in the batter (especially if you add chocolate)

Preheat the oven to 375 F/190 C with a rack set in the center.

Butter the holes of a 24-hole mini muffin tin.
Blend the hazelnut meal, arrowroot, salt, and baking powder together in a medium bowl and set aside.
In a large bowl, whisk the eggs and extra white together with the sugar a few minutes so the eggs are broken down and the sugar is well incorporated. Add espresso powder here if you choose to use it.
Add the melted butter and mix well.
Pour the hazelnut mixture you've previously set aside into the eggs, sugar, and butter. Mix with a rubber spatula, until just homogeneous.
Divide the batter among the spaces in the muffin tin, they should be about 3/4 full.
Now it's time to dress them up a bit if you wish. Tuck a berry into the top of each, pressing it down slightly to sink it in (but try not to hit the bottom of the pan). Or, add some chopped chocolate, or a tiny dollop of jam to the center of each cake.

Bake the cakes 15-20 minutes, or until they are golden and puffed. Remove the pan from the oven and let cool only a couple minutes before turning the cakes out onto a cooling rack (they may need a little assistance- just don't make the mistake of waiting until completely cool because by then they've glued themselves to the pan).
Let cool completely, dust with powdered sugar (or dip the tops in ganache if you choose), and serve. 


Tuesday, August 2, 2016

Crème Fraîche Ice Cream


The flavor of cream can be quiet and delicate, perhaps more supportive and background than others may be, but it's still there.  Crème fraîche on the other hand may not be quite so subtle as far as cream goes.  It certainly holds another place in the cream continuum, and can have it's own purposes and preferred matches with other flavors.


Another simple summer dessert, this one almost no-cook, crème fraîche ice cream is a nice warm weather option.
(Start a day ahead and you can make your own crème fraîche.)
Great when paired with fresh strawberries or peaches since that fresh, ripe and sweet fruit can benefit from just a touch of cream and tang.


Or, might I recommend broiled or grilled peaches?
(Especially smart if the grill is already hot.)


If you want to do a little extra, splash halved peaches cut side up (and placed in a cast iron pan or heavy and slightly curved foil) with amaretto and sprinkle with a good layer of sugar. Place the pan outdoors on a hot (covered) grill or inside under a broiler until done (softer, juicier, warm with maybe a bit of char from the heat)... Brandy or bourbon and perhaps rum could be other options.
Maybe you could forego the amaretto to go the Peach Melba route and add some raspberry sauce (maybe a splash of Chambord if you've got it).


All in all, a slightly different take on peaches and cream.


Crème Fraîche Ice Cream
serves 6 or so (makes less than 1 qt)


1 1/2 c (375 ml) whole milk
1 c (225 g) sugar
Pinch of salt
3/4 c (180 ml) heavy cream
3/4 c (180 ml) crème fraîche

Whisk milk, sugar, and salt together in a medium saucepan. Heat over medium-low to almost a simmer, stirring occasionally, until the sugar has dissolved completely. Remove from the heat and pour the sweetened milk into a large glass measuring cup or bowl. Whisk in the heavy cream and crème fraîche until fully combined. Refrigerate at least an hour until cold.

Freeze the ice cream base in an ice cream maker according to manufacturer's instructions.
Remove the soft ice cream from the ice cream maker to a lidded container, and place in the freezer to stiffen several hours before serving.


Monday, July 11, 2016

Raspberry-Rose Sorbet


As far as this recipe goes, I wanted something summer-appropriate and good to go while berries are plentiful, nice, and ripe. Thankfully, there's also no cooking involved, no heat per se whatsoever.
Fruit macerates with the sugar, everything is blended and strained, and finally frozen.

It's a deep shade of red-pink with an intense fruit flavor. To me, a bit goes further than perhaps another option, as it can be savored in small scoops.

The rose component may be a little different yes, but I have a bottle of rosewater that I don't use all too often. I wanted another function for the ingredient- no matter how small that may be.


Rosewater is certainly not one of those "more is better" things. Subtlety is better with rosewater, and that balance is not always easy. As with many things, it can completely be a personal preference, too. A bit of it may be enough for one, but not enough for another. A touch more may be much too much for the first person, and just enough for the second.
I'd rather go the conservative route.
And yes, I have accidentally gone the opposite way.

Raspberries smell very "green" to me. Not green as in unripe, but green as in grassy, fresh. Strawberries, for example, do not.
Rose can enhance that fresh raspberry flavor, which can at times be "rose-y" itself (in fact, they're botanically related- and sometimes things can go together that way). There's just a bit of that floral essence the finish of the sorbet, I don't find it to be a rose perfume flavor through and through.

Depending on your berries, you may want to add a bit more sugar, or more lemon juice (and perhaps a few more drops rosewater) The berries I started with were somewhat tart this time, and I ended up adding about two more tablespoons of sugar, whisked through to combine after being strained. And still, it is a bit tart, but I think that's how it should be. However, I still think that bit of lemon is important for brightness.


The finished sorbet is kind of nice with a tiny meringue crumbled over the top.

And so...


Raspberry-Rose Sorbet
makes about 1 quart

30 oz (850 g) raspberries

3/4 c (170 g) sugar (extra as necessary depending on your berries)
zest of 1 small lemon
1 T (15 ml) fresh lemon juice (extra as necessary, to taste)
1/2 t (about 3 ml) rosewater - plus a few drops more to taste


Combine raspberries and sugar in a large bowl and cover. Let macerate a couple hours, stirring and smashing the berries a couple times so that the sugar dissolves and the berries give up their juice.  Add the lemon zest and stir it through the mixture. Pour the bits of berries and juice into a blender and blend to break up the last bits. Strain to remove most of the seeds (some really don't bother me- at least you know it's real).

Add the lemon juice and rosewater, and whisk through to blend. Taste and add a bit more sugar or lemon juice, and/or a few drops more rosewater as you think necessary.

Refrigerate an hour or two until cold.

Chill in the bowl of an ice cream maker per manufacturers instructions.

Remove the slushy, cold sorbet to a container, cover, and place in the freezer to stiffen until it reaches the appropriate and scoopable texture.
(If the sorbet has been in the freezer a while and is very hard, obviously leave out to stiffen a bit.)


Thursday, May 19, 2016

Rhubarb Strawberry Jam


When rhubarb season rolls around, I just can't resist.
At the very least I have to make ONE batch of jam to put away (for at least a little while). This way rhubarb can be savored much later in the year (or early the next). One nice thing about jam is that you can get a bit of that great flavor, and it doesn't disappear all at once. A jar of jam theoretically lasts longer than, say, a pie or tart might.
(And yes, I like to reuse certain jam jars for their shape and style.)


I think it's my all-time favorite confiture.
There are just a few ingredients, simple and perfect.
When I make a batch I don't really want to share, but I know its better for several reasons that I do so.


This is an updated version of a rhubarb berry jam I posted years ago.
I have this habit of making lists and notes on Post-its and misplacing them, so it behooves me to write recipes elsewhere ASAP so I don't have to do a frantic search or take the time to figure something out all over again.
Some concepts here are based on The Blue Chair Jam Cookbook by Rachel Saunders- but there is no actual rhubarb strawberry jam listed in the book.


It's a two-day project (or maybe some prep the afternoon or night before, not too much work on Day 1), and I would totally recommend the use of a kitchen scale for a recipe like this that utilizes larger amounts.

I agree that you need to let the rhubarb shine, making it the greater portion of the fruit in the recipe. Rhubarb certainly has it's own flavor, tart and distinctive. As I write, I'm trying to think of ways to describe the flavor, but am having a hard time coming up with anything...
I don't know. To me, there's something amazing about that flavor.


Obviously, as the jam cooks the fruit will break down, so it's a personal preference to have larger pieces of fruit to retain texture and so you really see and taste what's in the finished jam.

But, the jam is nice on plain yogurt, with pound cake, on good vanilla ice cream, as a filling for a tart, crostata, or cookies, and of course toast.


Rhubarb Strawberry Jam
makes about 8, 12 oz jars


Day 1
2 3/4 lbs. (about 1 kg and 247 g) rhubarb (*after being trimmed and sliced)
1 3/4 lbs. (about 794 g) cane sugar
2 oz (1/4 c or 60 ml) lemon juice

To add on Day 2
1 1/2 lbs. (about 680 g) strawberries, sliced if large
1 3/4 lbs. (about 794 g) cane sugar
3 oz (1/4 c plus 2 T or 90 ml) lemon juice, separated


Clean the pieces of rhubarb, cut off the top and bottom ends, and slice into 1-2 inch pieces. Weigh out 2 3/4 lbs. of the rhubarb, place in a glass container, add the sugar and lemon juice and stir to combine.
Cover tightly with plastic wrap and leave in a relatively warm place to macerate for at least 12 hours and up to 24.

When ready to make the jam, place a small plate with several spoons in the freezer (for later, to check the consistency of the jam).

Place the rhubarb along with any juices in an 11-12 qt. copper preserving pan or a nonreactive kettle. Add the strawberries, sugar, and 2 oz of the lemon juice and stir until the sugar is thoroughly combined.

Bring the mixture to a boil over medium-low heat, stirring occasionally with a heatproof rubber spatula about 10 minutes. Raise the heat to medium-high and continue to stir occasionally.  As the jam thickens, stir more frequently, relatively constantly near the end, making sure to scrape the sides and bottom of the pan so it does not scorch. If the jam seems to get too sticky on the sides of the pan, perhaps reduce the heat a bit. Cooking time at the higher heat will take about 20 minutes depending on juiciness of the fruit and evaporation. Add the rest of the lemon juice, stir through, and continue to cook the jam for 2-3 minutes.

Remove the pan from the heat (if it seems a little thin remember that it will continue to thicken as it cools), and place a spoonful of the jam on the frozen plate. Put the plate with the spoon back in the freezer for a few minutes. When the time is up, take the plate and spoon back out of the freezer and lift the spoon to see if the jam is runny. If it's watery and easily falls off the spoon, you'll need to cook it a few minutes longer and re-test the consistency. If the jam is instead thick and wrinkles a bit when you nudge it with your finger, it's finished and ready to place in glass jars.

NOTE ON JARS:
Lids should be clean and jars should be HOT and sterilized. You can use an empty dishwasher on a hot cycle, but you can boil the jars or use your oven.  If using your oven, place clean jars on a pan in a 250 F (120 C) oven for 30 minutes. Place a little jam in one of these jars and see if it bubbles or boils. If so, the jar is a little too hot and should cool off a bit before continuing.

Fill the hot jars with the finished jam, leaving about 1/4 inch space. Wipe the rims with a clean damp cloth, and screw lids on the jars. 


Jam can be left as is, to cool, or placed in that 250 F (120 C) oven for 15 minutes. 
If the oven method is used, the filled jars should be left to cool on a wire rack overnight before storing them.

Jars that have NOT been finished in the oven should be refrigerated.
Any jars that have been finished in the oven which are not completely sealed and whose centers are not convex should also be placed in the refrigerator.

Properly canned jars can last a year or two in a pantry.
Mine don't last that long (I give some away and those I keep, I usually just leave in the fridge).