Tuesday, November 8, 2016

Autumn Salad with Roasted Delicata Squash


A meal salad, because sometimes you really need one of those.
Not necessarily flimsy, but with a bit of body to it- along with texture, tooth, variety, interest, and flavor.

Of course, depending on portion size, the salad CAN be as a meal, or more of a colorful starter.

I tend to prefer making and serving composed salads rather than the tossed variety- I think they look prettier, and you can also be sure that everyone has the same amount of everything on their dish.


Delicata squash is tender, so there's no need to peel it- one very nice benefit of this squash.
I don't see it often, so I'm pretty sure there's a "when it's gone, it's gone" aspect to this bit of produce.
So: get it while you can.
It brings a slightly earthy and sweet pumpkin flavor, boosted a bit with the maple syrup added prior to roasting.
Obviously it's very likely you'll have extra squash, unless you're making salad for a crowd. The good news is that it makes a nice leftover- in my opinion.


Crisp, sweet and tart come from sliced apple, and some tart chewiness from the dried cherries or cranberries.
Other flavors in the salad include a bit of requisite sharpess and funk from the onion and bleu cheese, while the nuts add a bit of toasty crunch.


Everything is placed on top of a portion of hearty spinach, drizzled with olive oil and aged balsamic, then finished with pinches of flaky salt and freshly ground pepper.


Autumn Salad with Roasted Delicata Squash

2 Delicata squash
1 1/2-2 T (23-30 ml) pure maple syrup
3 T (45 ml) olive oil
kosher salt
freshly ground black pepper
a nice pinch of dried red pepper flakes (optional)

To roast the squash:
Preheat the oven to 425 F (220 C) with a rack placed in the center of the oven.
Cut the ends off the squash, halve crosswise, then lengthwise so that you have quarters. Scoop out the seeds and pulp, then slice into pieces between 1/4 and 1/2 inch thick. Toss the half rounds of squash on a sheet pan with sides along with the maple syrup, olive oil, a large pinch of salt, black pepper to taste, and red pepper if desired.
Roast the squash 20-30 minutes, until cooked, shaking the pan a few times and rotating the pan after about 10 minutes.
Remove the pan from the oven and let cool completely.


For the salad:
baby spinach (as an idea, 5 oz/140 or so grams could serve 2-5)
sliced green onion 
roasted Delicata squash (above)
dried cherries or cranberries
crisp apple, sweet and tart (Jazz, Fuji, Gala, Honeycrisp)

aged balsamic, thick and syrupy
extra virgin olive oil
flaky sea salt (Maldon or fleur de sel, for example)
freshly cracked/ground black pepper
toasted chopped nuts: hazelnuts, pecans, or walnuts
bleu cheese, one you like, albeit a bit more delicate than strong so as not to overpower


Place a portion of spinach on each plate, and sprinkle with green onion. Top with several slices of roasted squash, followed by cherries or cranberries, sliced and "cubed" apple. Drizzle a spoon of olive oil (2t-1T/10-15ml) and a spoon of balsamic vinegar (1t -1 1/2t or 5-8ml) over each of the salads, then sprinkle each with a bit of salt and pepper. Add a shower of nuts, and finally crown with bleu cheese, either a small slice or crumbled, and serve. 


Tuesday, August 2, 2016

Crème Fraîche Ice Cream


The flavor of cream can be quiet and delicate, perhaps more supportive and background than others may be, but it's still there.  Crème fraîche on the other hand may not be quite so subtle as far as cream goes.  It certainly holds another place in the cream continuum, and can have it's own purposes and preferred matches with other flavors.


Another simple summer dessert, this one almost no-cook, crème fraîche ice cream is a nice warm weather option.
(Start a day ahead and you can make your own crème fraîche.)
Great when paired with fresh strawberries or peaches since that fresh, ripe and sweet fruit can benefit from just a touch of cream and tang.


Or, might I recommend broiled or grilled peaches?
(Especially smart if the grill is already hot.)


If you want to do a little extra, splash halved peaches cut side up (and placed in a cast iron pan or heavy and slightly curved foil) with amaretto and sprinkle with a good layer of sugar. Place the pan outdoors on a hot (covered) grill or inside under a broiler until done (softer, juicier, warm with maybe a bit of char from the heat)... Brandy or bourbon and perhaps rum could be other options.
Maybe you could forego the amaretto to go the Peach Melba route and add some raspberry sauce (maybe a splash of Chambord if you've got it).


All in all, a slightly different take on peaches and cream.


Crème Fraîche Ice Cream
serves 6 or so (makes less than 1 qt)


1 1/2 c (375 ml) whole milk
1 c (225 g) sugar
Pinch of salt
3/4 c (180 ml) heavy cream
3/4 c (180 ml) crème fraîche

Whisk milk, sugar, and salt together in a medium saucepan. Heat over medium-low to almost a simmer, stirring occasionally, until the sugar has dissolved completely. Remove from the heat and pour the sweetened milk into a large glass measuring cup or bowl. Whisk in the heavy cream and crème fraîche until fully combined. Refrigerate at least an hour until cold.

Freeze the ice cream base in an ice cream maker according to manufacturer's instructions.
Remove the soft ice cream from the ice cream maker to a lidded container, and place in the freezer to stiffen several hours before serving.


Monday, July 11, 2016

Raspberry-Rose Sorbet


As far as this recipe goes, I wanted something summer-appropriate and good to go while berries are plentiful, nice, and ripe. Thankfully, there's also no cooking involved, no heat per se whatsoever.
Fruit macerates with the sugar, everything is blended and strained, and finally frozen.

It's a deep shade of red-pink with an intense fruit flavor. To me, a bit goes further than perhaps another option, as it can be savored in small scoops.

The rose component may be a little different yes, but I have a bottle of rosewater that I don't use all too often. I wanted another function for the ingredient- no matter how small that may be.


Rosewater is certainly not one of those "more is better" things. Subtlety is better with rosewater, and that balance is not always easy. As with many things, it can completely be a personal preference, too. A bit of it may be enough for one, but not enough for another. A touch more may be much too much for the first person, and just enough for the second.
I'd rather go the conservative route.
And yes, I have accidentally gone the opposite way.

Raspberries smell very "green" to me. Not green as in unripe, but green as in grassy, fresh. Strawberries, for example, do not.
Rose can enhance that fresh raspberry flavor, which can at times be "rose-y" itself (in fact, they're botanically related- and sometimes things can go together that way). There's just a bit of that floral essence the finish of the sorbet, I don't find it to be a rose perfume flavor through and through.

Depending on your berries, you may want to add a bit more sugar, or more lemon juice (and perhaps a few more drops rosewater) The berries I started with were somewhat tart this time, and I ended up adding about two more tablespoons of sugar, whisked through to combine after being strained. And still, it is a bit tart, but I think that's how it should be. However, I still think that bit of lemon is important for brightness.


The finished sorbet is kind of nice with a tiny meringue crumbled over the top.

And so...


Raspberry-Rose Sorbet
makes about 1 quart

30 oz (850 g) raspberries

3/4 c (170 g) sugar (extra as necessary depending on your berries)
zest of 1 small lemon
1 T (15 ml) fresh lemon juice (extra as necessary, to taste)
1/2 t (about 3 ml) rosewater - plus a few drops more to taste


Combine raspberries and sugar in a large bowl and cover. Let macerate a couple hours, stirring and smashing the berries a couple times so that the sugar dissolves and the berries give up their juice.  Add the lemon zest and stir it through the mixture. Pour the bits of berries and juice into a blender and blend to break up the last bits. Strain to remove most of the seeds (some really don't bother me- at least you know it's real).

Add the lemon juice and rosewater, and whisk through to blend. Taste and add a bit more sugar or lemon juice, and/or a few drops more rosewater as you think necessary.

Refrigerate an hour or two until cold.

Chill in the bowl of an ice cream maker per manufacturers instructions.

Remove the slushy, cold sorbet to a container, cover, and place in the freezer to stiffen until it reaches the appropriate and scoopable texture.
(If the sorbet has been in the freezer a while and is very hard, obviously leave out to stiffen a bit.)


Thursday, May 19, 2016

Rhubarb Strawberry Jam


When rhubarb season rolls around, I just can't resist.
At the very least I have to make ONE batch of jam to put away (for at least a little while). This way rhubarb can be savored much later in the year (or early the next). One nice thing about jam is that you can get a bit of that great flavor, and it doesn't disappear all at once. A jar of jam theoretically lasts longer than, say, a pie or tart might.
(And yes, I like to reuse certain jam jars for their shape and style.)


I think it's my all-time favorite confiture.
There are just a few ingredients, simple and perfect.
When I make a batch I don't really want to share, but I know its better for several reasons that I do so.


This is an updated version of a rhubarb berry jam I posted years ago.
I have this habit of making lists and notes on Post-its and misplacing them, so it behooves me to write recipes elsewhere ASAP so I don't have to do a frantic search or take the time to figure something out all over again.
Some concepts here are based on The Blue Chair Jam Cookbook by Rachel Saunders- but there is no actual rhubarb strawberry jam listed in the book.


It's a two-day project (or maybe some prep the afternoon or night before, not too much work on Day 1), and I would totally recommend the use of a kitchen scale for a recipe like this that utilizes larger amounts.

I agree that you need to let the rhubarb shine, making it the greater portion of the fruit in the recipe. Rhubarb certainly has it's own flavor, tart and distinctive. As I write, I'm trying to think of ways to describe the flavor, but am having a hard time coming up with anything...
I don't know. To me, there's something amazing about that flavor.


Obviously, as the jam cooks the fruit will break down, so it's a personal preference to have larger pieces of fruit to retain texture and so you really see and taste what's in the finished jam.

But, the jam is nice on plain yogurt, with pound cake, on good vanilla ice cream, as a filling for a tart, crostata, or cookies, and of course toast.


Rhubarb Strawberry Jam
makes about 8, 12 oz jars


Day 1
2 3/4 lbs. (about 1 kg and 247 g) rhubarb (*after being trimmed and sliced)
1 3/4 lbs. (about 794 g) cane sugar
2 oz (1/4 c or 60 ml) lemon juice

To add on Day 2
1 1/2 lbs. (about 680 g) strawberries, sliced if large
1 3/4 lbs. (about 794 g) cane sugar
3 oz (1/4 c plus 2 T or 90 ml) lemon juice, separated


Clean the pieces of rhubarb, cut off the top and bottom ends, and slice into 1-2 inch pieces. Weigh out 2 3/4 lbs. of the rhubarb, place in a glass container, add the sugar and lemon juice and stir to combine.
Cover tightly with plastic wrap and leave in a relatively warm place to macerate for at least 12 hours and up to 24.

When ready to make the jam, place a small plate with several spoons in the freezer (for later, to check the consistency of the jam).

Place the rhubarb along with any juices in an 11-12 qt. copper preserving pan or a nonreactive kettle. Add the strawberries, sugar, and 2 oz of the lemon juice and stir until the sugar is thoroughly combined.

Bring the mixture to a boil over medium-low heat, stirring occasionally with a heatproof rubber spatula about 10 minutes. Raise the heat to medium-high and continue to stir occasionally.  As the jam thickens, stir more frequently, relatively constantly near the end, making sure to scrape the sides and bottom of the pan so it does not scorch. If the jam seems to get too sticky on the sides of the pan, perhaps reduce the heat a bit. Cooking time at the higher heat will take about 20 minutes depending on juiciness of the fruit and evaporation. Add the rest of the lemon juice, stir through, and continue to cook the jam for 2-3 minutes.

Remove the pan from the heat (if it seems a little thin remember that it will continue to thicken as it cools), and place a spoonful of the jam on the frozen plate. Put the plate with the spoon back in the freezer for a few minutes. When the time is up, take the plate and spoon back out of the freezer and lift the spoon to see if the jam is runny. If it's watery and easily falls off the spoon, you'll need to cook it a few minutes longer and re-test the consistency. If the jam is instead thick and wrinkles a bit when you nudge it with your finger, it's finished and ready to place in glass jars.

NOTE ON JARS:
Lids should be clean and jars should be HOT and sterilized. You can use an empty dishwasher on a hot cycle, but you can boil the jars or use your oven.  If using your oven, place clean jars on a pan in a 250 F (120 C) oven for 30 minutes. Place a little jam in one of these jars and see if it bubbles or boils. If so, the jar is a little too hot and should cool off a bit before continuing.

Fill the hot jars with the finished jam, leaving about 1/4 inch space. Wipe the rims with a clean damp cloth, and screw lids on the jars. 


Jam can be left as is, to cool, or placed in that 250 F (120 C) oven for 15 minutes. 
If the oven method is used, the filled jars should be left to cool on a wire rack overnight before storing them.

Jars that have NOT been finished in the oven should be refrigerated.
Any jars that have been finished in the oven which are not completely sealed and whose centers are not convex should also be placed in the refrigerator.

Properly canned jars can last a year or two in a pantry.
Mine don't last that long (I give some away and those I keep, I usually just leave in the fridge). 


Tuesday, May 17, 2016

Tempura


I had to put this one up as soon as I could because all potential options are not available year-round.

It's pretty much the soft shelled crab that I do this for- I don't spend time year-round battering and frying food.
But soft shelled crab is a once-a-year thing, and that's it.


Tempura is light-ish, as far as fried foods go, and nice appetizer idea.
Shrimp, vegetables.... and, as above, really nice with soft-shelled crab for a meal if you can get your hands on some.

Vegetable options include green beans, carrots, sweet potato, squash or zucchini, squash blossoms,  asparagus, broccoli/broccolini, sliced onions or whole green onions, eggplant...

Obviously, you'll need fry in rounds, and you certainly won't want to be making it for a huge crowd. AND, you'll want to give the oil a chance to come back up to heat between rounds as necessary. I can be personally guilty of not doing this, as I want to hurry up and get it done, but it can lead to oil-logged tempura (not quite so nice).


For me, all it needs is a squeeze of lemon and maybe a sprinkle of salt right after it's removed from the hot oil... Maybe some chili sauce if you need a little heat.
Wow. Especially that crab. So good. 
And of course, it's all best right off the heat.

Tempura Batter
(coats about 12 soft shelled crabs)

3/4 c plus 3 T (144 g) white rice flour, plus more to dredge
3/4 c (104 g) cornstarch
3/4 t (6 g) salt
1/2 t (4 g) baking soda
1 large egg, cold
1 1/2 c (360 ml) sparkling water, cold

soft shelled crabs (*gills removed by you or your fishmonger), shrimp, vegetables (onion, broccoli, zucchini, etc.) to fry
neutral vegetable oil (canola, sunflower, etc.) for frying

Whisk together the rice flour, cornstarch, salt, and baking soda in a large bowl. Refrigerate the mixture until ready to use.

When ready, heat a dutch oven over medium heat with about 2 inches or so of oil.  Dust the crab (or the onion rings, or broccoli, etc.) with rice flour and set aside.

Preheat the oven to 200-225 F (94-107 C) and place a paper towel lined sheet pan inside.
When the oil reaches 350-375 F (175-190 C) finish the tempura batter.
Whisk the egg and sparkling water together and pour into the cold flour mixture. Whisk the batter together until combined.
Quickly coat a crab with the batter and place it in the hot oil. Repeat with 1-2 more crabs, however many fit comfortably in the pot. Let the crab fry a couple minutes, until a pale golden, then flip it so the other side cooks about the same amount of time.
Remove crabs to the paper towel lined sheet pan in the oven to stay warm and drain a bit.
Repeat with the remaining crabs and/or vegetables, perhaps giving it a minute between batches to come back up to heat (too cool and your batter soaks up extra oil).
Perhaps sprinkle with salt and serve with lemon wedges, chili sauce, or as desired.

Wednesday, April 13, 2016

Oat and Buckwheat Crêpes


I love crêpes, and this particular version was initially a bit experimental, partially meant as a way to help use up buttermilk.
Am I the only one who buys a quart- since most of the time that's all I can find- only to use 1/2 cup or so? I'm thinking not...
The rest was using some of the things on hand.
Buckwheat, one thing I have but not something that I happen to use religiously, is somewhat earthy and a crêpe (galette) classic.
Oat flour (a favorite flour of mine, actually) add slightly sweet nuttiness.
The overall flavor seems especially nice when paired with strawberries

The results aren't bad at all, I think, so here you go.
(And basically, yes, it has so far assisted in reducing buttermilk supply, and will continue to do so when I have an excess of buttermilk. Then again, maybe I'll be purchasing buttermilk solely for this purpose.)


Crêpes are initially delicate while they're cooking- so a well seasoned pan is paramount.
And a steel crêpe pan is certainly nice, but not entirely necessary.
Note for a crêpe pan: don't let anyone scrub the finish (seasoning) off your pan that you worked to put there in the first place- it's what keeps the pan nonstick and is so much more convenient than dealing with the alternative.

If you're not used to pan swirling, you'll get a little practice here. It's a timing thing, you'll be using both hands, and you have to keep moving. But once you get into the swing of things it'll be fine.
And remember, the first crêpe or two can often be duds. No big deal. They're still edible.

My  favorite is eating the crêpes right off the heat, "failed" and torn or not, tender with crispy edges.


Folded with fresh berries and topped with whipped cream is always a good option, rolled into cigars with a bit of cinnamon sugar or a very thin layer of jam, chocolate, or lemon curd is another possibility.
The sliced banana and Nutella combination is pretty classic, too.

Crêpes Suzette is a bit more involved than the more basic crêpe I'm offering today, but also very nice.
A high-stacked crêpe cake layered with chocolate or a cream between crêpes would also be an idea.

OR, maybe omit the sugar, add a pinch more salt, and fill with cheese, sauteed mushrooms (or maybe this version instead), ham, eggs, ham and eggs... or whatever other savory things you might like.


Oat and Buckwheat Crêpes
(makes 15-20, 6 inch crepes)


1/2 c (55 g) oat flour
3/4 c (115 g) buckwheat flour
1/4 t (2 g) salt
1 T (16 g) sugar
3 large eggs
2 T (30 g) butter, melted
1/2 c (125 ml) buttermilk
3/4 c (180 ml) whole milk
1/2 c (125 ml) water, plus extra as necessary
Butter, to cook the crepes


In a medium bowl, whisk together the flours, salt, and sugar until well blended. Add the eggs and butter, and whisk, breaking up any lumps, until a smooth paste forms. Add the buttermilk and whisk the mixture together until incorporated. Finish by adding the milk and water into the mixture, and carefully blend to a nice pour-able batter. 
Cover and refrigerate to rest and let the flours absorb the liquid at least an hour and up to a day.

When ready to cook the cr
êpes, remove the batter from the fridge and place a well-seasoned pan over medium heat to warm.
While the pan heats, check the consistency of your batter, stir and then pour a bit back into the bowl. You want it to be about like a nice heavy cream- NOT glue. Add water, maybe 1 T (15 ml) at a time or so until you reach the correct consistency.


To the now-hot pan, add a bit of butter. After the butter melts and foams, swirl the pan to coat the bottom with a thin layer.


Remove the pan from the heat with your non-dominant hand and pour batter into the pan using your dominant hand, aiming for somewhere between 3 T and 1/4 c range (45-60 ml). Quickly swirl the pan to evenly distribute the batter. Place the pan back on the heat and cook a couple minutes. The top of the cr
êpe will appear more matte and tacky, while the edges will crisp a little and possibly pull away from the sides. Carefully slide a rubber spatula around the edge and under the center, pick the crêpe up off the pan, and flip it so the cooked side is up. Cook a further minute or two until the second side is slightly browned and the crêpe slides around on the pan easily.
(If you've found that the batter is a bit thick and doesn't flow and "swirl" properly, you'll likely need to thin the batter with a bit of water- or potentially add a bit more flour if it's too thin so it behaves appropriately.)

Slide the cr
êpe out of the pan and onto a plate, stack the crêpes as you go, or serving them as they are made.
Continue in the same manner to cook the remaining cr
êpe batter, adding a little butter to the pan, etc., and stirring the batter a bit between crêpes to make sure the batter remains fairly uniform throughout.
Serve as desired. 


NOTE/UPDATE:
I've found they work out quite well lactose-free too, if replacing both the milk and buttermilk measurements with an alternative milk. I've used unsweetened "milk" made with peas (Ripple) and had great results. Ghee can replace the melted butter- I've not tried other oils, but at some point I'd try coconut oil to make the cr
êpes completely dairy-free.

Wednesday, April 6, 2016

Salmon Cakes


I wanted a more "fresh" salmon cake, something somewhat simple in flavor, a version that also didn't require a garden's worth of vegetable dicing.
So, this recipe ends up working for me, and I think the flavors are quite nice.
You'll get some freshness from the lemon and parsley. The cooked shallot adds one type of allium note, while the more raw green onion adds a greener, more delicate tone.


Sure, I bet you could use canned salmon if you like, and reduce the steps and time a bit. But most of the time I prefer to do things ALL the way myself- in some ways it can be a skill and practice thing, and in others it's the fact that I know as much as possible about how things are accomplished and cooked- and that's why I start from as scratch as possible. Plus, I have the idea that your salmon cakes will be a bit more tender when you start with raw salmon. Then again, I can't say I've tried it with canned salmon.


If you're cooking salmon anyway, great. Maybe make a little extra and extend that meal a bit into salmon cakes the next day.
And if you'll just be cooking the salmon to flake for salmon cakes, know that the cut doesn't have to be the center- the initial shape certainly won't be there for presentation.

The nice thing is that it's not much extra work to double the recipe, and really, the cakes don't take awfully long to cook. And perhaps to speed the process (if you can handle it for a larger batch), you could have two pans going at once.


The type of salmon is up to you. For example, Sockeye, King, and Coho vary among themselves, but would all have a stonger flavor and deeper color than the more neutral Keta salmon (Sockeye is especially red). Strength of flavor, oil content, and color of salmon vary. All salmon are not the same. If you have a choice and are unsure, talk to the fishmonger before making a decision and then go with what you like.
If I'm making a larger batch, I prefer mix a couple different types to keep things interesting.


I like to serve these with greens alongside, with lemon wedges and sriracha (*please note the ever-important life skill of writing with condiments), though the "unadorned" version certainly works, too.


Salmon Cakes
makes 5

1 lb. (500 g will work) fresh salmon
1/2 c (55 g) shallot, minced
1 T (15 ml) olive oil, plus extra if needed
zest of 1/2 lemon
3 green onions, 4 if small, thinly sliced
2 T (7 g) fresh minced parsley
2 large eggs, lightly beaten
1/2 c (50 g- though weight may vary by type/brand) breadcrumbs (gluten free if preferred)
salt
pepper

To cook the salmon cakes:
1 T (14 g) butter
1 T (15 ml) olive oil

Cook the salmon: Preheat the oven to 350 F (180 C) Place the salmon skin side down on a foil covered pan and season it with salt and pepper. Drizzle with a bit of olive oil.
Bake the salmon 20 minutes, remove the pan from the oven and let the salmon rest 10 minutes. Cover the pan with foil and refrigerate the salmon until cold- at least 30 minutes.
Meanwhile saute the shallots in a pan with the tablespoon of olive oil, just until translucent. Remove from the heat and let cool.

Flake the salmon into a large bowl. Add the cooked and cooled shallot, lemon zest, green onion, parsley, eggs, breadcrumbs, and 1 t (5 g) salt and 1/2 t (1.3 g on a sensitive scale- or add to taste) freshly ground black pepper. Mix gently until everything is fully incorporated, cover, and refrigerate 1 hour (the chilled/rested mixture is easier to form).

At this point you can divide the salmon mixture into 5 portions (a generous 1/2 cup each) and shape into cakes. Place on a tray, cover, and refrigerate if not cooking immediately.

Heat a heavy frying pan over medium heat. Add the butter and olive oil. When melted, swirl the pan to distribute evenly. Depending on your pan size and comfort level, carefully add the salmon cakes one at a time, cooking 2 or 3 to begin with (or all 5). Cook about 4 minutes on each side or until deep golden brown.
Keep the cooked salmon cakes warm on a paper towel lined sheetpan in a 250 F (120 C) oven- especially important if you're doubling the recipe.
(And if doubling, you will likely want to remove the oil/butter mixture from the pan and replenish it after a round or two of cooking)

Thursday, March 31, 2016

Chocolate Lavender Meringue Cake


Very often strange things happen and I feel like maybe I'm in a sitcom, or a reality show, and I'm there for someone's amusement.
I sometimes glance up to be sure there are no cameras present.

It's as if there's a joke, or a prank, or something is completely off- and most of the time it seems that other people don't quite catch it. I can't see any reactions.

And, with so much of it, it's funnier to look back on it than it is to live it, I suppose. That, or it WAS funny and it just gets funnier.


Last month I was at my grandmother's wake at a funeral home in Indiana. Not a funny situation, right?
Not funny at all.
But, at the end of the wake (I guess it's an "ok, your time is up" type of a thing), I would swear a Willie Nelson song quietly came on over the speakers. I couldn't recall any music playing at all prior to this point. Maybe there was music, but it was obviously so background that it was completely unnoticed.
Don't get me wrong, I do like Willie Nelson, and when I was little I guess he was my immediate family's country music guy. (Hey, maybe the go-to for some was Johnny Cash, but the records we played were Willie- not a Johnny album to be had).
This is not to say in any way that my grandmother was a Willie Nelson fan herself. I don't know that any of these particular cousins grew up with Willie Nelson (It could be a total other side of the family thing, something one parent likes but doesn't necessarily mean much to the other).
I can't recall anything about him with regards to Gran. She certainly wasn't a fan through and through.
But a Willie song played nonetheless- I still swear it.
It wasn't anything like a greatest hit for him, it was more of a public domain type of thing, a "Great American Songbook" type of song. It truly could have been "Red River Valley"- and though I knew what it was immediately upon hearing it, I can't remember what it actually was anymore. I think maybe it's been blocked due to my slight shock that a Willie Nelson song was playing at this event.
(Likewise, I'm extremely averse to hearing Neil Diamond sing selections from Les Miserables while at the grocery store. It's very wrong. Then again, I've got problems with Neil in general- but I think this made things worse.)


Willie, I like you and all, really I do, but you don't quite belong at my grandmother's wake. See, this sort of thing is more appropriate for a movie- mostly because I can see a song like this coming on at a bar, as in their familiar "last call" song at the end of every night before the bar closes ("Turn Out the Lights, The Party's Over" would be a good one for that purpose). That or some ironic twist during a funeral on the big screen- certainly not something for real life.
Who does this in real life?

Anyway, I surreptitiously glanced around as I was listening to see if anyone else was reacting to this.
No.
When I asked a couple people later that night, nobody else had noticed.
Was this song chosen? Maybe by one of my uncles?
Was it a joke?
Was this the funeral home's ending theme for all wakes?


And, well, what is the connection of the story to the recipe?
Nothing at all.
Sorry, the story just sort of happened.
But, Gran really loved chocolate. Even when she wasn't supposed to eat it the last several years because it would make her pass out, she still did. She'd insist that a little bit was ok, and as long as she was at home and not out.
I think she would have been ok with this dessert.

All of that now said, I will also say that sometimes it can be a bit difficult to name a recipe, giving the best general idea of a finished product while trying to be concise (and/with, to include "mousse" or "ganache" in the title? "Stack"? Should I include that word?)
Still working on this aspect.


Maybe this isn't the flashiest of cakes, but it does take a little time and effort to complete the steps.
And the end result of contrasting creamy and crispy, with a little fudgy thrown into the mix that truly isn't so bad.

If you'd like more texture contrast in your cake, perhaps work on it early in the day and serve it the day of. However, if you prefer the cake to be a bit more homogeneous in texture, maybe make it the day before you plan to serve. Either way, it still tastes good.


I'm trying to perfect my giant chocolate meringue game, but for some reason they don't quite want to cooperate. I'm not sure if it's the weather, the fact that there's something IN the meringue as a potential source of oil (ahem, cocoa powder) and meringue distruction...
But, anyway, the meringue seems to go on in the oven just fine for a while- but then it flattens.
It still tastes good, and serves a purpose. Besides, in the end they're all engulfed in ganache and completely hidden.


Well, I would like to potentially make this again soon, and I'll update the recipe with any notes or changes.
So, I'm not saying this one is completely finished!


Chocolate Lavender Meringue Cake
serves 10-12

Meringue:

8 large egg whites, at room temperature
pinch of salt
1 1/4 c (250 g) granulated sugar

1/2 c (40 g) cocoa powder, sieved

Mousse:
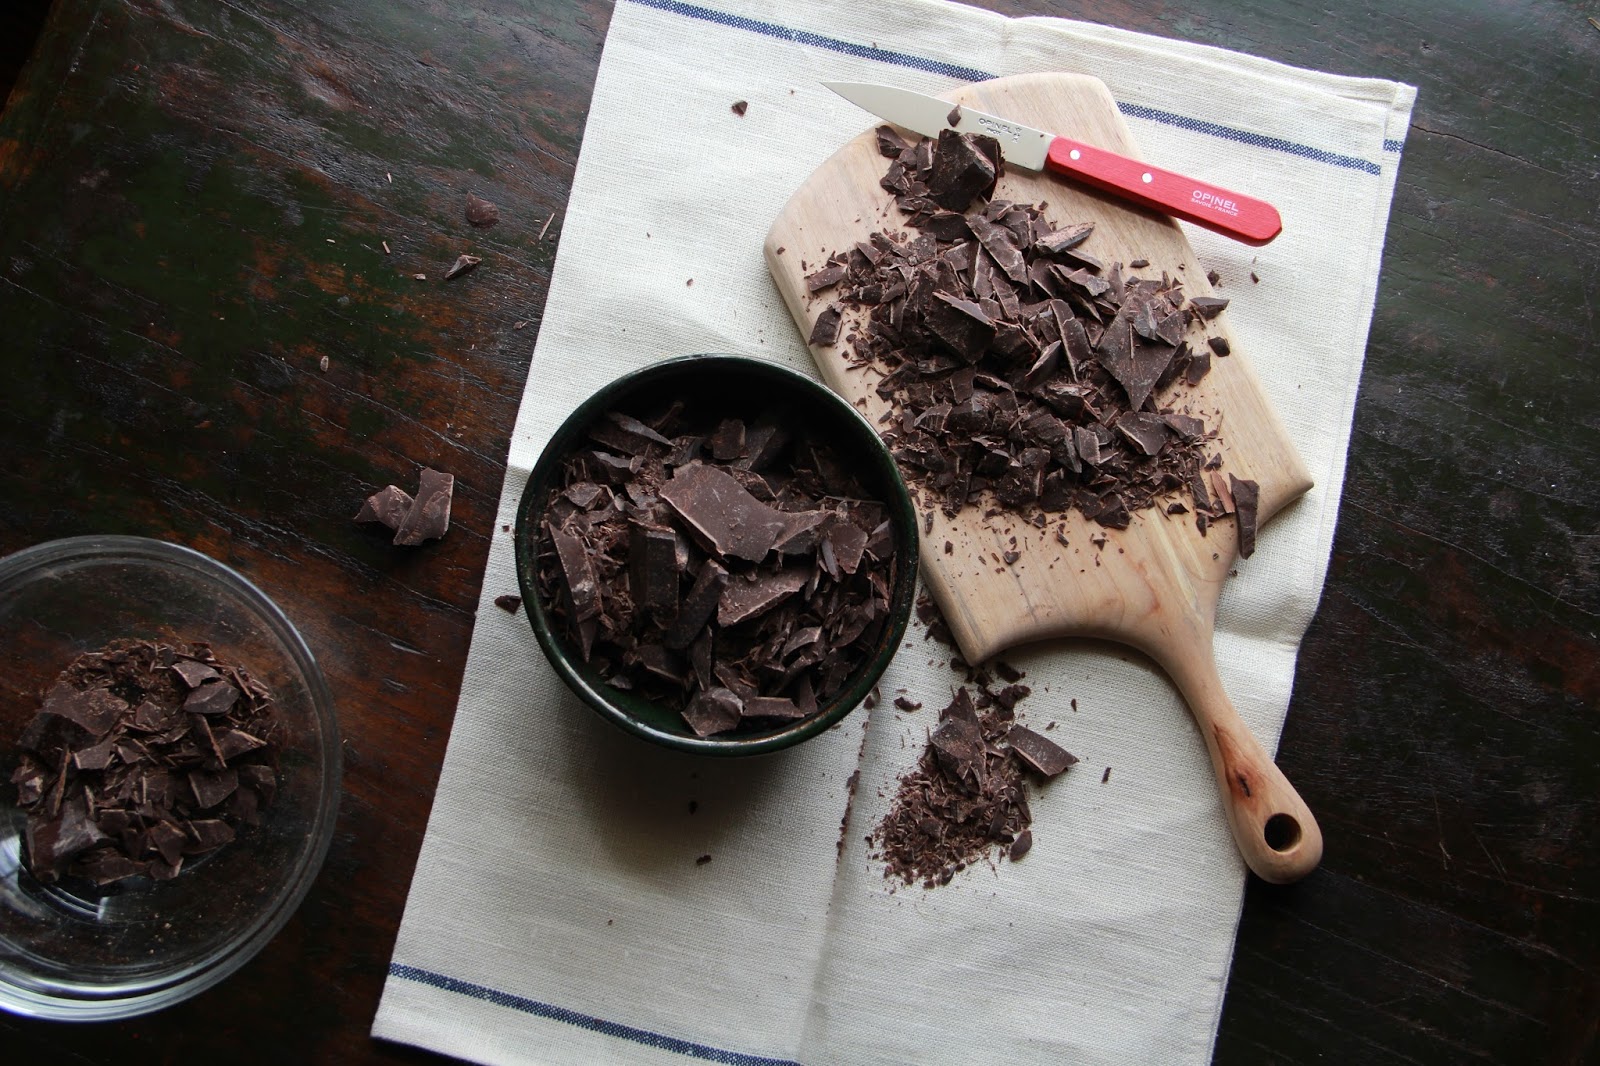
14 oz (400 g) dark chocolate, chopped  
4 T (56 g) butter 
pinch of salt
4 large eggs, separated
1/4 c (50 g) granulated sugar
2/3 c (160 ml) heavy whipping cream

Ganache:
1 c (250 ml) heavy whipping cream
2 T (7 g) dried lavender buds
8 oz (227 g) dark chocolate, chopped

1/2 T (about 7 ml) corn syrup or glucose syrup (optional)


Prior to making the meringue, preheat the oven(s) to 250 F (120 C), and prepare 3 sheet pans with parchment paper, each with a 9 inch diameter circle drawn on (drawn side turned upside-down on the pan).
Beat the egg whites and salt in the bowl of an electric mixer until soft peaks form. With the mixture running on low, slowly add the sugar. Continue to beat until all is incorporated and there are no sugar granules present (touch a bit of the meringue and then rub it between your fingers to test).
Carefully fold in the cocoa powder using a large metal spoon or a rubber spatula, scraping the sides and bottom of the bowl, to incorporate as best as possible while deflating the whites as little as possible.
Divide the chocolate meringue between the pans, by piping it onto the rounds or scooping directly from the bowl. Smooth the meringues so they're relatively round and within the borders of the circles.
Bake the meringues 1 hour and 15 minutes,  rotating the pans about halfway through, then leave the meringues to cool completely in the oven(s) with the light on (this will be at least 2 hours).
In the end, the meringues should be dry, not gooey. If they are sticky, maybe add a little heat and time...

To make the mousse, melt the chocolate along with the butter and salt in a bowl set over a pan of simmering water (bain marie). Stir until smooth, remove the bowl from the pan and set aside to cool 5-10 minutes.
Whisk the egg whites in a clean bowl until stiff peaks form. Slowly add the sugar and continue whisking until stiff peaks form. Set aside.
Add the egg yolks to the melted chocolate mixture one at a time, whisking to incorporate fully between additions.
Fold the stiff egg whites into the chocolate mixture, beginning with about 1/3 to lighten the mixture, and then adding the rest, folding a bit more gently.
Whip the cream in the egg white bowl (save a little cleanup!) until medium peaks form. Fold half of this into the mousse, then add and fold in the final half. It's ok if your mousse is a little streaky and not all the cream is totally mixed in.

Place a meringue round on a piece of parchment paper on top of a cutting board or tray (perhaps in a springform pan that it will fit into so as to keep the sides straight). Top it with half the mousse and spread it evenly about an inch from the edge. Top the meringue with another meringue round, press down slightly to spread the mousse closer to the edge, then top the second meringue with the rest of the chocolate mousse. Again, spread the mousse to about an inch from the edge, add the last meringue and press down slightly.
Cover with plastic wrap and refrigerate at least 4 hours.

About an hour before you would like to serve the cake, remove it from the fridge.
Place the cake on a rack placed on top of a pan with sides that's been covered with aluminum foil.
In a small saucepan, place the cream and lavender buds. Bring the cream to a strong simmer, remove the pan from the heat, cover and let the mixture steep 5 minutes.
Strain the lavender cream over the chopped dark chocolate. Let sit a minute, then stir until smooth. Add the corn or glucose syrup if using (not necessary, but it will add a bit of patent leather sheen).
Let the lavender ganache cool a couple minutes to thicken slightly, then slowly pour it over the top of your cake. The ganache will drip down over the sides, and you may spoon it from the pan and back onto the sides to help cover any bald spots if desired.
(OTHERWISE, the ganache that is left on the foil-covered pan can be repurposed for some great hot chocolate- just stir into hot milk to taste.)

Leave the coating to set before serving (and of course, you can put it back in the fridge for later if you wish).
Cut the cake with a serrated knife, and store any leftovers in the fridge. 

Saturday, March 19, 2016

Falafel Revival


I try to make falafel at least once a year, preferably more (for the obvious reason of their fabulousness).
And well, for the past couple years falafel has been part of the Good Friday dinner over here. The meal that evening is more of a simple appetizer type of affair for us- perhaps cheese, apple slices, a green salad.
I don't know, I just think they're wonderful little bites, fantastic when extremely fresh and just made, but they certainly more than pass muster when baked from frozen.

In a way this is sort of a PSA, if you want to think about it that way. It's something to think about a little ahead of time- especially since dried chickpeas need to soak overnight.

Especially for this purpose, I make falafel several days before and freeze them. They're easy to throw into the oven- reheat however many you want or need when you're ready.
Besides, I'd much rather have a stash of homemade in the freezer (as insurance, of course) than a store bought frozen version.
(And I may end up having to make another batch before they're needed next week...)


The full recipe for falafel can be found here.

(No, they're not cooked in these photos- time to go fry them up!)

Monday, March 14, 2016

Vin de Pamplemousse


This is quick little post I wanted to document while there's still time.
It's an infused wine (like vin de pêche - and both wines are made seasonally for obvious reasons) made with winter citrus fruit, namely zesty grapefruit, that will be very refreshing when it gets a bit warmer outside.
Since not all citrus is easy to find year round, I thought I'd better post this while everything is available.
Of course, while I'm able to put it together right now, it's not ready to drink for over a month. Everything needs to infuse and perhaps ferment a bit.

I can promise the scent is intoxicating.
(It's not the vodka, I promise that, too- it's all that fruit.)


It'll be nice as an aperitif...

I can honestly say this is 100% not my recipe. It belongs to Heidi Swanson of 101cookbooks.
The recipe is in her beautiful book Near & Far, however, I also found the recipe posted online- so I figure I can safely and honestly direct to that location for your benefit.


This is the first time I'm making it, so I'm not tweaking it.
The problem is that by the time it's finished, it'll be too late to gather the ingredients- so if there's any interest at all in something like this, now is the time to make it.

Please be attentive, if possible, to purchasing organically grown fruit in this instance. Obviously, citrus fruit is sprayed and the chemicals are absorbed by the skin. You're using the whole fruit here, including the peel. At the very least, and certainly for all the fruit you end up using, please wash with soap and warm water.

I'll start by giving you a shopping list:

3 Ruby Red grapefruits
2 blood oranges
2 lemons
1 Cara Cara orange
vanilla bean
cane sugar
vodka
4, 750 ml bottles of rosé wine


If you don't have the book, the recipe can be found here.

Now just to wait.
I'll look forward to a sip in April.

Monday, February 15, 2016

Green Soup


Sometimes when you're sad, you have no appetite. And when you do eat something, it just crumbles in your mouth with a texture and taste like sawdust. Overall, food is just unappealing.

You may have a group to commiserate with, depending on the situation, but that certainly has both good and bad points. Camaraderie if you don't really care how you look vs. don't-make-eye-contact-or-you-won't-keep-your-composure.
Your call.


Though, to me, soup can be entirely different when it comes to foods at times like these (or at the very least a more palatable choice). Soup is good for sadness. It is in a way comforting on it's own, especially if it's of the warm and creamy persuasion. And if it has a little kick, there's a bit of liveliness and a different warmth that you're not entirely able to ignore.

I like soup, no matter what, but there are times that soup as a dish is imminently appropriate, and totally fits the bill. It seems nothing else will do.

I'm now thinking that soup would be best following funerals, especially funerals on snowy days.


This is a soup I've made a couple times in the past couple weeks.
One that I initially put together late one afternoon knowing I didn't want to go back out that day and that I could figure something out after going through a well-stocked fridge.
I'm glad I took notes because I enjoyed it (and frankly, it seems the other eaters were ok with it, too).

"Green Soup" has variety of vegetables, can be whipped up in less than an hour, is a springy shade of green, and is good for you and tastes pretty good, too. It has a velvety texture, and while the recipe as written calls for a touch of light cream, it's entirely unnecessary and you could make this and end up with a "creamy" vegan soup. You wouldn't even miss the cream. 

If you like, serve with a bit of grated cheese- cheddar and Parmesan are really nice for their zing.


And as another note or two before we move on to the recipe: most of it is estimation of vegetable size. I don't call for much weights and measures here. So, because this is the case (volume inexactitude), you'll have to play some of it by ear and likely end up with a slightly different soup each time. Start with the 6 cups of stock, and add more (or make that extra a cup of water) if necessary to thin it out. However, you may want to wait until closer to the end of cooking time to finally decide whether to add it to increase the liquid to veg ratio (maybe before you add the broccoli florets is best).
Don't overcook the broccoli florets- they're greatly what gives the soup it's nice shade.


Green Soup
serves 6 or more, depending on the eaters

3 T (90 ml) olive oil
3 medium leeks, white and light green part only
1 medium onion, diced
4 large garlic cloves, minced
2 medium zucchini, top and bottom removed sliced lengthwise, then into 1/2 inch half moons
1 medium potato (or 2-3 small potatoes to amount to a medium one)

6-7 c (1.4 to 1.65 liters) vegetable or chicken broth
1 lb, 4 oz (about 570 g) broccoli
1/8 t cayenne pepper (0.4 g if you have a sensitive scale, otherwise a nice pinch)

1 t (2 g) freshly ground black pepper 
Freshly ground nutmeg
1/2 c (125 ml) light cream, optional (half and half, or heavy cream or c
rème fraîche if you wish)
Salt, as necessary

Slice the root end off the leeks then slice them in half lengthwise. Slice the leeks into 1/2 inch pieces, and place them in a bowl of cold water. Agitate and soak a bit, then pull the leek pieces out of the water and into a strainer (instead of pouring the bowl of leeks and water out through a strainer- leave the sand and grit at the bottom of the bowl instead of putting it back on your leeks).
Drain well.

Warm the olive oil in a large heavy bottomed pan (such as enameled cast iron) over medium heat. Add the leeks and onion, and saute 3-5 minutes until slightly wilted and the onions are translucent.

Add the minced garlic and saute about 30 seconds, before adding the prepared zucchini and potato. Stir so that everything is coated in oil, then pour in 6 cups of broth.

While the broth is warming, prepare the broccoli. Remove the florets from the stems and place them in a bowl. Set aside. Remove the ends of the stems, and peel the tough outer layer from the stalks. Slice the peeled portions of broccoli stems and add them to the pot.

Add the cayenne and black pepper to the soup, as well as several good grinds of nutmeg.
Bring the soup to a gentle simmer and cook about 20 minutes, or until the vegetables have softened. If you so choose, add the extra liquid about 12 minutes in, then add the broccoli florets after 15 minutes. Cook the soup the last 5 minutes, at which time the broccoli tops will have turned a bright green. 


Remove the pot from the heat and puree in batches, carefully filling the blender only 1/2- 2/3 full. Pour the pureed soup into another pot or tureen, and continue to puree the remaining soup.
When finished, add the cream if desired and taste for seasonings. Adjust as necessary.

Serve as is, or with grated cheddar or Parmesan.