I think it must be a horror movie... and a reminder to clean out the fridge.
Friday, October 28, 2011
Playing With Food
I think it must be a horror movie... and a reminder to clean out the fridge.
Tuesday, October 25, 2011
Goose Liver Pâté

What do you do when you're gifted with a goose liver?
Now, I am aware that many may not look at this as a particularly advantageous gift.
Wow... thanks... you shouldn't have. Really.

Of course it can be a particularly wonderful surprise, you just have to work with it a bit.
It's not an everyday thing (yes, or an anyday thing for many... animal factor and ewww factor both included).
And it doesn't need to be from a goose specially raised for foie gras (you could substitute chicken livers if that's easier or a preference).

It was just part of the goose, ok?
Whole animal cooking- it's economical, non-wasteful, and happens to be very popular these days.
That said, this is the only type of liver I've ever had- and only as part of a pâté, mousse, or foie gras.

But really, pate is a lovely special occasion hors d'oeuvres, and how much more special can it get than when it's homemade?

Goose (or Chicken) Liver Pâté
makes about 1 cup
6 T (3/4 stick, about 84 g) butter
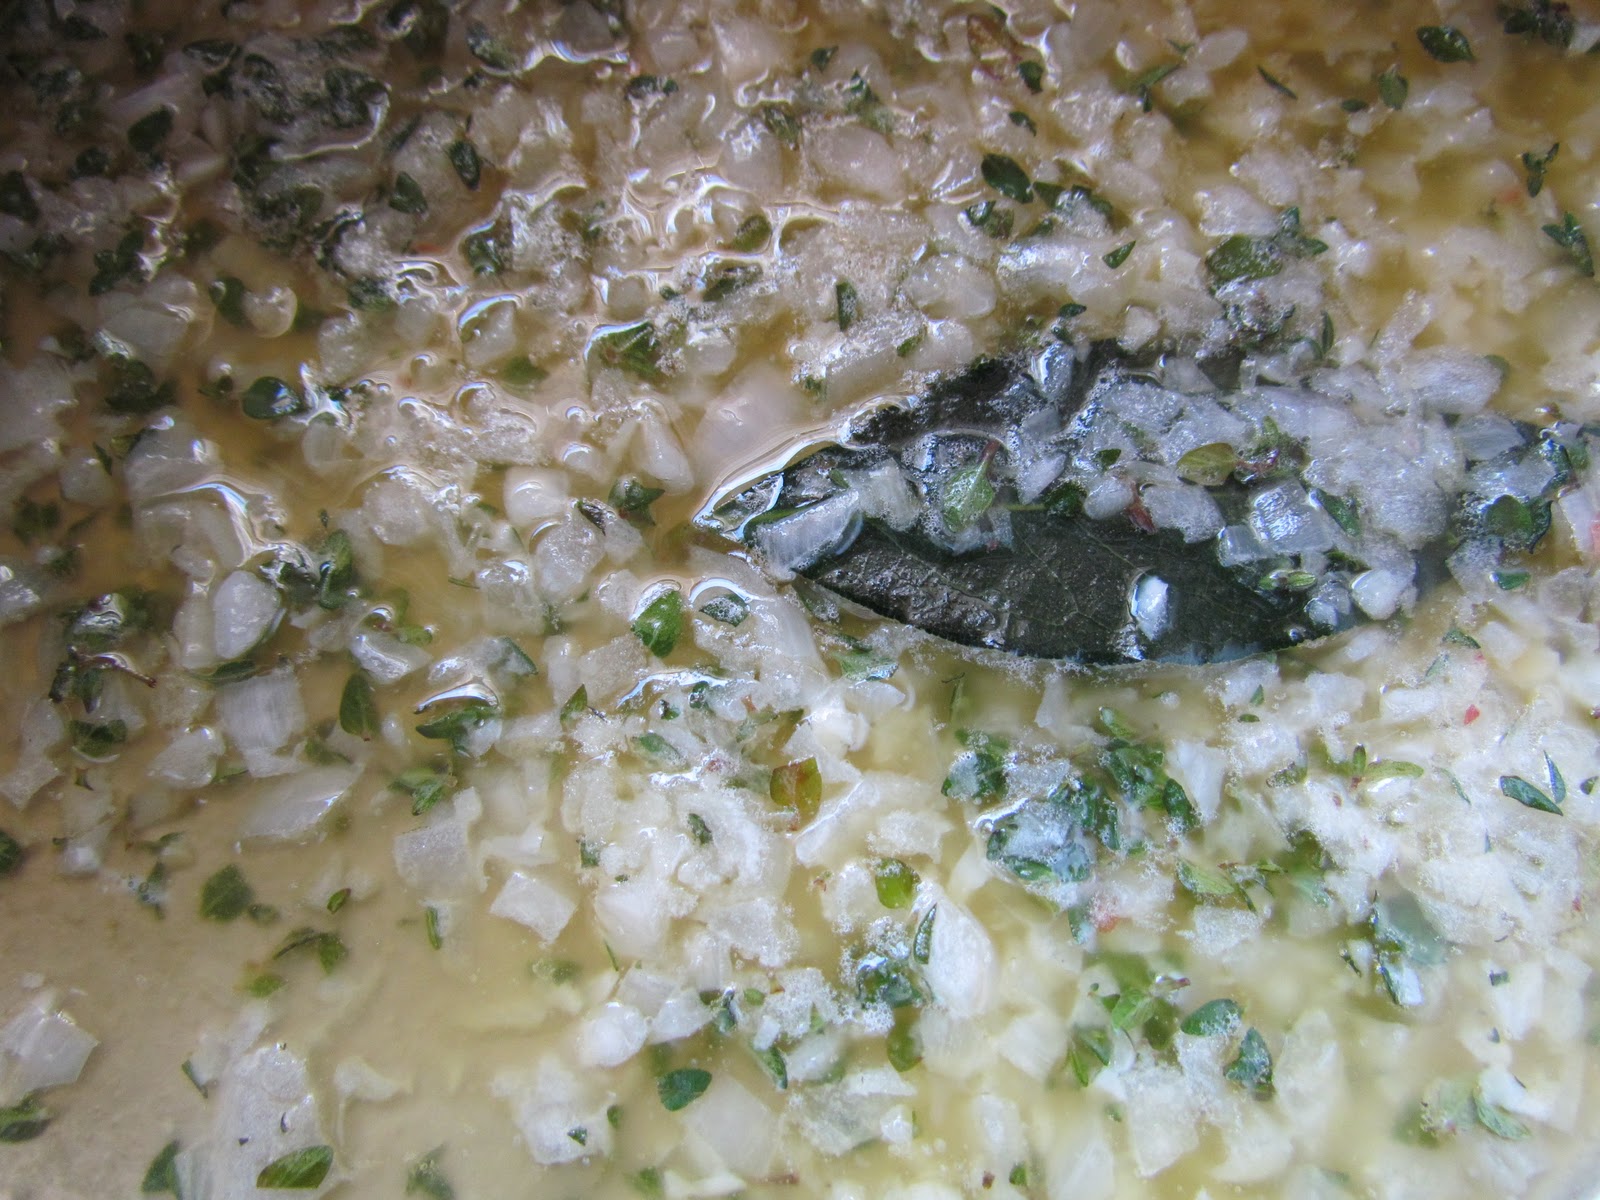
1 bay leaf
1 large shallot, minced
1 clove of garlic, minced
2 t fresh thyme leaves, slightly chopped
1/2 lb. (about 140 g) goose liver- rinsed, patted dry, and removed of any connective tissue
salt
freshly ground black pepper
2T Sherry
pinch of ground allspice
pinch of freshly ground nutmeg
2 T heavy cream
Melt the butter in a medium saucepan over medium heat. Add the bay leaf, shallot, garlic, and thyme, and saute a few minutes until the shallot is soft. Season the liver well with salt and pepper. Increase the heat in the pan a little and add the liver. Cook the liver in the butter mixture, turning occasionally, until the outside begins to color but the inside remains slightly pink (cut it open if you're not sure). This should not take very long.
Remove the pan from the heat, add the Sherry, and scrape the bottom of the pan to remove any fond. Set aside for a minute to cool slightly.
Remove the bay leaf and puree the liver and butter mixture in a blender or food processor along with the allspice, nutmeg, and cream. For a very smooth texture, force the pate through a fine mesh sieve using a rubber spatula.
Spoon the pate into ramekins or a small porcelain container and smooth the top.
Let cool completely, cover the surface directly with plastic wrap, and refrigerate at least a couple hours until cold and the flavors have had a chance to meld.
Take the pâté out of the refrigerator an hour or two before serving so it warms up a bit and spreads easily.
Serve with thin slices of a good baguette or good toast points.
The pâté will last only a couple of days, so be sure to make it just before you plan to serve it!
Friday, October 21, 2011
Spiced Nut Trail Mix

It's now fall, the weather is cooler, and we can look forward to comfy-cozy clothes.
Bundling up in sweaters and scarves, perhaps some mittens...

The other day I wore a favorite jacket.
My mother saw me and said, "Please be careful not to put any holes in your jacket."
There was nothing as far as I could tell that prompted the request, it just happened.
I said nothing in reply.
At first I was a little taken aback and confused as to why I would need such and exhortation, but a little later I thought it was hysterical.

(A good strong look is all it'll take, no words are necessary.)
Thirty? Certainly not. It's a tad superfluous in my opinion.
I thought about why the statement was potentially made.
Let's see here... I've not been climbing trees, no bear or alligator westing, I generally try to steer clear of sharks, there's been no jumping of fences, there's not been any close frictional contact with concrete, no street fights, I don't play with ice picks or nail guns, and I've been good with scissors for years. True.

Ok, so technically I DO play with knives, but it's a safe sort of play- closed toed shoes and all that jazz (and I don't play with knives with my jacket on, that's completely ridiculous).
Please, Natalie! If you're going to use knives at least take your jacket off!
Things could get dangerous to say the least.

Nope. Nothing that leads me to any logical reason.

Second only to clotheslining anyone who unfortunately happens to be sitting in the passenger seat if you come to a semi-sudden stop while driving.
So, anyway, the trail mix recipe included here is full of warm autumnal flavors.

The original recipe came from a magazine at least 10 years ago... I liked it and have been making a version since with what nuts and dried fruit I could find or whatever sounded good at that moment.
Just don't forget your jacket. Preferably one that's completely intact.
Spiced Nut Trail Mix
1 c cashews
1 c dried apricots, quartered (or halved, depending on size)
3/4 c walnut halves
1/2 c shelled sunflower seeds
1/2 c golden raisins
1/2 c dried cranberries
1/2 c sugar
1 t Chinese five spice powder (pumpkin pie spice or a mix of ginger, anise, cloves, allspice, black pepper, and/or nutmeg will also work... choose a few, whatever suits your taste)
1/4 t ground cinnamon
1/8 t cayenne pepper
1 t water
Preheat oven to 225 degrees F.
In a large bowl stir together cashews, apricots, walnuts, sunflower seeds, raisins, cranberries, sugar, five spice powder, cinnamon, cayenne, and salt. Beat the egg white and water until frothy, then fold gently into the nut and fruit mixture.
Spread the mixture out onto a nonstick baking sheet (or a regular sheet pan covered with a layer of parchment paper). Bake for 1 hour.
Remove the pan from the oven and place on a rack to cool completely.
Break the trail mix into pieces and store in an airtight container.
1 c cashews
1 c dried apricots, quartered (or halved, depending on size)
3/4 c walnut halves
1/2 c shelled sunflower seeds
1/2 c golden raisins
1/2 c dried cranberries
1/2 c sugar
1 t Chinese five spice powder (pumpkin pie spice or a mix of ginger, anise, cloves, allspice, black pepper, and/or nutmeg will also work... choose a few, whatever suits your taste)
1/4 t ground cinnamon
1/8 t cayenne pepper
1/2 t salt
1 large egg white1 t water
Preheat oven to 225 degrees F.
In a large bowl stir together cashews, apricots, walnuts, sunflower seeds, raisins, cranberries, sugar, five spice powder, cinnamon, cayenne, and salt. Beat the egg white and water until frothy, then fold gently into the nut and fruit mixture.
Spread the mixture out onto a nonstick baking sheet (or a regular sheet pan covered with a layer of parchment paper). Bake for 1 hour.
Remove the pan from the oven and place on a rack to cool completely.
Break the trail mix into pieces and store in an airtight container.
Monday, October 17, 2011
Carnitas

To me, carnitas make the perfect burrito.
Not to say I'm a huge pork fan, and I'm not always a meat person, but for some reason when I really crave a burrito, it's always got to be carnitas.

You know, you look at the menu, and entertain the idea of this or that, but when it comes time to order, I just go with the old standby. Perhaps I'm set in my ways when it comes to burritos.
Mildly spicy, slightly sweet, complex. Perfect with guacamole and black beans.


Different chiles do different things, and they have different purposes.
Some are sweet, others are hot. Some have more flavor, others have more... feeling.
Generally, the tiny ones have the intense blistering heat, and the bigger ones are more sedate.


But he was actually only a threat on the field, he had a fairly mild temper when it came to dealing with people in the day-to-day.
Or I suppose we could liken the small chiles to little dogs. They oftentimes make an extremely loud ruckus and act quite violent, don't they? Much moreso than many of the docile, bigger dogs, many of whom don't bat an eyelash when confronted by these little tornados.
Is it a Napoleon complex for dogs?


Generally, the tiny ones have the intense blistering heat, and the bigger ones are more sedate.


It's like that big huge football player you had class with. He was big- impressively so- and for that very good reason nobody messed with him.
But he was actually only a threat on the field, he had a fairly mild temper when it came to dealing with people in the day-to-day.
Or I suppose we could liken the small chiles to little dogs. They oftentimes make an extremely loud ruckus and act quite violent, don't they? Much moreso than many of the docile, bigger dogs, many of whom don't bat an eyelash when confronted by these little tornados.
Is it a Napoleon complex for dogs?


Hey, the same goes for chiles.
Poblano chiles are shaped like large jalapeños.
Once they're dried, Poblano chilis become Ancho chiles. They may look like they'd pack a punch (or read like they do since they're chiles), but they really don't.
Ancho chile powder is mild- mild and a little smokey.


Based on David Lebovitz's recipe in The Sweet Life in Paris
It's a little adapted, a little Cuban-ized.
Fantastic as a filling for tacos or burritos, but also good with a bowl of rice and black beans.
Carnitas
serves 10 or more
Carnitas
serves 10 or more
5 1/2 lb. pork shoulder (boneless), excess fat removed and cut into large pieces
1 generous T kosher salt
2 T vegetable oil
2 T vegetable oil
1 1/2 c orange juice
1 T ancho chile powder
1/2 t cumin
3 cloves of garlic, smashed
1 stick of cinnamon
2 bay leaves
Water
Preheat the oven to 350 degrees F.
Rub pieces of pork all over with salt. In a large roasting pan set over the stovetop, heat the oil over medium high heat. Sear the pork on all sides. Make sure you only have a single layer of pork, if not, sear the pork in two batches. Remove the pork to a plate and blot any excess oil. Pour the orange juice into the pan and scrape up any browned bits stuck to the bottom. Add the chile powder, cumin, garlic, cinnamon stick and bay leaves. Stir through the orange juice to combine. Return the pork back into the pan and add enough water so that the pieces of pork are about two-thirds submerged.
Braise the meat in the oven for about 3 1/2 hours, turning occasionally. By the end of the cooking time, the pork should be extremely tender and falling apart. Remove the pan from the oven, and place the pork in another 4-sided pan, but do not get rid of the marinade. Place the roasting pan back on the stove and boil until it reduces slightly and becomes a little syrupy.
Meanwhile shred the pork using two forks.
Once the marinade has reached the desired consistency, remove the pan from the heat and add the shredded pork. Quickly turn and stir the pork to coat each bit (the marinade will soak in).
Serve warm with tortillas or rice.
Wednesday, October 12, 2011
Basics: Omelettes

As a part-time job when I was in school, I spent time working at a cooking store.
I remember one of my coworkers telling people that eggs were the only reason anyone ever needed a nonstick pan.


Some people wanted nonstick for everything. And some of the pans were very expensive and ended up coming back to the store after they had been ruined by people who didn't know what they were doing.
Perhaps a sharp knife was used to take some bits of burnt food off the pan (instead of a little elbow grease, soap, and hot water). The knife took whatever it was off the pan's surface, but it also gouged out a chunk of the nonstick finish.

Perhaps a sharp knife was used to take some bits of burnt food off the pan (instead of a little elbow grease, soap, and hot water). The knife took whatever it was off the pan's surface, but it also gouged out a chunk of the nonstick finish.

One time someone brought a nonstick roasting pan back. It was after either Thanksgiving or Christmas and the pan had only been used once.
The one and only little problem with this particular nonstick pan was that there was no nonstick finish at all. It was completely gone.
The entire inside of the pan had the dull shine of brushed silver.
When expensive things are returned to a store, people usually come up with some interesting explanations. I think they're afraid that the truth won't get them what they want.
When expensive things are returned to a store, people usually come up with some interesting explanations. I think they're afraid that the truth won't get them what they want.
I can't remember the exact excuse, but I think in reality someone was trying to be helpful and didn't know when to stop.
Sadly, customers aren't always technically right...


It's true about the eggs though. They are sticky little things, aren't they?
But, if the pan's hot enough and there's a slick of butter, the nonstick surface is unnecessary.
Either that, or you can have a great well-loved and used pan that over time develops a finish for these sorts of things.
Eggs aren't a huge problem when it comes to cleanup anyway.
Eggs aren't a huge problem when it comes to cleanup anyway.
Sorry, Mr. DuPont.

Omelettes are simple and filling fare. Plus they're quick.
Of course this is the plain version, but you can fill an omelette with whatever you would like. Cheese (maybe with apple or pear), bacon, herbs, caramelized onions, mushrooms or other sauteed vegetables. Just place the filling in prior to folding the omelette.
You don't want a completely dry, overcooked and tough omelette. The operative word when cooking an omelette is creamy, not raw.
The center should be set and not move when the pan is shaken.

This recipe will yield one thin crêpe-like omelette. If you prefer a more fluffy omelette, or you're more than a two-egg type of person, use a smaller pan or add another egg. Cooking time will be a little longer, but it's still easily manageable as omelettes only take a couple/few minutes to cook.
If you end up adding a third egg, remember to add a little more water and seasonings.
Omelette
serves 1
1/2 T water
large pinch salt (1/8 t)
several grinds fresh nutmeg
several grinds freshly ground black pepper
1/2 T sized lump of butter
1/2 T sized lump of butter
10 inch skillet
In a small bowl whisk together the eggs and water until combined. Add the salt, nutmeg and pepper and set the bowl aside.
Heat the skillet over medium high heat, add the butter, and tilt the pan to coat. Once the butter just starts to brown a bit, add the eggs and shake the pan to distribute evenly. The omelette should begin to set up very quickly. Move the edges of the omelette with a spatula so that uncooked egg slides from the center to the outside of the pan.
Have a plate ready...
Once the omelette is set in the center (you're not looking for completely dry- it should be wet but not runny), fold about 1/3 of the omelette over to the center. Shake the pan to loosen the omelette. Slide the unfolded side of the omelette out of the pan (using the spatula to help guide it if necessary) and onto a plate then slightly flip the rest of the omelette over the top so it folds once again (like a letter).
Serve warm.
Thursday, October 6, 2011
Basics: Crêpes

They can be sugary or savory, make a complete meal at any time of day, or just act as the sweet finish.

Fresh, homemade crêpes don't take too much time or trouble, and they're much better than the pre-made, pre-packaged crêpes you can buy at the store.
In college, they would have "International Week" in the dorm cafeterias. One night during this wonderful week, there was a crêpe bar set up, complete with very thin, rubbery, pasty-white, flavorless packaged "crêpes" available for us to work with.
Needless to say, not good eating.
Please don't buy these sorry imposters, because you'll find yourself disappointed.
I didn't know they even existed until I was away at school, and I have since seen them at the grocery store.
Sad fact.


At our house, the occasional crêpes were for breakfast and contained different types of jam, fruit, Nutella, or cinnamon sugar.
The possibilities are limited by imagination and the what's available in the pantry.

The possibilities are limited by imagination and the what's available in the pantry.

In France, you can frequently find crêperies- and last time one of my sisters and I were there together, our plan was to try as many crepes as we could.
We didn't get too far with that plan, probably in most part due to the fact that we were in a group and it wasn't one of the main group activities, but we did end up having several crêpes.
Chicken and mushroom, cheese and ham, chestnut creme and banana, Nutella (the ubiquitous), crunchy raw sugar...


You don't need a stainless steel crêpe pan to make crêpes, but it certainly does make a nice crêpe.
If you've got one, pull it out, dust it off, and use it.
If not, a small frying pan works just fine.


You won't necessarily need to add butter or oil before each crêpe. As you get the feel for things, you'll just know.
And the first crêpe never turns out perfectly (but it still tastes just fine).
If you've got one, pull it out, dust it off, and use it.
If not, a small frying pan works just fine.


You won't necessarily need to add butter or oil before each crêpe. As you get the feel for things, you'll just know.
And the first crêpe never turns out perfectly (but it still tastes just fine).
Crêpes
makes about 12, 8 inch crepes
2 large eggs
1/2 c plus 1T water
1/2 c plus 1T milk
1 c flour
Pinch of salt
2 T (1 oz) unsalted butter, melted
Butter or vegetable oil for the pan
In a medium bowl, whisk together eggs, water, and milk. Add flour and salt and whisk until combined. Stir in the melted butter and blend well. Refrigerate 1 hour.
Strain if necessary.
(Alternatively, use a blender to mix the batter.)
Heat a crêpe pan or small frying pan with a little butter or vegetable oil over medium-low heat until hot. Hold the pan in one hand and pour about 2 T of crepe batter into the pan. Quickly swirl and twist the pan so that the batter coats the bottom in a nice even layer. You may notice the batter is a little thick and won't easily spread. If so, add a tablespoon or two of water or milk to the batter to thin it out a bit for the next crêpe. Place the pan back on the burner and cook about 30 seconds, or until the edges of the crêpe are visibly dry. Flip the crepe and cook about 15 seconds. Remove the cooked crêpe to a plate and continue with the rest of the batter, stacking the crêpes on top of one another as you finish them.
Fill the crêpes with the desired filling, and fold or roll before serving.
Saturday, October 1, 2011
Slow Roasted Tomato Soup

Tomato soup can be blasé.
No character, no texture, just smooth pinkishness with a mostly indistinct flavor.
(Tomato soup tastes like tomato soup... but what does that taste like? Can you describe it?)


Yes, maybe it's nice for floating Goldfish crackers and dipping grilled cheese sandwich triangles that your mother has cut the crust off of, but you've got to grow up sometime.
(Ok, you can still have the grilled cheese, but please eat the crust.)


When I recently made this, some of the tomatoes were fresh, others were frozen.
The frozen ones were fresh once upon a time, but tomatoes can turn too quickly when you have a million and you're not eating them as quickly as they demand. And so, they're loaded into freezer bags for a long vacation in the freezer and will later make surprise appearances in soups. However, prior to summer tomatoes' re-appearance in your dinner, you must take care when opening the freezer. An avalanche of rock hard frozen softballs on your toes is not pleasant.
And this is why they now make fridge/freezer combos with a freezer drawer on the bottom. We can assume this kind of thing has happened more than once, in more than one home.


So...
This version of tomato soup has a little more personality than a condensed and canned soup. Plus, it's got to be better for you and you know exactly what's gone into it.
I know the tomatoes roast a while, but it's one of those things that can be done and sort of forgotten for a while as you get other things taken care of.
I know the tomatoes roast a while, but it's one of those things that can be done and sort of forgotten for a while as you get other things taken care of.


Slow Roasted Tomato Soup
Adapted from a Barefoot Contessa recipe
Serves 8-10
3 lbs. tomatoes (I used Romas and some unidentified tomatoes from the garden)
5 T olive oil, divided
1 T dried thyme
1 1/2 t kosher salt
3/4 t freshly ground black pepper
2 T unsalted butter
2 medium onions, diced
6 medium cloves of garlic, minced
1/4 t red pepper flakes
28 oz good canned whole tomatoes, in juice
1 bay leaf (preferably fresh if you have one)
4 c chicken or vegetable stock
1 c basil leaves, packed
1 c light cream (half and half)
Optional garnishes: julienned basil, sour cream, crème fraîche, cheese (Gruyère, Parmesan), croutons...
Preheat oven to 250 degrees F.
Slice tomatoes in half lengthwise (if larger tomatoes, quarter them). Place in a bowl with olive oil and thyme and toss to coat. Place cut side up on a 4-sided sheet pan and pour any extra oil and juice around the tomatoes. Sprinkle the cut sides of the tomatoes with salt and pepper.
Bake 3 hours, checking occasionally and turning or shaking the pan if necessary.
In a large pot, heat the butter and olive oil over medium heat until the butter is melted. Add the onion and garlic and saute until the onion begins to caramelize. Add the red pepper, saute another minute, then add the canned tomatoes and juice, the roasted tomatoes and juices, bay leaf, and the chicken or vegetable stock. Bring to a boil, cover and reduce to a simmer. Cook 40 minutes.
Add the basil, stir through the soup and remove the pot from the heat. Puree the soup with a stick blender, or in several batches in the bowl of a food processor. The soup will be thick and not completely smooth, but of course smoothness would depend on how well it was pureed. If using a food processor, you will need another pot or a large bowl to transfer the soup into between batches. Once all is pureed, place the pan back on the heat to warm gently. Stir in the light cream and season to taste with extra salt and pepper as necessary.
Serve with garnishes as desired.
Serve with garnishes as desired.
Subscribe to:
Posts (Atom)


