Showing posts with label eggs. Show all posts

Saturday, March 15, 2014

A Simple Breakfast


I have to say, a soft boiled egg is a simple pleasure.
Even so, I don't think enough people eat them. Maybe they're forgotten, maybe they're too elementary.
But perhaps it's because they don't know what they're missing out on. On the other hand, not everyone prefers egg yolks very soft...


With fresh asparagus, only just cooked, it's even more pleasant and a perfect addition to brunch.


If for few enough people, both the asparagus and eggs can be made in a single pot.
I'm aware that people don't normally add salt to their water to boil eggs in the shell, however, remember that the water is also meant to cook asparagus (which certainly needs a bit of seasoning). Then again, eggshells are porous, maybe you can get some of that seasoning into the egg, too. I'd like to think so.


For one or six, it's a recipe easily multiplied for however many people you need to feed.
If you need, of course you're more than welcome to use two pans: one for eggs and another for asparagus.


You can pierce either end of the egg to take off a bit of pressure to help keep the shell from cracking, but you'll more than likely have a bit of the egg white cooking on the outside of the egg.
Either way, you choose.


With coffee or tea, toast and jam, and maybe small dish of yogurt, a soft boiled egg breakfast is made complete.


Soft Boiled Egg with Asparagus Spears
serves 1

1 egg
3 asparagus spears
Salt to season the water (such as kosher or grey)

Optional:
Salt to season (something more delicate and flaky would be preferable)
Freshly ground black pepper

Using a pin, poke a hole into both the small and large end of an egg (optional).
Bring a few inches of water in a saucepan to a rolling boil. Add a nice amount of salt to season the water.
When the water comes back to the boil,  carefully place the egg in the pan and cook 5 minutes for a soft-boiled, somewhat runny-yolked egg. 
Two minutes before the egg is finished, add the trimmed asparagus spears to the boiling water. When time is up, remove both the egg and asparagus, and rinse the asparagus in very cold water to shock it, keep it's bright color, and stop the cooking process. 
Season and serve as desired. 

Monday, June 10, 2013

Shakshuka


Sometimes for breakfast I want something savory and substantial. If I'm out for breakfast and happen to see chilaquiles on a menu, that's what I want- no question about it.


Another savory morning option, shakshuka is probably easier to make at home than chilaquiles (although both are equally fun to say). 
Essentially eggs poached in a tomato sauce, this North African dish can be one of those any time of day meals.


Eggs are like that: they're versatile. The fact that they almost always fit the bill is probably the best thing about them.


Eggs can be the perfect addition to so many one-bowl meals: sauteed vegetables, rice, quinoa, beans...
And a beautifully poached egg can make a silky sauce for whatever it's perched atop.


Shakshuka is one of those things that I've wanted to make for a while, it sounded so good, but I never got around to it until now- I'm glad I did. It's hearty with a little kick (it would be perfect when tomato season winds down and the weather cools off).
I'm sure I'll make it again, and I'll probably try some different variations along the way.


Shakshuka
Adapted from Yotam Ottolenghi's recipes in Plenty and Jerusalem
Serves 4-6

3 T olive oil
1 large onion, sliced
kosher salt
3/4 t (2 g) cumin
1 T (22 g) tomato paste
1 t (5 ml) hot chili sauce (such as sriracha)
3 lage cloves of garlic, minced
4 ripe tomatoes, chopped into large pieces
2 red bell peppers, large dice
1 1/2 t (7 g) brown (or muscovado) sugar
freshly ground black pepper
4-6 large eggs

Additions:
chopped fresh parsley or cilantro, plain yogurt, feta cheese, extra chili sauce, lemon zest

Heat olive oil in a 10 inch skillet over medium heat until shimmering. Add sliced onion and 1/2 t (5 g) kosher salt. Reduce heat slightly and saute 10-15 minutes until the onions are softened and slightly caramelized. Stir in the cumin, tomato paste, and chili sauce and saute together with the onion a couple minutes until the onions are coated with the mixture and the tomato paste thickens and darkens slightly. Add the garlic and stir the mixture about 30 seconds, or until the garlic is fragrant. 

Add the tomato and peppers along with the brown sugar and another 1/2 t (5 g) kosher salt. Cook the mixture, stirring occasionally, about 15 minutes until it starts to resemble a thick and chunky pasta sauce (add a little water to thin the sauce while cooking if desired). Season to taste with salt and pepper. Make 4-6 wells in the simmering sauce and crack an egg into each space. Cover the pan and continue gently simmering the shakshuka about 5 minutes, or until the egg whites are set, but the yolks are still soft. 

Garnish to taste and serve with toast or good bread. 

Wednesday, October 12, 2011

Basics: Omelettes


As a part-time job when I was in school, I spent time working at a cooking store.

I remember one of my coworkers telling people that eggs were the only reason anyone ever needed a nonstick pan.


Some people wanted nonstick for everything. And some of the pans were very expensive and ended up coming back to the store after they had been ruined by people who didn't know what they were doing.
Perhaps a sharp knife was used to take some bits of burnt food off the pan (instead of a little elbow grease, soap, and hot water). The knife took whatever it was off the pan's surface, but it also gouged out a chunk of the nonstick finish.


One time someone brought a nonstick roasting pan back. It was after either Thanksgiving or Christmas and the pan had only been used once.
The one and only little problem with this particular nonstick pan was that there was no nonstick finish at all. It was completely gone.
The entire inside of the pan had the dull shine of brushed silver.
When expensive things are returned to a store, people usually come up with some interesting explanations. I think they're afraid that the truth won't get them what they want.
I can't remember the exact excuse, but I think in reality someone was trying to be helpful and didn't know when to stop.
Sadly, customers aren't always technically right...


It's true about the eggs though. They are sticky little things, aren't they?
But, if the pan's hot enough and there's a slick of butter, the nonstick surface is unnecessary.
Either that, or you can have a great well-loved and used pan that over time develops a finish for these sorts of things.
Eggs aren't a huge problem when it comes to cleanup anyway.

Sorry, Mr. DuPont.


Omelettes are simple and filling fare. Plus they're quick.
Of course this is the plain version, but you can fill an omelette with whatever you would like. Cheese (maybe with apple or pear), bacon, herbs, caramelized onions, mushrooms or other sauteed vegetables. Just place the filling in prior to folding the omelette.
You don't want a completely dry, overcooked and tough omelette. The operative word when cooking an omelette is creamy, not raw.
The center should be set and not move when the pan is shaken.


This recipe will yield one thin crêpe-like omelette. If you prefer a more fluffy omelette, or you're more than a two-egg type of person, use a smaller pan or add another egg. Cooking time will be a little longer, but it's still easily manageable as omelettes only take a couple/few minutes to cook. 
If you end up adding a third egg, remember to add a little more water and seasonings. 
   
Omelette
serves 1

2 lg. eggs
1/2 T water
large pinch salt (1/8 t)
several grinds fresh nutmeg
several grinds freshly ground black pepper
1/2 T sized lump of butter

10 inch skillet

In a small bowl whisk together the eggs and water until combined. Add the salt, nutmeg and pepper and set the bowl aside. 
Heat the skillet over medium high heat, add the butter, and tilt the pan to coat. Once the butter just starts to brown a bit, add the eggs and shake the pan to distribute evenly. The omelette should begin to set up very quickly. Move the edges of the omelette with a spatula so that uncooked egg slides from the center to the outside of the pan. 
Have a plate ready...
Once the omelette is set in the center (you're not looking for completely dry- it should be wet but not runny), fold about 1/3 of the omelette over to the center. Shake the pan to loosen the omelette. Slide the unfolded side of the omelette out of the pan (using the spatula to help guide it if necessary) and onto a plate then slightly flip the rest of the omelette over the top so it folds once again (like a letter). 
Serve warm.

Monday, May 16, 2011

Oeufs en Cocotte


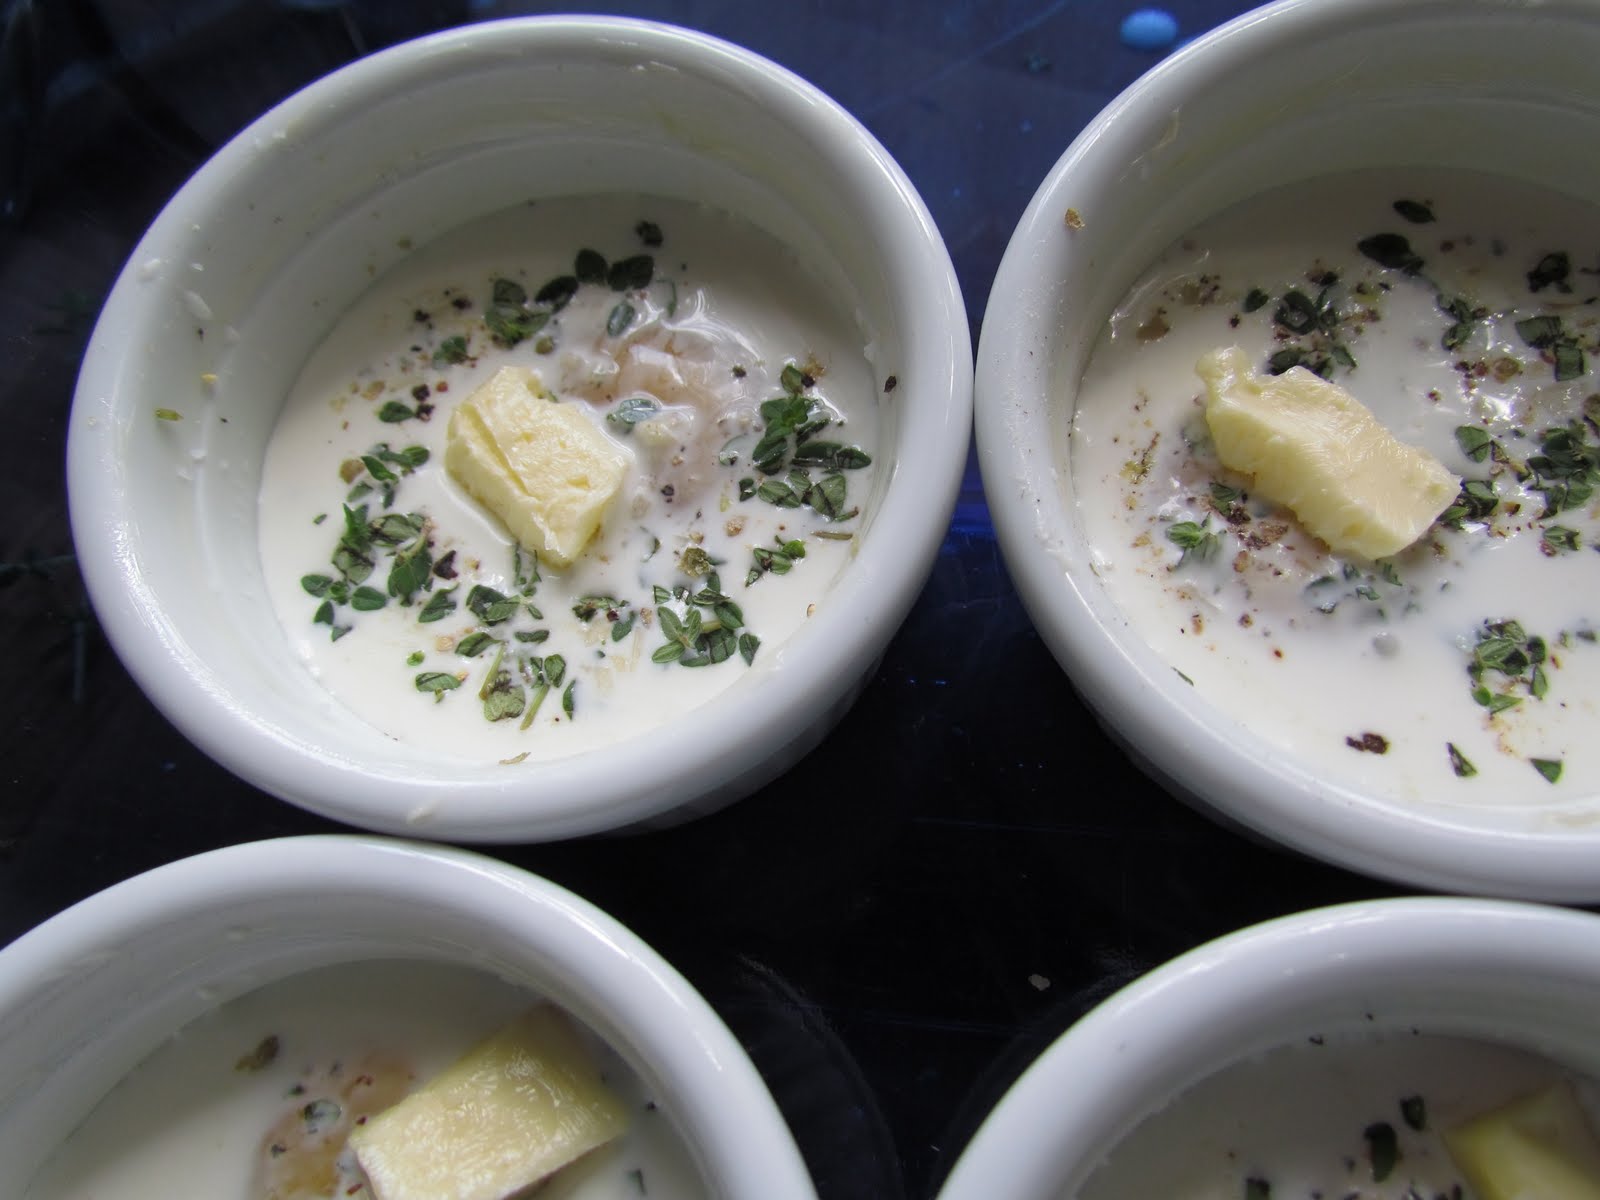
This is a nice way to serve eggs- a little different and elegant, but at the same time simple and satisfying.


I think that when anything is prepared individually it's usually a little more special.
Time has been taken and attention has been given for each little detail several times over.


This dish can be a beautiful, warm and comforting sort of thing at times- and it seems to be one of those foods that's good to serve most of the year. Autumn, winter, and spring... but maybe not so much in the summer.


It can be used for breakfast, brunch, or as part of a light lunch or dinner.
Serve with toast and/or a salad. Perhaps fruit salad for brunch, and green salad at any other time of day.


You want the white to be set, however the yolk should only to be softly set.
But the whole little dish becomes a creamy, silky savoriness once cooked...

I think this is sort of a combination/adaptation recipe from The Canal House as well as The Barefoot Contessa... but it seems like there are so many variations out there (including vegetables, meat, fish, etc.).

Oeufs en Cocotte
serves 4

4 eggs
6 T or more heavy cream
1 T butter (more or less)
4 sprigs thyme, leaves stripped and chopped
Kosher salt
Freshly ground black pepper

Optional: 1 clove garlic finely minced, additional fresh herbs such as chives and parsley, finely freshly grated Parmesan cheese

Preheat the oven to 400 degrees F and place a kettle or pot with water on to boil.
Butter 4, 1/2 cup ramekins and pour 1/2 T of cream into each. Break an egg into each ramekin, sprinkle with thyme, salt, and pepper. If using garlic, divide minced garlic among tops of eggs. Pour at least 1 T cream over the tops of the eggs (sprinkle with Parmesan if using), and place a small lump of butter on top of each yolk.
Place finished ramekins in a baking dish that will fit all of them comfortably, so they sit flat, and with a little space between. Pour boiling water into the baking dish so it reaches halfway up the sides of the ramekins. Bake 8-10 minutes, until the whites are set and the yolks are softly set. The eggs will continue to cook after being removed from the oven.
With a pair of tongs, carefully remove the dished from the water bath and serve.
If using additional tender herbs, chop and sprinkle over the finished eggs.

Monday, February 21, 2011

A Little Sweet Potato Quiche


This recipe was an adaptation from Donna Hay's book Entertaining.
Her photos and recipes are always beautiful things. I suppose she might be the Australian equivalent of Martha Stewart.
Only, there seems to be a certain casual effortlessness...


I own a couple Australian cookbooks and I've given several as gifts.
I must say there's something I love about the photography, food, and food styling.
It's so... fresh!


I've started doing some teas, and this was one of the offerings on the first day.


I thought it would be easiest to handle them in regular-sized muffin tins, this way they're all uniform in size, a perfect single serving, and no new kitchen equipment is necessary.


Everyone has a muffin tin, right?


Although the puff pastry is a great time-saver and looks beautiful, I think I'd like to try a variation of this combination in a large quiche with a regular pastry crust...


Little Sweet Potato Quiches
makes 6

1/2 lb. sweet potato, peeled and cut in a medium dice
olive oil
kosher salt
1 sheet frozen puff pastry, (gently!) thawed overnight in the refrigerator
2 lg eggs
1/2 c half and half or whipping cream
1/4 t freshly ground black pepper
1/4 t freshly grated nutmeg
1/3 c freshly grated Parmesan cheese
Fresh sage leaves, torn or chopped

Preheat oven to 400 degrees F.
Grease a 6-hole regular-sized muffin tin.
Toss the sweet potato with about 1 1/2 T olive oil, a few grinds of black pepper, and a sprinkling of kosher salt. Place on a baking sheet and bake about 15 minutes, tossing once during baking.
While the sweet potato cooks, roll out puff pastry with a rolling pin on a lightly floured surface until approximately 11 x 13 inches in size. Cut the pastry into 6 equal pieces. Line each muffin cup with a piece of pastry, pleating the sides as necessary so the pastry fits the tin. Dock the bottom and sides of the pastry and place the muffin tin in the freezer about 10 minutes.
Bake the pastry cups at 400 degrees F for about 10 minutes, or until the sides puff and begin to turn golden brown.
While the pastry cups bake, combine the eggs, cream, nutmeg, pepper, a sprinkle of kosher salt, and Parmesan cheese. Whisk until blended and set aside.
When the pastry is done, remove the pan from the oven and turn the oven temperature down to 375 degrees. Using the back of a spoon, "deflate" the puff pastry on the sides of the muffin cup to make room for the filling. Divide the egg mixture between the muffin cups, being careful not to overfill. Place roasted sweet potatoes in each cup with the eggs and top with sage leaves.
Bake for approximately 20 minutes, or until the filling is set. Let the quiches cool slightly and remove from the muffin tin. You may need to run a sharp knife along the edge between the tin and the pastry.
Serve warm.

Wednesday, October 27, 2010

Bleu Cheese Soufflé


This is a recipe I'd been wanting to try a while, but it never quite happened.
I like to make souffles a lot (as long as they happen to be cooperative souffles), and I happened to be on a cheese kick when I finally tried it.


You see, the only souffles I had made up to this particular point had been sweet, never savory.


I know bleu cheese isn't everyone's cup of tea- it can be fairly strong and sharp... another one of those "love it or hate it" types of foods. Penicillium cultures are added to give the cheese it's flavor as well as lovely veins and marbling (other than as a possible exclamation from a phlebotomist, this may happen to be one of the only times veins can be referred to as "lovely"... I just had to say that here, I think it might have been a requirement).


In the nineteenth century, Roquefort cheesemakers found that they could speed the production of bleu cheese ripening by baking loaves of rye bread and adding a little powdered mold. The moisture in the bread made it a good place to grow mold. The loaves were completely molded through after about two weeks, the loaves were dried and ground, and later added to cheese.
It sounds like a science experiment!


The cheeses spend some time in dark, cool caves to age a little.
An interesting story about Roquefort deals with the fact that it's almost always shipped in half-wheels. It's traditionally believed to be this way because of Charlemagne. He stopped in the area and was served bleu cheese by the abbot. Charlemagne saw the blue bits in the cheese, took out his knife, and started removing them. The abbot gently told him the blue parts were considered the best parts. Charlemagne loved the cheese and asked to be sent two wagonloads a year. To ensure that he could see he had the most flavorful, best cheese, he instructed the abbot to split the wheels in half.


The flavor of a specific bleu cheese (Roquefort, Stilton, Maytag, Gorgonzola...) depends on the type of milk used as well as aging time and terrior. Two products from two different locations can taste very different from one another (depending on climate, soil, "air" or the general area something is produced in) although the steps taken to produce said things may be exactly the same.


Examples include coffees, chocolate, vanilla, wine, and cheese.
It's very interesting...


The production of bleu cheese requires humidity and moderate temperatures, so it can't be created everywhere. The mold was originally an accident that became purposeful.


This one is adapted from Ina Garten- very miniscule adaptations.
When you make souffles, you'll want to serve them as soon as possible. The cooler temperature outside the oven causes souffles to begin deflating as soon as they come out (a tip in case you plan to photograph your food). This is also the reason behind not opening the oven to peek at a souffle- the rush of cool air isn't conducive to a rising souffle.


Bleu Cheese Soufflé
serves 2-4

3 T unsalted butter, plus extra for greasing the dish
1/4 c finely grated Parmesan cheese, plus extra for sprinkling
3 T flour
1 c scalded milk
kosher salt and finely ground black pepper
pinch of cayenne pepper
large pinch of freshly ground nutmeg
4 XL egg yolks, at room temperature
3 oz good bleu cheese, chopped
5 XL egg whites, at room temperature
1/8 t white vinegar

Preheat oven to 400 degrees F. Butter the inside of an 8-cup souffle dish (7 1/2 inches in diameter x 3 1/4 inches deep) and sprinkle evenly with Parmesan.
Melt the butter in a small saucepan over low heat. With a wooden spoon stir in the flour and cook, stirring constantly for 2 minutes. Off the heat whisk in the hot milk, 1/2 t salt, 1/2 t pepper, cayenne and nutmeg. Return to low heat and cook, whisking constantly, for 1 minute, until smooth and thick.
Off the heat, while the mixture is still hot, whisk in egg yolks one at a time. Stir in the bleu cheese and the 1/4 c Parmesan, and transfer to a large mixing bowl.
Put the egg whites, white vinegar, and a pinch of salt in the bowl of an electric mixer fitted with a whisk attachment. Beat on low speed 1 minute to incorporate ingredients, on medium speed 1 minute, then finally on high speed until they form firm, glossy peaks.
Whisk one quarter of the egg whites into the cheese sauce to lighten, and then carefully fold in the rest. You want it incorporated, but don't over stir.
Pour the mixture into the prepared souffle dish then smooth the top with a spatula. Draw a large circle on top with the spatula to help the souffle rise evenly, and place in the middle of the oven. Turn the temperature down to 375 degrees. Bake for 30-35 mintues until puffed and brown. Serve immediately.