Sorry, things have been too crazy for me...
Wednesday, July 28, 2010
Monday, July 12, 2010
Grilled Pizza and Flatbread

Cooking dough on a grill is something you would really want to play with...
There are no hard and fast rules to this one (as with many of the things I have been posting here...)

Grills are SO variable- the only thing I would really say was to make sure you keep an eye on this one. The good news is that it cooks fairly quickly- between 5 and 20 minutes (probably) depending on heat and what you decide to do technique-wise.
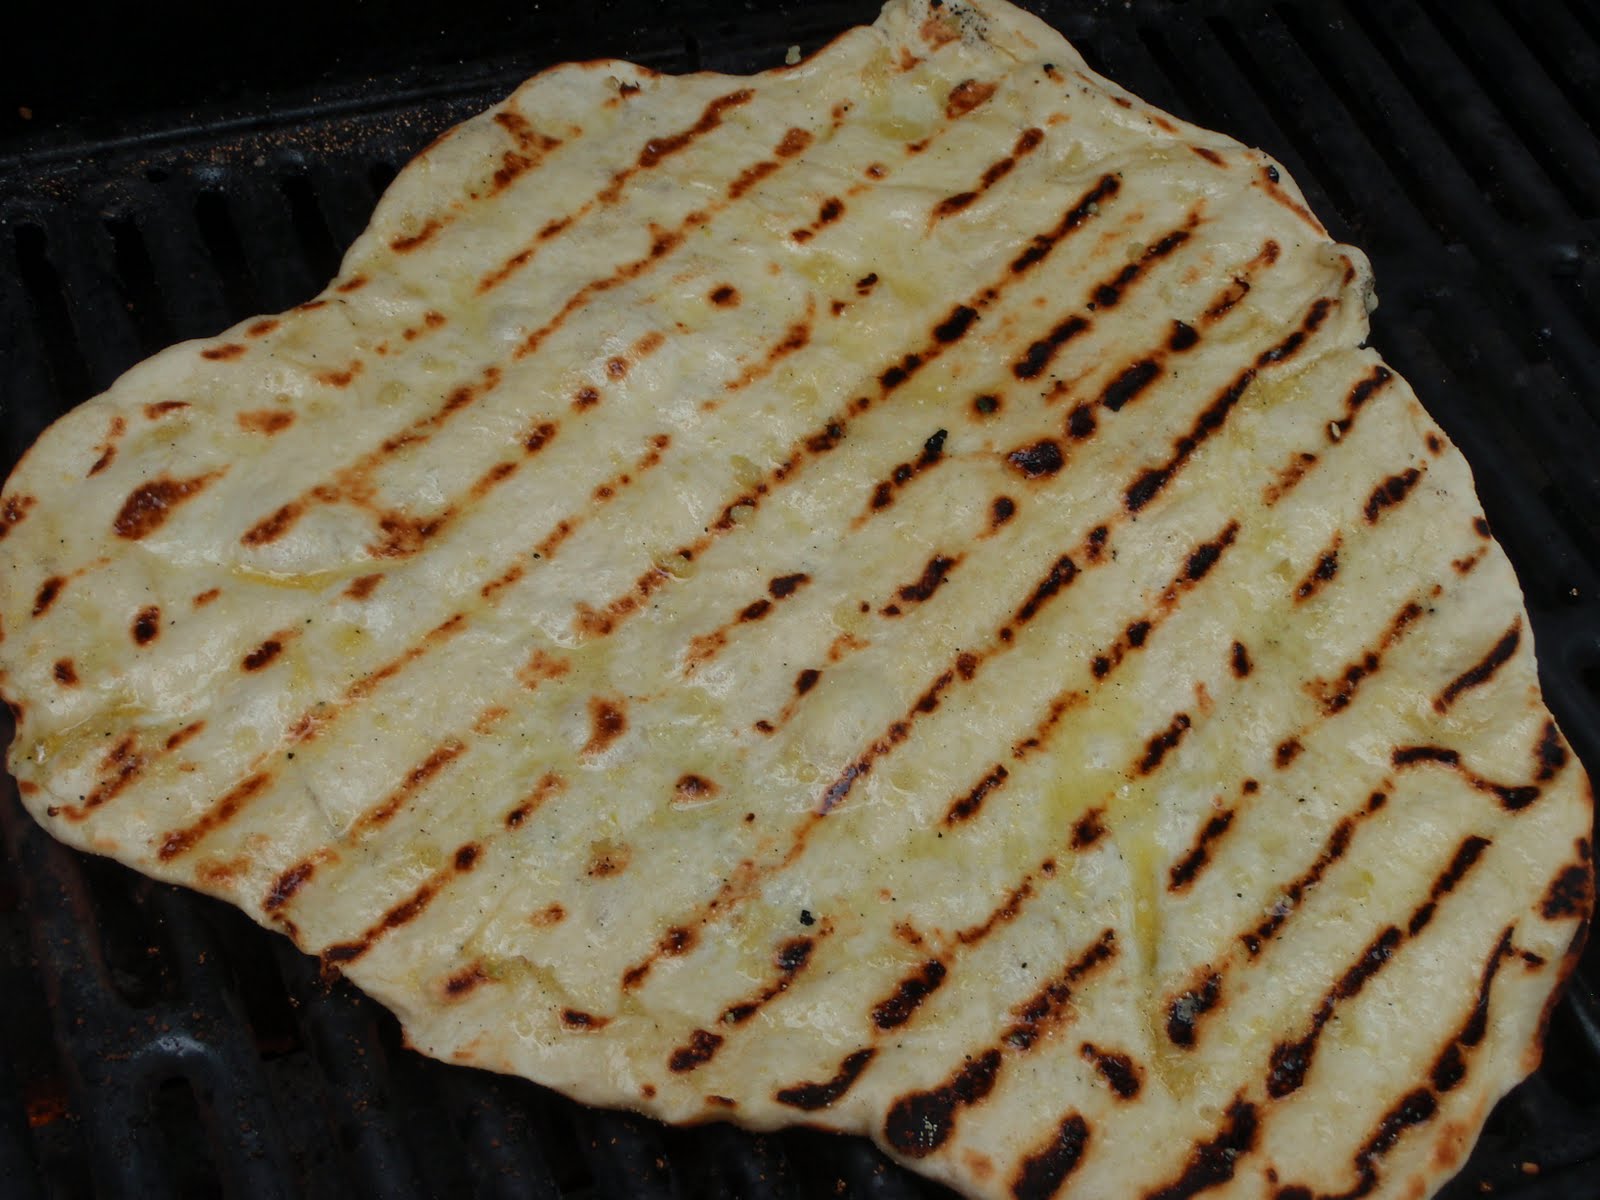
Personally, I really like grill marks, but you may not.
The really nice thing is that you could go with some no-holds-barred creativity and pretty much make this however you wanted.
Sauce, no sauce, vegetables, meat, cheese, herbs, olive oil...
You could even just go to the market, see what's fresh, and go from there!

Tomatoes, shaved asparagus, caramelized onions, a nice melange of summer veg that you have grilled prior to placing them on the crust...
Perfection is not required- it can be "charming" and completely homemade-looking. Besides, it probably tastes better when it's not perfect.
One thing that you will want to have is either a pizza peel or a cookie sheet without sides, so you can roll out the dough and get it to (and off) the grill. It just makes things easier.
Cooking it at a higher heat and with a thinner crust will definitely make it crisper, but a slightly thicker crust cooked at a "not-quite-as-high" heat will give you something chewier.
It makes a light meal or is a great addition to antipasti.

I like to make a garlic olive oil while the dough is rising- and it can infuse for a while before I use it for the crust.
As you can see, one of these is a "Margherita"-style with tomato, mozzarella, basil and a sprinkle of freshly grated Parmesan. The other is thinly sliced lemon (make sure to wash well!), red onion, rosemary, and shaved Parmesan. Both crusts have been painted with garlic oil and the whole thing is sprinkled with kosher salt and freshly grated black pepper. It all depends on what you like...
The "Margherita" dough was partially cooked on one side, garlic oil and toppings were added, and it was given some time to finish cooking and melt the mozzarella.
The dough I added lemon and onion to was cooked on both sides before garlic oil and toppings were added.
And I would like to apologize here- things are not moving along at the clip I would prefer for my blogging this month. Sorry, things have been a tad crazy as of late.
There are tons of recipes for pizza dough out there.
I actually made this about a month ago (and took photos). I looked at two recipes and then combined them and made some things up. Ta-da! Pizza.
Unfortunately, I didn't write things down and I don't have time to re-figure out what I did because I want to post something! This recipe is slightly adapted from Essentials of Classic Italian Cooking by Marcella Hazan (It's a great book- but nothing flashy. There are pen and ink drawings but no photos, no color... if you're in need of something attention grabbing because sparkles and flashing lights assist you in cooking endeavors, I'm very sorry. However, what it does have is really great raw information).
Pizza Dough
makes 2 pizzas, about 12-inches wide (depending on how thin they are)
1 1/2 t active dry yeast
1 c lukewarm water
3 1/4 c AP flour
about 2 T olive oil
1 T honey
1/2 T salt
cornmeal for dusting pizza peel or pan
Dissolve yeast completely in a large bowl with 1/4 c lukewarm water. When dissolved in 10 minutes or less, add honey and 1 c flour and mix thoroughly with a wooden spoon. As you continue to stir, gradually add 1 T olive oil, 1/2 T salt, 1/4 c water, and 1 c more of flour. Repeat with 1/4 c more of water and 1 c flour. Add enough additional flour and/or water to make a soft, manageable (not sticky) dough.
Take the dough out of the bowl, slap it (hard) on the counter several times, fold it over and push it away from you using the heel of your hand. Fold and push, fold and push. Continue kneading for about 10 minutes, giving the dough a quarter turn a few times during the kneading process. You're looking for a resilient dough that springs back when poked. Pat the kneaded dough into a round shape and place it back into the bowl which you have greased with 1 t of olive oil. Rub a little extra olive oil over the dough. Cover the bowl with plastic wrap and put in a warm place to rise until doubled- about 3 hours.
Preheat the grill medium to medium-high heat.
Divide dough in half, and place one piece back into the bowl. Punch down the piece you will be using, and with your hands try to push it into a rough circular shape. Sprinkle the peel or cookie sheet with a good amount of cornmeal so the dough does not stick. Place the dough onto the prepared surface and roll it out to approximately 12 inches in diameter. Try to leave the outside "rim" a little thicker than the rest of the dough.
With a forceful "flick", jerk the peel or cookie sheet to slide the dough onto the grill.
If you want grill marks on both sides, turn the dough over when it looks good (probably 5-10 minutes each side). If not, when the dough starts rising you can add your sauce and toppings. Either way, brush garlic olive oil (and bits of garlic) onto what you decide will be the "top" of the dough BEFORE adding other toppings if you're using it. Once again, it will probably only take up to 20 minutes to finish cooking each pizza. Just keep peeking at it for desired doneness (both top and bottom)!
Remove pizza or flatbread using cookie sheet or peel and move to a cutting board for slicing. Repeat the process with the second piece of dough.
******************
Garlic Oil
1/2 c olive oil
4-6 garlic cloves, minced or pressed through a garlic press
Place olive oil in a small saucepan and add garlic. Heat the olive oil over low heat until it simmers. Turn off the heat, remove the pan from the heat and set aside until you are ready to use.
(*I also like to add a little salt, pepper and maybe crushed red pepper flakes to this, paint it on French bread and grill it to make some very nice garlic bread!)
Monday, July 5, 2010
Chard and Onion Omelette


It's also one of those things you could have at any time of day, for any meal: breakfast, lunch or a light dinner with a salad.


It's so nice to just run outside and get what you need!
We keep onions around and of course there's always the staples of salt, pepper, olive oil, Parmesan, and Swiss cheese (ok, so the last two may not be staples for everyone...).

Chard and Onion Omelette
From Vegetarian Cooking for Everyone by Deborah Madison
Makes 1 10-inch omelette, serves 4-6
3 T olive oil
1 large red or white onion, quartered and thinly sliced crosswise
1 bunch of chard, leaves only, chopped
salt and freshly ground pepper
1 clove garlic
6-8 eggs, lightly beaten
2 T chopped parsley
2 T chopped basil
2 t chopped thyme
1 c grated Gruyere
2 T freshly grated Parmesan
Heat 2 T olive oil in a 10-inch oven proof skillet, add the onion, and cook over low heat, stirring occasionally, until completely soft but not colored, about 15 minutes. Add the chard and continue cooking, stirring occasionally, until all the moisture has cooked off and the chard is tender, about 15 minutes. Season well with salt and pepper.
Meanwhile, mash the garlic in a mortar and pestle with a few pinches of salt (or mince finely together), then stir it into the eggs along with the herbs. Combine the chard mixture with the eggs and stir in the Gruyere and half the Parmesan.
Preheat the broiler. Heat the remaining oil in the skillet and, when it's hot, add the eggs. Give a stir and keep the heat at medium-high for about a minute, then turn it to low. Cook until the eggs are set but still a little moist on top, 10 to 15 minutes. Add the remaining Parmesan and broil 4 to 6 inches from the heat, until browned.
Serve in the pan or slide it onto a serving dish and cut it into wedges.
Thursday, July 1, 2010
Blueberry Cornmeal Cake

Along with cranberries and Concord grapes, blueberries are native to North America.
July is also national blueberry month- so you should probably eat some at some point as a celebratory gesture.
Not surprisingly, blueberry is the most popular variety of muffin...

As with any colorful fruits and vegetables, blueberries are very good for you (and they contain a lot of antioxidants).
Plus, when you have all these great fresh fruits this time of year, why not make good use of them?

This particular recipe is one of those perfect things for when you have a bunch of guests. It's like a giant muffin in cake form. Not too difficult to throw together and for some reason it's pretty impressive.

The cake's got a great texture (crunchy on top, moist and dense inside) that's augmented by the cornmeal (which also adds a sweet nuttiness).


This is one of those multi-talented cakes that's perfect for breakfast, brunch, or tea.

I didn't really mess with this recipe since it looked just perfect.
Well, just one thing... lemon zest. I had to do it. It's only because I think blueberries and lemon are one of those perfect combinations.

I think it was a nice addition. The cake is fantastic- the flavors are wonderful, the texture is great.
Corny blueberry-ness...

Blueberry Cornmeal Cake
very minimally adapted from the Huckleberry Bakery & Café in Santa Monica
recipe found in Bon Appetit, May 2010
makes 1 10-inch cake, 12 servings
Nonstick vegetable oil spray
1 1/2 c all purpose flour
2/3 c yellow cornmeal
2 t baking powder
2 t baking soda
6 T vegetable oil
2 large eggs
1 T vanilla extract
1 t honey
10 T (1 1/4 sticks) unsalted butter, room temperature
3/4 c plus 3 T sugar, divided
zest of 2 lemons
1 1/2 t salt
1 c ricotta cheese
1/3 c plain yogurt
3 c fresh blueberries
Preheat oven to 325 degrees F. Spray a 10 inch diameter springform pan with 2 3/4 inch inch sides with non stick spray. Whisk oil, eggs, vanilla and honey in another medium bowl.
Using electric mixer, beat butter, 3/4 c plus 2 T sugar, lemon zest, and salt in a large bowl until creamy. With mixer running on medium speed, gradually add egg mixture; beat to blend. Beat in flour mixture just to blend. Add ricotta and yogurt; beat on low speed just to blend. Pour half of batter into prepared pan. Scatter 1 1/2 c blueberries over. Spoon remaining batter over in dollops, then spread to cover blueberries. Scatter remaining blueberries over. Sprinkle remaining 1 T sugar over.
Bake cake until top is golden brown and tester inserted in center comes out clean, about 1 hour 15 minutes. Cool completely in pan on rack.
Subscribe to:
Posts (Atom)


