I thought I would take a little break and insert a simple recipe here, it's been a while.
Really, basic popcorn is very easy, and I prefer it so much to any bagged microwave popcorn.
You can flavor it however you wish, and more likely than not it'll be less salty and greasy than anything you'd pull out of the microwave.


Here in the US most corn you can find for purchase is GMO. However, popcorn is not; popcorn wouldn't be popcorn if it were modified. It wouldn't pop if it's structure were changed.
Some nights dinner is light and simple over here- a pureed soup and popcorn. Maybe a salad on the side, perhaps apples, pears, cheese, and almonds.


Sometimes I like to use coconut oil and add a little salt and curry powder to the finished popcorn.
Other times, maybe and a different spice blend.
Truffle salt?
Rosemary or garlic infused oil?
Finely shaved Parmesan?
Dill, onion and garlic powders?


I was thinking about making homemade Christmas gifts this year- and making things that are consumable. Things that are generally used, enjoyed and gone. They don't have to be put away, they take up space on a mantle, no one has to wonder, 'now what am I going to do with this?!' and hopefully no one feels the need to re-gift them.

I can't make any promises, but I was hoping to post a few things that might make nice gifts.
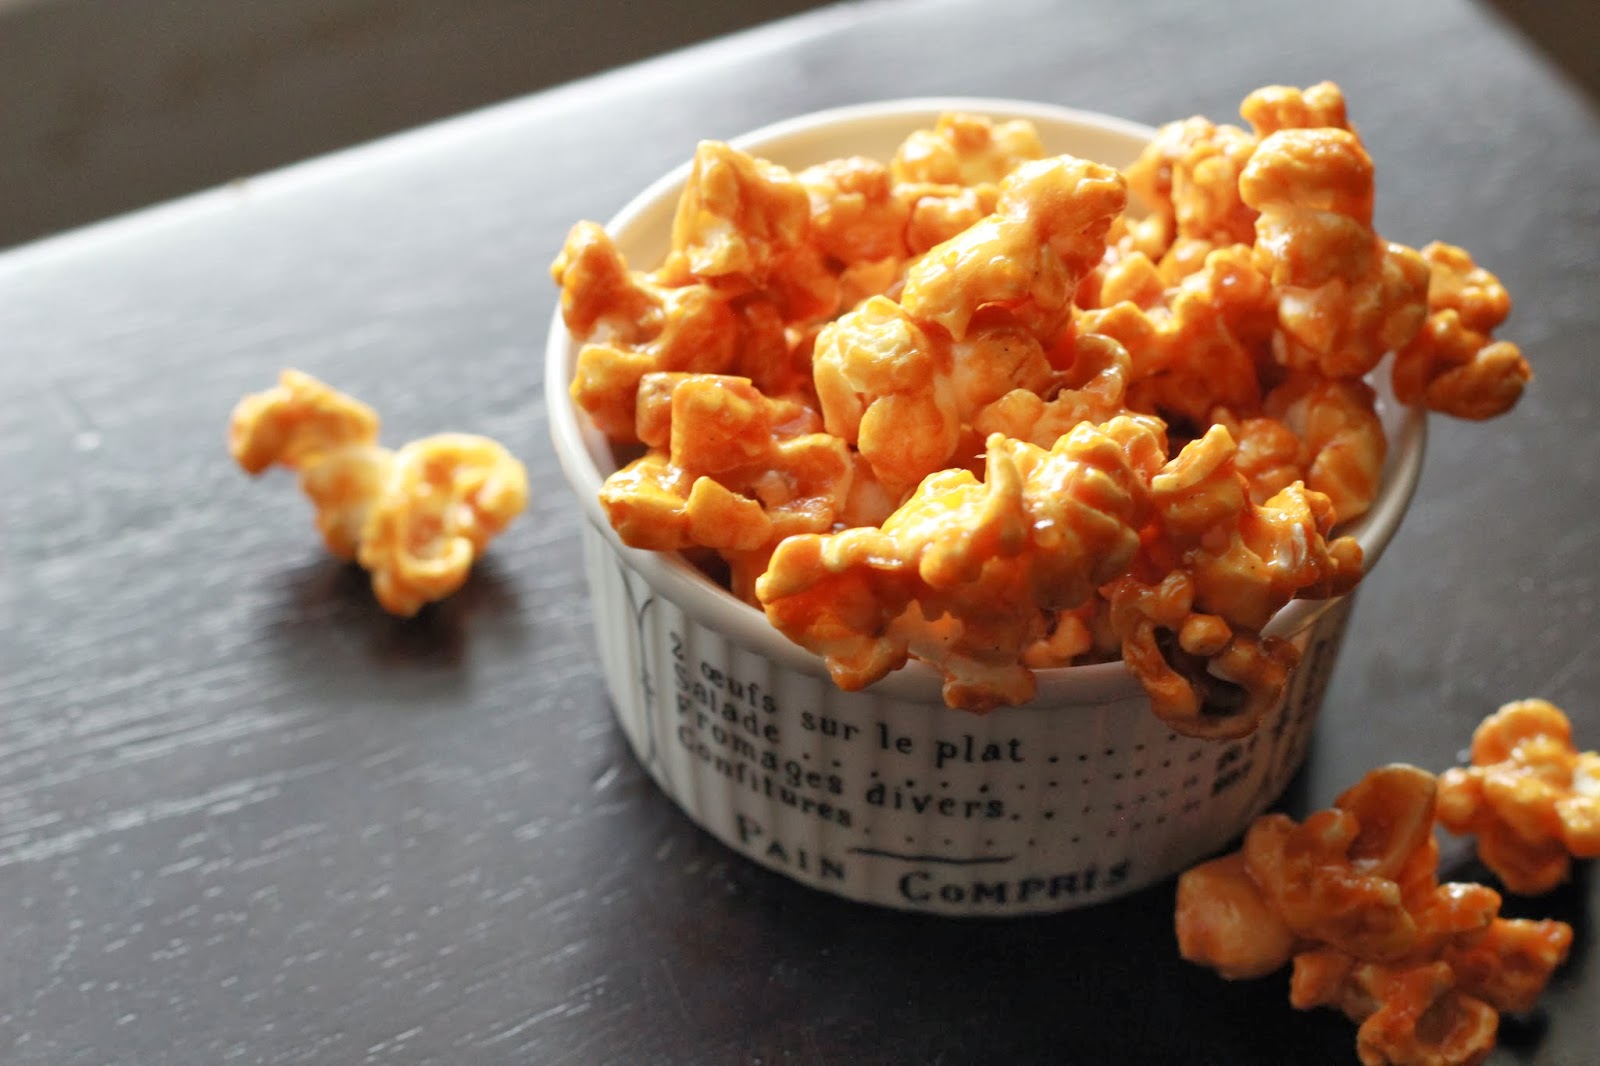
Well, other than gifting purposes, caramel corn is also good to have around for a party or if you're expecting people to stop by and visit.
This is a caramel corn version without the use of corn syrup, and I'm happy it worked out.
The idea comes from Alana Chernila's Homemade Pantry, where there's a recipe for maple caramel corn.I liked that recipe enough initially, thought it wasn't my all time-favorite, and I wanted to make some changes.
The most notable change is the use of golden syrup.
Golden syrup is a gorgeous raw sugar syrup, already caramel-y, a little deep with some molasses notes- really great stuff.
I'd like to tweak the maple syrup recipe to make it more to my liking, but that will have to wait a little bit for sometime down the line.
Maybe I'll try another time with little molasses in the mix, or honey, perhaps different types of sugar.
Also, as an aside, if you're wary, I would recommend starting with less salt than called for. Perhaps go for 1/2 t (3 g) and add more after tasting the caramel but before adding the baking soda. I've used both amounts, I like both but I would say it depends on personal taste. The baking soda adds some semblance of salinity if that helps at all.
And be careful of hot syrups... hot sugar = nasty burn.

a little cinnamon stirred into the caramel at the end of cooking
maybe a little chili powder
slivered almonds or pecan pieces sprinkled on top before baking
drizzle of melted and tempered chocolate after the popcorn has cooled
dried cranberries stirred in at the end
Basic Popcorn
makes about 9 c (around 2 L)
1/2 c (110 g) popcorn kernels
2 T (30 ml) cooking oil (such as grapeseed, safflower, sunflower, or coconut)
Seasonings, as desired
In a 5 qt (about 5 L), heavy dutch oven heat the oil over medium-high heat until it shimmers. Add the popcorn and shake the pan to distribute evenly. Cover the pan and continue to cook, shaking occasionally at first, then more vigorously when the corn really starts to take off.
Once the popping starts to diminish, and there are 2-3 seconds between pops, take the pan off the heat. Remove the popcorn to a large bowl, set aside if using for caramel corn, or season as desired.
**************************
Salted Caramel Corn
9 c popcorn (see above recipe)
7 T (100 g) unsalted butter
1/2 c (120 ml) golden syrup (preferably Lyle's)
1/3 c plus 1 T (93 g) raw cane sugar
3/4 t (5 g) fine sea salt
1/2 t (5 ml) vanilla extract
1/2 t (3 g) baking soda (bicarbonate)
Preheat oven to 225 F/110 C.
Lightly grease a 4-sided sheet pan and set aside.
In a medium saucepan, combine the butter, syrup, sugar, and salt. Stir over medium heat until the mixture comes to a boil. Stop stirring, and let the caramel cook 5 minutes. Remove the pan from the heat and stir in the vanilla. Add the baking soda, and stir (careful, it will foam up).
Pour the caramel over the bowl of popped corn and fold quickly but carefully, so as to coat, but not deflate or crush the popcorn too much (don't worry, it doesn't have to be perfect- the caramel will even out a little later).
Place the pan of popcorn in the oven and bake 1 hour, stirring every 15 minutes.
Remove the pan from the oven and stir again. Let cool completely, stirring every few minutes until the popcorn no longer adheres to the pan.
Once cool, store in an airtight container.
Best within 5 days.