Thursday, June 30, 2011

Green Apple - Cucumber Soup


A nice, cold, slightly sweet, pale green summer soup.


Place it in the freezer a couple hours before serving so it becomes a little frosty, then make sure to whisk it before serving.


Green Apple - Cucumber Soup
serves 8

6 Granny Smith apples, 3 peeled
2 large cucumbers, 1 peeled
2 T freshly squeezed lime juice (from 1-2 limes)
2/3 c water
2 packed T fresh mint
1 packed T fresh dill
1 1/2 t kosher salt
1/2 t freshly grated black pepper
1/4 t ground coriander
1 c sour cream or plain yogurt
1 bunch scallions

Roughly chop half the apples and one cumber and puree in a large food processor or blender with 1 T lime juice and 1/3 c water. Pour the mixture into a large, fine strainer, pressing out as much liquid as possible with a spatula. Repeat with remaining apples, cucumber, water, and lime juice.
Pour 1/3 of the juice back into the food processor, add the mint leaves, dill, salt, pepper, coriander, sour cream, and roughly chopped scallions. Puree until well blended. Pour this creamy mixture back into the rest of the juice and whisk until combined.
Cover and refrigerate at least an hour so the soup is well-chilled and the flavors meld.
If desired, place the soup in the freezer a couple hours prior to serving so that it is very cold and a little icy. Whisk occasionally to break up any ice chunks that form.
Serve with a dollop of sour cream, extra mint or dill, diced tomato, or croutons if desired.

Monday, June 27, 2011

Cottage Cheese (and Ricotta)


You've bought too much milk and don't know what to do with it?
You're suddenly part of a dairy co-op? (Hey, it happens.)

This is milk in a different form- and it takes up less fridge space than a gallon of milk.
And it's very simple.
AND it tastes better than store-bought cottage cheese.
It's actually got a flavor like sweet and milky fresh mozzarella. Of course, this depends on the salt content...


Simple cheese making is a good project for kids in a science experiment type of fashion- and it may elicit a nice "wow" effect.
The milk doesn't get so hot that it'll burn (just be careful not to splash).
Warmer than body temperature at 98.7 F, 120 F might be more like very warm bathwater.

Eat it with:
cantaloupe
apples
bananas
strawberries, raspberries, blackberries
tomatoes, sea salt, black pepper, basil
honey
cinnamon
lemon zest
with crêpes...


I recently read a little article about paneer (mostly because I like cheese and happened to come across this article). Paneer is another fresh cheese, Indian in origin, a vegetarian protein source. It seems to be pretty much the same as cottage cheese, but the curds are pressed into a more solid form, sort of like a block of tofu. It's then often cubed and added to a variety of dishes. If you've never had it, perhaps the next time you're in an Indian restaurant you should order something with paneer.

With the milky whey that you drain off, you can turn around and make ricotta cheese (because you might as well get the most out of the milk you bought).

Cottage Cheese
makes about 2 cups

1 gallon (16 c) whole milk
2/3 c white vinegar (or lemon juice)
1/2-1 t kosher salt
1/4-1/3 c heavy cream

Heat the milk in a large, heavy-bottomed pan over medium heat until it reaches 120 degrees F (the outside of the pan is quite warm, but bubbles don't yet appear in the milk).
Remove the pan from the heat and add vinegar. Stir slowly for about 2 minutes.
Cover the pan and set aside for 30 minutes.
Place a large sieve or colander over a large bowl or pan.
Line the sieve with a tea towel (a smooth flour sack towel, not a plush towel) or several layers of cheesecloth. Ladle or carefully pour the curds and whey through the towel. Pick up the towel and squeeze out the excess whey.
Place the now dry curds in a bowl and toss with salt.
If eating immediately, fold the cream into the cheese curds. If using later, add the cream just before serving.
Store in a jar in the refrigerator.

________________________________________________

Ricotta Cheese

Let the whey rest a few hours after draining the cottage cheese.

Add 1/2 c whipping cream to the whey for extra creaminess if desired.
Place the leftover (milky) whey in a large, heavy-bottomed pan. Slowly heat to the boiling point, stirring occasionally to keep the curds from sticking to the bottom of the pan. Once the mixture reaches a boil, you may add an extra 1/4 c vinegar if desired. Remove the pan from the heat and let it sit at room temperature until it is cool enough to handle easily.
Strain out the ricotta cheese curds with a small, fine-mesh strainer (or spoon the mixture into several layers of cheesecloth placed in a strainer).

Use in salads, omelettes, on little toasts with some herbs...

And the whey leftover form ricotta making?
If you want you can drink it, use it in breadmaking, use as part of a smoothie...

I know dogs really like to drink it...

Saturday, June 25, 2011

Roasted Lemon Chicken Breasts


The other day I was sitting at the bookstore trying to get some work done.
Work and cookbook perusal, that is.

While sitting next to the cookbook stacks the things you see and hear can be interesting.


There was a man who came into "my" area with a store employee. He swept up a book by a cook I can't stand. I imagined myself standing up and asking what he thought he was doing- I hate this woman. But, that's not the kind of thing I do- especially to strangers.
He went on about how great this woman was to the employee.
Fine. He's entitled to his (possibly erroneous) opinion.


A little later, two women walked in. After a quick glance at the large selection of cookbooks, one complained loudly, "WHO has time to cook these days!?"
Then she went on to complain about cooking.
My questions are:
1. Why do you care and why can't people do what they want with their time?
2. If you have such a vehement reaction to cookbooks, what are you doing in the cookbook section?


Once upon a time I had a roommate with a similar opinion. However, this roommate complained that people did things from scratch instead of using canned goods.
So what?
If someone wants to do something from scratch, why is it such a problem for you?
Who knows...


I love lemon chicken. So good.
Well, pretty much lemon anything at all.

It's a nice dish you could serve at any time, and it's fairly simple.
The next best thing to grilled lemon chicken for a year-round summery flavor.
Lemon chicken goes perfectly with couscous (you need something green too, though).


Any of the prep work you do directly effects the flavor. The only actual cooking you do is sear the chicken to get a golden crust, then you pop the pan in the oven and let it do it's thing.


Make sure you thoroughly wash the lemons (with soap!) before cutting or zesting them.


You could actually use either chicken breasts or thighs, depending on your particular meat (dark vs. light) and size preference.
Another riff on a Barefoot Contessa recipe...

Rosted Lemon Chicken Breasts
Serves 6

1/4 c olive oil, plus extra for brushing
5 large cloves of garlic, minced
1/3 c dry white wine
Zest of 1 (small) lemon
Juice of 1 (small) lemon
1/2 t dried thyme OR 1 t fresh minced thyme leaves
Kosher salt
Freshly ground black pepper
6 boneless, skin-on chicken breasts
2 lemons, thinly cut into rounds

Preheat the oven to 400 degrees F.
Warm the olive oil in a small saucepan over medium- low heat. Add the garlic, swirl the pan on the heat for about 1 minute, and remove the pan from the heat. Combine the wine, lemon zest, lemon juice, thyme, 1 t salt, and 1/4 t pepper to the oil mixture and pour into a 9x13 inch glass baking dish.
Pat the chicken breasts dry and trim any excess fat and skin. Brush the skin side lightly with olive oil and sprinkle with salt and pepper.
Heat a pan over medium-high heat until hot. Place chicken breasts skin side down in the pan and sear about 4 minutes. Do not touch the chicken at all for the first 3 and a half minutes, you want to get a nice golden sear! Once golden, remove the chicken from the pan and place skin side up in the pan with the lemon marinade. Repeat with remaining chicken breasts and nestle them all snugly together in the pan.
Top each chicken breast with one or two lemon slices and place the pan in the preheated oven. Cook the chicken about 30 minutes, remove the pan from the oven and cover tightly with a layer of aluminum foil. Let rest about 10 minutes while covered.
Serve chicken hot with pan juices.

Wednesday, June 22, 2011

Butter Almond Cake and Rhubarb-Raspberry Compote


I saw something that looked very nice on the menu of a French restaurant I visited recently.
It sounded so good, but I didn't order it because I wasn't feeling like cake at that moment- I ordered a Grand Marnier souffle instead (it wasn't a bad choice).
However, I took the cake idea...
I freely admit to keeping a teeny tiny Moleskine notebook with me. For notes.
Notes and ideas.


Inspiration?
Revelation?
Nope, just cake.


Essentially, the cake is a version of pound cake or quatre quarts (in French), which is supposed to have 4 ingredients: flour, sugar, eggs, and butter.
This one is slightly gussied up.


Quatre quarts is a basic cake that's actually a specialty of Brittany in the northwestern area of France.


Butter is a specialty of Brittany, and those Breton people certainly do have some fine butter in their area...
Caramel and salt are also specialties, but we're not really discussing them today.


The compote is a nice tart accompaniment to the dense cake.
Actually, the cake texture and flavor remind me a bit of marzipan.


I use the vanilla bean because I like vanilla beans a lot, but also since I'm able to use the seeds from the pod for the cake, then turn around and use the bean (and residual seeds) for the compote. The bit of vanilla will add a faint vanilla flavor.


You can use unsalted butter, just remember to add 1/2 t salt with the butter.

Butter Almond Cake and Rhubarb-Raspberry Compote
Serves 8-10

Cake:
1 c (2 sticks) salted butter, room temperature
1 c sugar
1 c AP flour
2/3 c almond flour
3 large eggs
1/2 vanilla bean (and/or 1 t vanilla extract)

Compote (makes about 2 c):
16 oz. rhubarb, washed
12 oz. raspberries, rinsed
1/2 c water
1/3 c sugar
1/2 vanilla pod (empty since the seeds have already been scraped for use in the cake)- optional

Preheat oven to 350 degrees F.
Grease and flour a 9x5 inch bread pan.
Combine flour and almond flour in a medium bowl and stir to combine. Set aside.
Cream butter in the bowl of an electric mixer until lightened. Pour in the sugar and beat until fluffy. Cut the 1/2 vanilla bean open lengthwise and scrape out the seeds. Add the vanilla seeds to the butter and mix until dispersed (or add the vanilla extract). Add the eggs, one at a time, beating well between each addition. Slowly add the flour mixture, beating until just combined.
Pour the cake batter into the prepared pan and smooth it out a bit (don't worry, it'll "melt" into the pan in the oven).
Bake 45-50 minutes, or until the top is golden and a cake tester inserted near the center comes out clean. Cool the cake in the pan about 15 minutes, then turn the cake out onto a wire rack.
Cool completely.

While the cake bakes, trim the ends and leaves and peel the rhubarb. Cut into approximately 1 inch pieces. In a large pan place the rhubarb pieces, water, sugar, and vanilla pod (if using). Cook the rhubarb over medium heat approximately 15 minutes, stirring occasionally, until it becomes soft and breaks down. Add the raspberries and cook for 5 minutes more. Remove the pan from the heat and let cool.

Slice the cake and spoon compote over the top.
Whipped cream?

Leftover compote? Use it on vanilla ice cream or plain or vanilla yogurt.

Sunday, June 19, 2011

Herbs


Some culinary herbs...


Basil
Delicate annual (sometimes a perennial in some climates), slightly licorice-y flavor, strong and sweet. Basil should be added to food at the last minute, chiffonade or tear just before adding to food. Used in sauces, salads.


Chives
Perennial with a delicate onion flavor. Chives are good as a last minute finish for flavor and color, used with fish, salad, potatoes, soups.


Dill
Annual, delicate and feathery, dill loses flavor when cooked and best added at the end to finish a dish. Used with fish, potatoes, pairs with cucumbers, salads, good added to creams and yogurts.


Lavender
Perennial (if you can get it started!), sweet and flowery flavor, pairs well with vanilla and/or lemon, fruits.
Nice for confections, cookies, and cakes.


Marjoram (Golden Marjoram)
Perennial, piney-citrus flavor, closely related to oregano (but milder)


Oregano
Perennial (annual in colder climates), warm (can be almost numbing) and slightly bitter taste. Oregano pairs well with meat, fish, vegetables, tomatoes, sauces/Greek vinaigrette.


Italian Parsley
Annual with a fresh green flavor, best used as a garnish for a splash of color, or added at the end of cooking. Italian parsley tastes much better than curly parsley (besides, the curly is normally used as a garnish thrown on the side of the plate).
Fish, chicken, vegetables, salad, sauce.


Rosemary
Hardy perennial, astringent and piney flavor. Rosemary is best if cooked with food for a time so the flavor is released, used with meats, beans, pairs well with garlic. Woody stems can be used as a flavor-enhancing skewer for grilling.


Sage
Perennial with a strong musty flavor. Used with meats, poultry, great with savory fall pumpkin dishes, classic in a brown butter sauce.


Thyme
Perennial, can have a strong, slightly antiseptic, clove-like flavor. Wonderful for meats, chicken, fish, eggs, soups and stews.
Used as part of a bouquet garni.
Thyme releases flavor after being cooked, like rosemary.

Wednesday, June 15, 2011

Cantaloupe and Thyme Salad


So, a while ago I was eating cantaloupe with my mother.
It was a cantaloupe lunch.
She'd just been to the grocery store and had also bought some nice salami.
At the deli counter another woman had ordered this salami, and asked for it to be cut paper thin. Mom decided to get the same thing.


While eating the cantaloupe we eyed this salami. It must have been just sitting there taunting us, as salami is sometimes apt to do. About 3 inches in diameter, thin slice, outside rim flecked with coarse black pepper...
Thoughts of proscuitto and melon crossed our minds, and we found that the salami and melon was just as good.


Salty meaty flavor with soft, sweet and fresh, ripe, juicy melon on a bed of tender green lettuce.
When fruit is in season, it's fantastic to have in salads.
For some reason I decided thyme would go well with the whole thing.
Ta-da.
The whole thing is hearty but light.


Cantaloupe and Thyme Salad
serves 8

2 heads Boston lettuce, washed and torn
1 cantaloupe, halved, seeds removed, sliced, and rind removed
1/3 lb. good quality, thinly sliced dry salami (mine was Boars Head brand Bianco D'Oro)

3 T cider vinegar
1 T honey
1 t Dijon mustard
1 T thyme leaves, stripped from stems and roughly chopped
1/2 c olive oil
1/2 t kosher salt
Freshly ground black pepper
Extra thyme sprigs, for garnish

In a small bowl, whisk together vinegar, honey, Dijon mustard, and chopped thyme. While whisking constantly, slowly drizzle in the olive oil. Add salt and several good grinds of black pepper and whisk to combine. Taste with a bit of lettuce and adjust seasonings as necessary. Let the vinaigrette sit at least 15 minutes before using so the thyme has a chance to infuse a bit.
Divide lettuce among plates. Top lettuce with sliced cantaloupe and folded pieces of salami. Drizzle salads with vinaigrette. Strip the leaves from the extra thyme sprigs and sprinkle over the cantaloupe.
Grind a little black pepper over the whole thing if desired.

Sunday, June 12, 2011

Vegetable Sushi


Long story short, when my older sister wanted to make sushi for the first time, she got her list together and went to a local Asian grocery. She told the woman at the store what she planned to do and showed her the recipe she planned to follow.


Apparently the woman told her what she had was all wrong and gave her instructions on what to do instead.
This recipe is adapted from that fateful encounter.


It's good, it's good for you, and you feel quite accomplished when you're finished with the project.
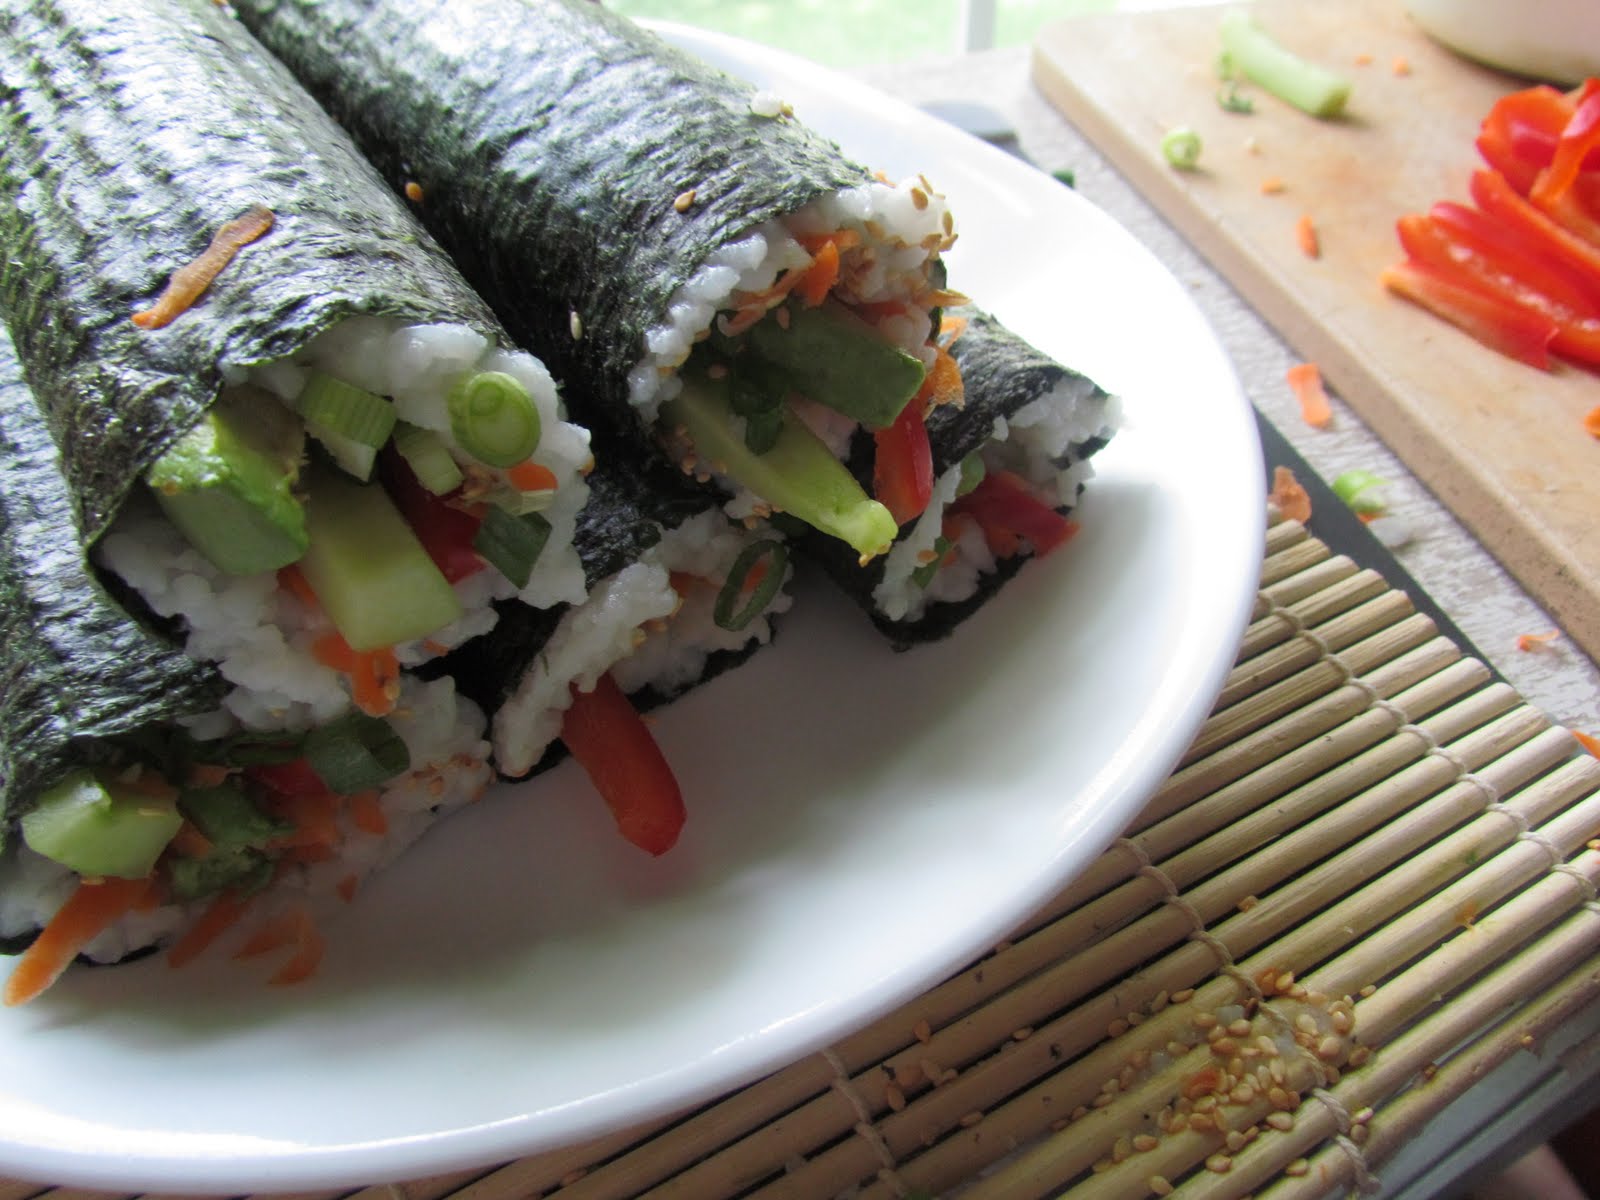
You can use whatever vegetables sound good.
You could also use fish (salmon or crabmeat), but then it wouldn't be vegetable sushi, now would it?


A sushi mat, reminiscent of roman blinds, will make the rolling job much easier. They're fairly cheap, which is certainly a plus.


Make sure the rice you use is a short-grained variety- the shorter the grain, the stickier the rice. No one wants fall apart sushi.
Seriously.


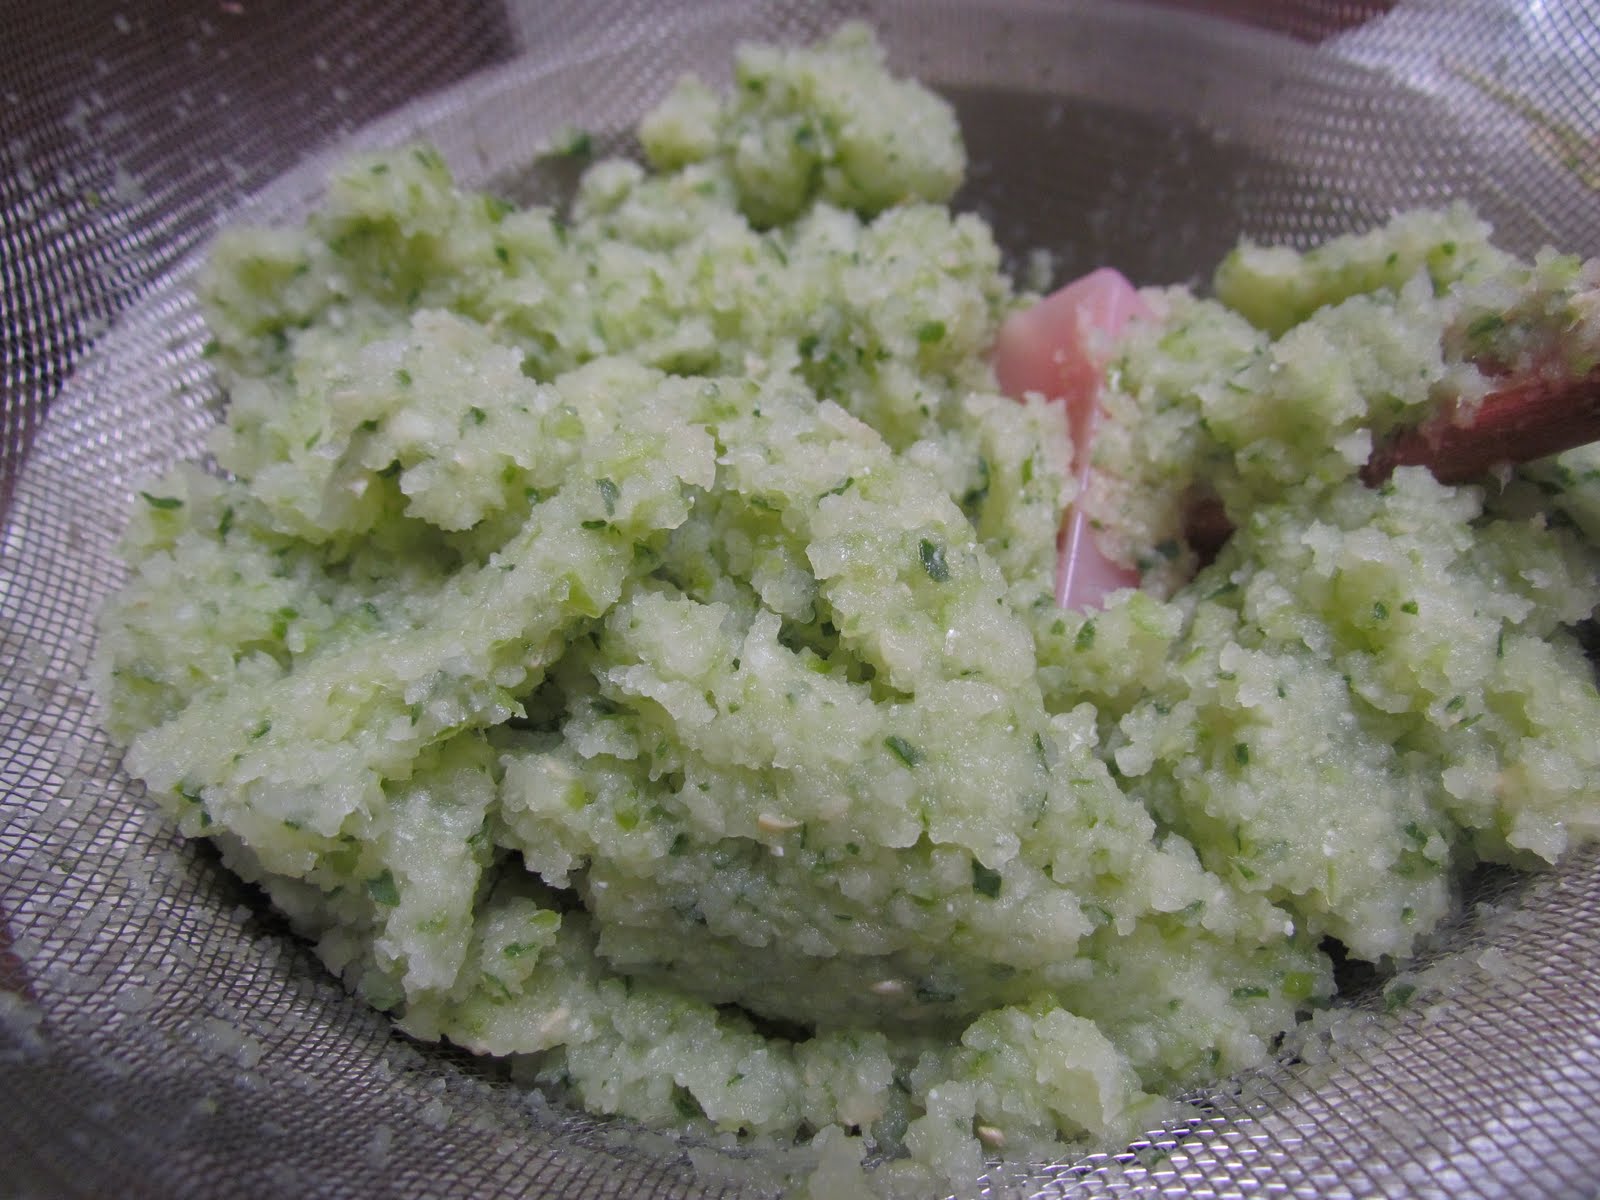
The pink stuff in the photo? Not salmon, it's ginger.

Vegetable Sushi
Makes about 5 whole rolls, which can be cut into about 40 pieces total

2 c short grain rice (Calrose is a good type for this)
4 1/2 c water
1/3 c sushi rice vinegar

5 Nori seaweed sheets

Vegetables of your choice such as:
Carrot, peeled and shredded
Avocado
Red bell pepper, cut in thin strips
Yellow bell pepper, cut into thin strips
Cucumber, peeled, seeded and cut into strips
Scallions, chopped
Red onion, chopped

Other options for the inside:
Sesame seeds
Pickled or powdered ginger
Wasabi

For serving: soy sauce, pickled ginger, wasabi

Bring water to a boil. Add rice, stir, and reduce heat to low. Cover and simmer about 40 minutes (if the rice mixture overflows a bit, cock the lid, reduce heat a bit, and continue cooking). Remove the pan from heat and let rest 10 minutes. Scoop rice into a glass or ceramic bowl (not metal), add the sushi vinegar, and stir to incorporate. Let the rice cool until it is just warm and can be handled relatively easily.
Place a bamboo sushi mat on a cutting board and place a piece of nori on top, shiny side facing up and centered on the mat. Have a small bowl of water close at hand.
Scoop approximately 1/5 of the rice onto the nori. Dip your fingers in water and press the sticky rice onto the seaweed starting at the side closest to you, but not smoothing so far as the side farthest from you. The far side must remain without rice, but the rice should be spread completely horizontally across the nori. Smooth the rice so that it covers about 3/4 of the sheet and is about 1/4 inch thick.
Pile the vegetables on the side closest to you, making sure they're fairly even and in horizontal rows across the rice. Sprinkle a row of sesame seeds on, spread on wasabi paste and/or layer on a row of ginger (if using).
Holding the vegetables with your fingers and the mat with your thumbs, gently but firmly roll the sushi away from you. Be careful, go slowly at first, and adjust as you go, making sure to roll the contents as tightly as you can. It takes a little practice...
Roll all the way to the end. The extra bit of un-riced seaweed should stick to the rest of the roll, "gluing" itself into a cylinder.
Refrigerate and cut into 8 rounds when cold.
Serve with pickled ginger, wasabi, and soy sauce.

I mixed up an aioli from mayonnaise, soy sauce, wasabi powder, sesame oil, and a little milk to thin it out.