Showing posts with label cookies. Show all posts

Wednesday, September 3, 2014

Pantry Cookies


Edison had the lightbulb, Tesla the alternating current.
Today, as far as societal contributions go, I have cookies.
No, it's not necessarily in the same realm as the other two- I can freely admit it.
Then again, those two things are dangerously inedible.

But as far as inventions go, this is one I've been working on and tweaking. The thing about wanting to get it right is that sometimes you have to try and try again. With cookies, it's both a good and a bad thing (though bad is relative and the degree is debatable...).


It's definitely good to be able to share something like this when you're making multiple batches. That way, you can get input from multiple people while sharing the wealth, so to say.
And, of course, there IS a point when you just can't deal with more cookies.


I figured these are things generally found in an American pantry (thus the name).
Well, they're found in MY pantry, and I'm betting 9 times out of 10 I could make them without having to make a grocery run.


I've been using natural peanut butter as of late- just ground peanuts and nothing else. Not completely creamy, but not totally crunchy either, it's somewhere in the middle. I don't know how the recipe would behave with another type of peanut butter- namely the more commercial creamy peanut butters one might normally choose for cookies.


The cookie dough is slightly crumbly, but malleable. As such, they should be rolled into balls, or packed tightly before baking. They may take a tad more work when portioning them out, but the good news is that the resulting texture is crunchy on the outside and chewy on the inside.

There is potential for multiple adaptations. Add some nuts, try dried cranberries, take out the raisins, add a little more chocolate.


Pantry Cookies
Makes about 40, generous tablespoon-sized cookies

1 1/2 c (375 g) natural peanut (... sunflower or almond) butter

3/4 c (160 g) packed brown sugar
1/2 c (120 g) granulated sugar
1 t (5 g) salt
1 1/2 t (7 ml) vanilla extract
1/2 t (4 g) baking soda
2 large eggs
3/4 c (90 g) rolled oats (GF if that's what you're looking for)
1/2 c (45 g) shredded coconut
2/3 c (100 g) chocolate chips (or chopped chocolate)
2/3 c (80 g) raisins

Preheat the oven to 350 F/ 175 C.

In stand mixer fitted with the paddle attachment, cream the peanut butter, sugars, salt, vanilla and baking soda until well combined. 
Add the eggs one at a time and mix well between additions then scrape down the sides of the bowl. 
Add the oats and coconut and mix well.
Pour in the chocolate chips and raisins, and mix just until evenly dispersed. 

Using a small cookie/ice cream scoop or a spoon, scoop generous tablespoon-sized (walnut) portions of cookie dough onto a parchment paper lined cookie sheet. Make sure the cookie dough is well-packed to insure that the cookies stay in one piece. Alternatively, roll walnut-sized balls of dough and place on the cookie sheet. Flatten the mounds of dough slightly with your fingers. 

Bake the cookies 10-12 minutes (they will continue to cook and set as they cool).

Let the cookies cool on the pan about 10 minutes before removing to a rack to cool completely.
Store in an airtight container.

Monday, November 4, 2013

What Are We Working With?


In this area of the world AC is rare. Not many have cars. No running water- bathing is done in the river or with the jugs of water someone has carried back home. Electricity in the little shack? Nope. 
Interestingly, everyone has a cell phone, but it'll only be re-charged if an extra outlet is found when people are out and about.


Children don't really have many toys, and in fact we saw some playing with trash. Taking a walk and trailing a plastic bottle on the ground which was connected to a stick. Maybe it was a car, maybe a boat, perhaps it was a pet...
Although sad, it made me think about "the occupation of being a child" from what should be considered my "real" job. Being a child involves filling time with play, activity, and imagination. That's their job, and it's how they learn.
Toys do have a purpose, though they don't require plastic and bright colors. Really, with a little imagination a simple stick can be a fine toy.
Even more sad, some children didn't seem to play at all, but just sat around outside in the dusty red dirt all day.
Many of the adults don't present a good example of keeping themselves occupied during the day either.
In my own American life, I can't say I could do that. Not doing something, not getting anything done all day every day would drive me crazy.


You might think that people would be bothered by this, but from what I heard they don't consider themselves poor or pitiable in any way.

Some people only eat once a day, and even then, it may only be manioc.
Mixed with water, wrapped in banana leaves and steamed, it's pasty and grey-ish, without much flavor at all.
In fact, a lot of the diet seemed to be starchy. There was rice, green plantains, taro, the manioc... at least one African meal had all of these things along with chicken and a condiment of very hot crushed fresh peppers.
Yes, lots of flavor and pain in those peppers. 

My purpose in Gabon, as I had said before, was to teach simple baking, and I really wanted to use what was easily available for that purpose.  I wasn't really sure what I would find.


Amazingly, baking soda (bicarbonate) is available only in the capital, Libreville. 
Baking soda can no longer be taken for granted- it made me think about how I couldn't just run out to the store and pick up even something that simple. If you don't have baking soda, there are a lot of baking options that suddenly disappear.


In Mouila, the grocery stores are not packed chock-full of your wildest supermarket shopping dreams.
The couple stores we did see were far more basic than what we're used to. Bags of rice, flour, sugar, butter, shelf stable milk, red palm oil, eggs, cookies, cans of applesauce imported from Belgium (in fact, most everything is imported, some from Brazil (!?) of all places, but much of it from France... and I'm going to assume this is the case because Gabon is a former French colony).
As small as these bare bones stores were, they did have a very impressive array of liquor for sale.
Chocolate? You can choose between Nesquick and a Nutella knockoff.


When I saw there was Nutella-ish-ness available, I thought I could make a chocolate-hazelnut cookie with the inspiration from good old peanut butter cookies. Although it didn't turn out like a peanut butter cookie, they were successful in their own way as thin and crispy chocolate wafers. Leavening turned out to be completely unnecessary in this case.


The nice thing about this area of Africa is that the fresh fruit is literally growing right outside.  Depending on the time of year there choices could include papayas, mangoes, lemons, limes, bananas, grapefruit, pineapple, and coconut.


I had initially thought that shredded coconut wouldn't be such a hard thing to find.
Think again: you'll probably have to do it yourself.


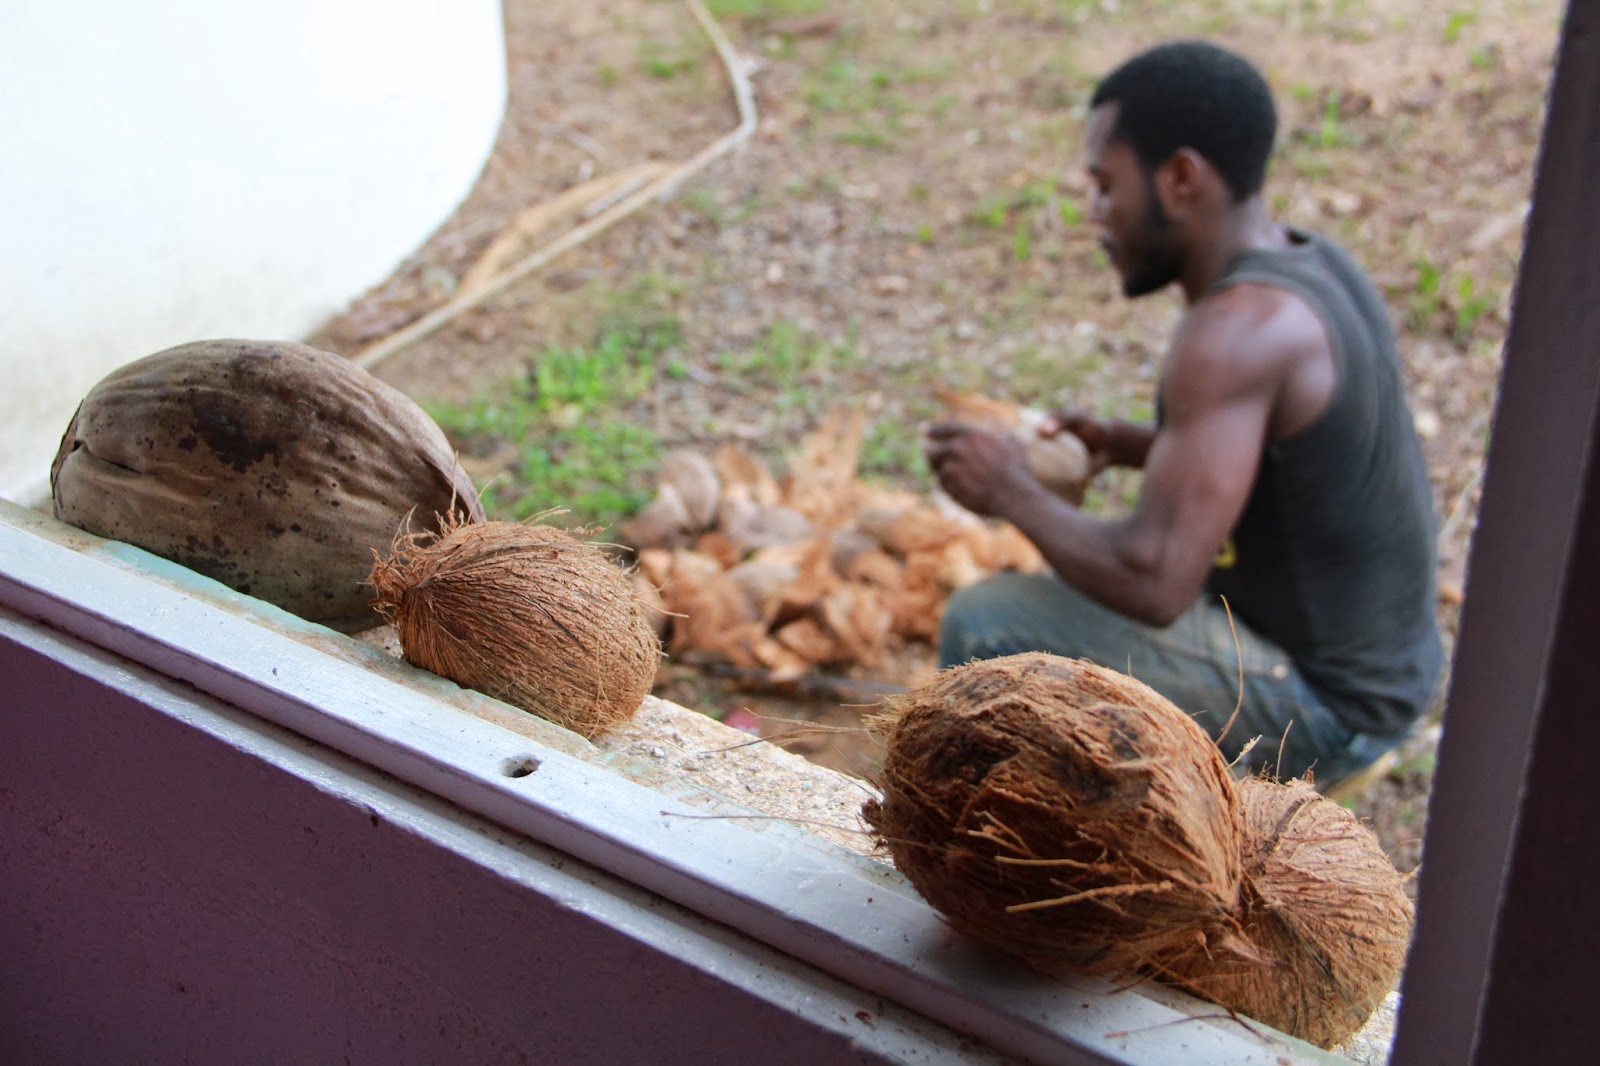
First thing's first: find someone who's handy with a machete.
Coconuts right off the tree need to be peeled with a machete so the husky brown shell is exposed.


Then the top is cut off so the coconut water can be drained. And wow. It's so much sweeter and flavorful than the boxed coconut water you find at the grocery.


The next step is to whack the shell with the back of a knife so that the shell cracks, and then wedge the knife blade between the shell and the meat to get the meat off the shell in large chunks.


The coconut is grated by hand, then dried a bit in the oven before the coconut macaroon batter is mixed.
Coconut macaroons are so much better when made with fresh coconut as compared to the dessicated stuff from the store back home...

Saturday, August 17, 2013

Coconut Macaroons and Mango Sauce


While much of the time we are able to do what we want and try creating new flavor combinations and confections at Kakao (provided we have the time for it), every now and then we have "assignments" or "challenges" for the confectioners at the shop.
I suppose you might call it forced inspiration.
Called Peculiar Pairings, we're given an ingredient or a style and we're supposed to create a confection with it in mind. For example, in the very recent past we've had "Indian" and another using local craft beers. Sometimes the ideas come easier than at other times.
Then there can be the whole question of how to go about making actual the flavor and texture that you happen to envision...

The pairing coming up soon is "comfort food." Well, I couldn't quite come up with anything. I racked my brain trying to think of what I might personally use as comfort food. Suggestions were there, the worst was mashed potatoes, but it was thankfully a joke (what in the world would I do with that even if I wanted to?). I thought of Cheetos myself, and while they fit the bill for comfort food (a good reason I do not buy them) and they do happen to be more usable in their form and texture than the potatoes, I decided that I wasn't ready for Cheetos and chocolate. It might take more finesse than I am able to provide the project. Then again, maybe there's no amount of finesse that would take care of the Cheetos.
Truthfully we do sometimes use things in our confections that one might not immediately expect as appropriate for sweets. But very often, the slightly odd is what people expect from us anyway.


It's not a crunchy, salty snack, but I finally decided on tea for the comfort food I would utilize. Ok, so I suppose it's technically not a food, but I do find tea comforting (in the evening, when it's cold outside, if I'm sick, as an accompaniment to a book). I especially like a good lavender earl grey.
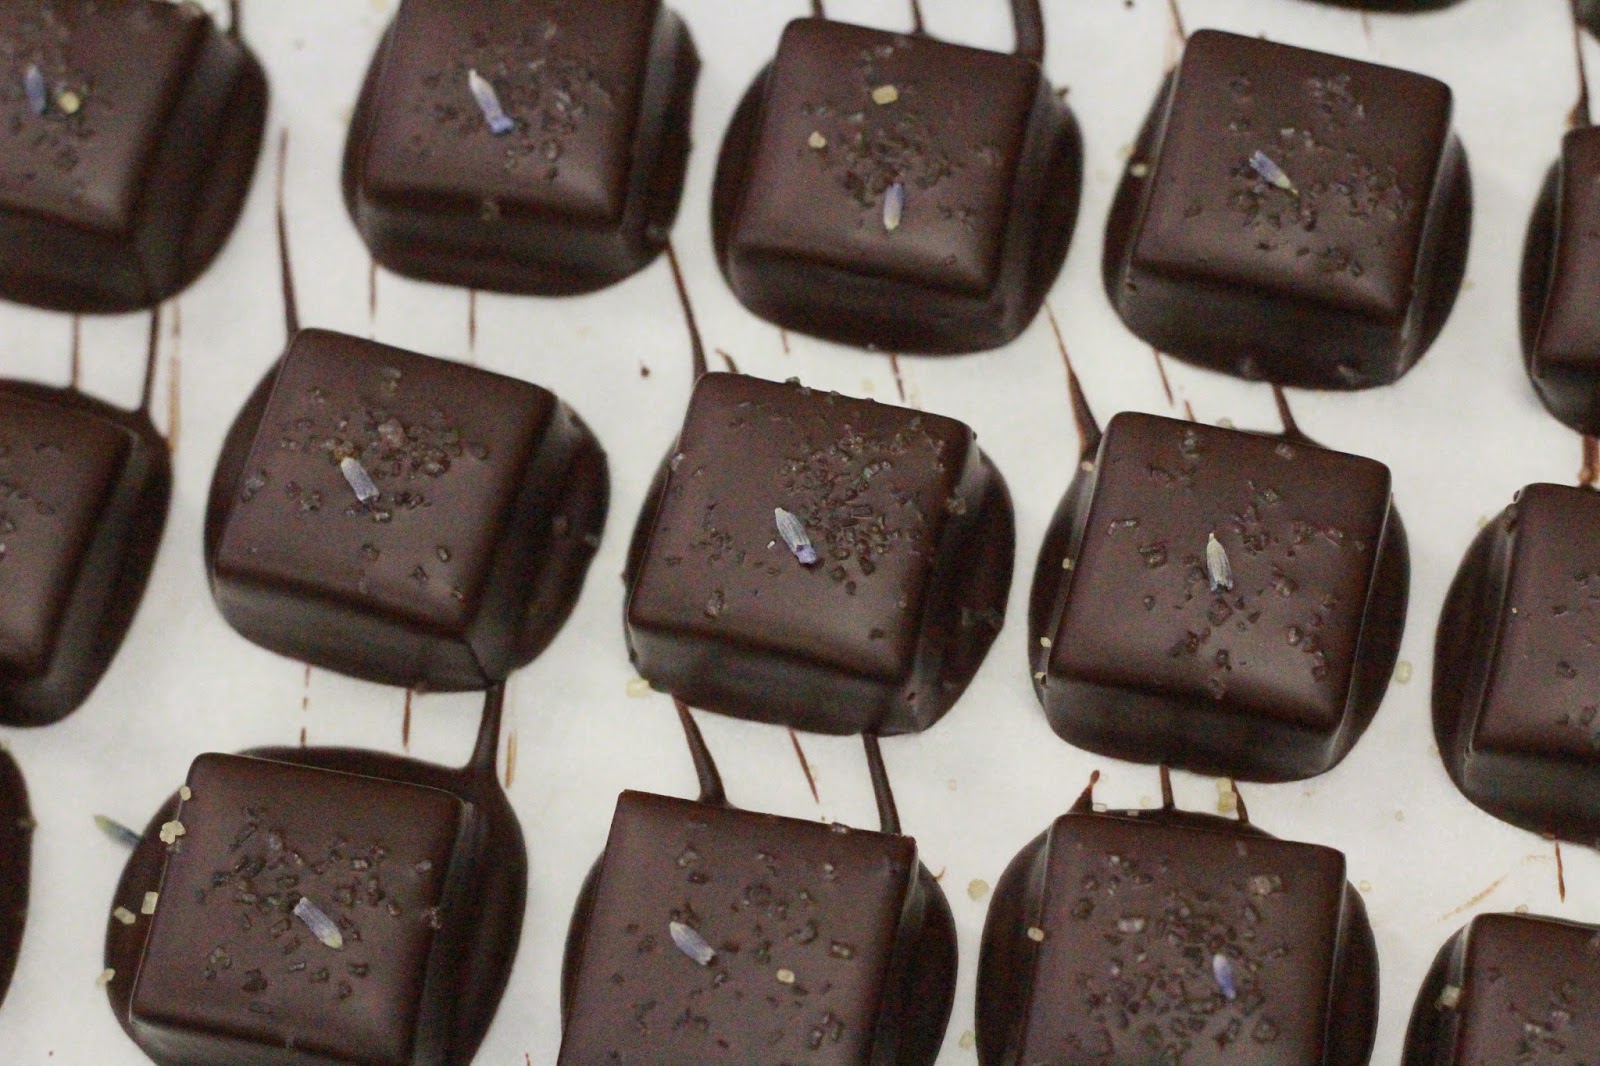
And so, to create the flavor, loose earl grey tea leaves and dried lavender buds were infused in cream. The infused cream was then used to make a batch of caramel. Ta-da.
The caramels were cut and dipped in 72% dark chocolate, topped with a sprinkle of raw sugar for the tea, and one lavender but as an identifier and flavor booster.
While certainly I like it, I have a couple ideas of how I would change it if I made it again...


In addition to all the chocolate, Kakao also carries ice cream from a local ice cream shop. We have two flavors available: a natural vanilla, and classic chocolate.
In addition to the things we have to offer in the day-to-day made in-store (salted burnt caramel sauce, chocolate sauce, lavender syrup...), we also have a specialty sundae every two weeks or so.


Working in a chocolate shop, we're obviously always surrounded by chocolate. Easy access, it's not as tempting as you might think (we often comment on how we really want salt).
Don't get me wrong, it's great chocolate. Most, if not all of us, who work at Kakao eat chocolate every day. The good news is that if you have good chocolate, you don't need as much of it to satisfy a chocolate need.
Maybe that shouldn't be a blanket statement. Maybe quality doesn't matter as much as quantity for some people, but it does for me.


Anyway, the point I was trying to make is that since we're working with chocolate all the time, we frequently crave other flavors. Sometimes it's nice to work with other foods, flavors, and textures to see what we can come up with.
Back to the ice cream...


One of my favorite flavor combinations is coconut and mango, and I especially love good coconut sticky rice with mango for a special dessert following a meal at a Thai restaurant.
So, I wanted to make fresh mango sauce for vanilla ice cream and serve it with a coconut macaroon.


Fresh mango, a little coconut oil, brown sugar, and lime juice... and things turned out pretty well!
(And no, the photo below does not show toasted coconut.)


So, this time around, two recipes in one post, though they certainly don't have to go together (they just did for my purposes).
Use them however you would like.  Or not.
I understand that coconut is one of those things. People are either coconut lovers or coconut haters. The grey area seems very small in this instance, and opinions can be quite strong.
If you happen to like coconut and feel like taking things a little further, temper some good dark chocolate, dip the bottom half of the coconut macaroons, and place them on parchment to set.


As far as the mango-lime sauce goes, it's very nice poured over good vanilla ice cream (sweet and creamy goes well with the fruity and slightly tart sauce- they seem to enhance each other), but it would also be great spooned over cheesecake, with fresh strawberries, or over pound cake with some whipped cream.


Coconut Macaroons
makes about 48, 1 T cookies

14 oz (397 g) unsweetened coconut
14 oz (397 g) sweetened condensed milk
1 t (5 ml) vanilla extract
2 large egg whites, room temperature
1/4 t (1 g) kosher salt
2 T (32 g)  granulated sugar

Preheat oven to 325 F/160 C.
In a large bowl and with a spatula, mix the coconut, condensed milk, and vanilla until well combined. 
In the bowl of an electric mixer fitted with the whisk attachment or with a hand mixer, whip the egg whites together with the salt until soft peaks form. While the mixer is running, slowly add the sugar and continue whisking until stiff peaks form. Gently fold the egg white mixture into the coconut mixture until incorporated. 

Using a small cookie scoop or spoon, portion out the macaroon mixture in about 1 T (visually 15 ml) mounds onto parchment paper lined sheet pans. 
Bake the cookies in the center of the oven 15-20 minutes, until golden, turing the pan back to front about 8 minutes through the cooking time. 

Remove the pan from the heat and let cool before removing the cookies from the paper. 
(*Coconut macaroons freeze well.)


Mango-Lime Sauce
makes a generous pint (more than 473 ml)

about 2 lb. (907 kg) ripe mango
3 T (45 ml) water
1/4 c (50 g) brown sugar
2 T (30 g) coconut oil
1/4 t ( 1 g) salt
2 1/2 T (around 37 ml) fresh squeezed lime juice

Cut the mango fruit from the flat central seed. To do so, I like to use the stem as a guide and cut the "cheeks" away from either side. If it's difficult you may be cutting too deeply, and into the seed. Then score each half mango on the flesh side 3-4 times in one direction to the skin but not through, and then 3-4 times perpendicularly through the flesh so you have a grid cut into it. Flip the skin inside-out so that the cubes you have cut separate from each other and appear to pop out  from the skin. Using a spoon, scoop the cut mango from the skin and into a medium saucepan. Repeat until all the mango is in the pan. Don't forget to peel the skin from the perimeter of the seed and cut the fruit that's still around the seed off into the pan with the rest of the mango. 

Add the water, brown sugar, coconut oil, and salt to the pan with the mango. Simmer over medium-low heat 3 minutes, stirring several times to make sure the fruit doesn't scorch. 
Let the mixture cool slightly and then pour everything into the bowl of a food processor and process until smooth. Add the lime juice and process again until combined. Taste and adjust as necessary (salt, lime juice, a little extra water to thin the sauce).

If not using immediately, let cool completely, place in a covered container and refrigerate until ready to use (the sauce should be fine several days in the fridge). Bring to room temperature before using. 

Tuesday, March 19, 2013

Pistachio Macarons


Pistachios are one of those rare non-vegetable, fruit, or herb, naturally green foods. Really, it's kind of difficult to think of green things not in those categories. Besides the base of green, they've got gold and mauve hues, too, but it's the distinctive shade of green they're identified with.


At the shop we have access to a pistachio oil and wonderful thick, dark evergreen and fragrant pistachio frucht paste (why it's so dark, I'm not sure). It's got a beautiful, deep flavor somewhat similar to cherries and almond.
There was one day when I opened the refrigerator to grab some cream and it smelled fantastic in there (not that the fridge smells bad, but it normally has no scent). It took a bit for me to figure out what it was: a pistachio frucht paste spill. Great smell, not a fun cleanup.
The paste is certainly a nice product for pastry and confections, and a little seems to go a long way to add an intense flavor.
However, that's not the kitchen I live in. While I can find nice things like this at work, they're not found at the grocery store. 
I suppose I can lament the fact that there are many nice things out there that are inaccessible to the home cook. Perhaps the reason is that there's not much call for them, they're more of a niche market sort of thing.
Well, actually, the only person I can think of who would want something like that on hand at all times might be a pastry chef... and I doubt they regularly turn out things at home like they do at the restaurant.
(It's like any other job- work vs. play, and maybe pastry chefs don't "play" like that at home because it's really work.)


So, we make do with what we can find, and in this case raw, whole pistachios are it.


I've been meaning to write about macarons for a long time.  I wrote about them once upon a time...
I make them, but it's very rarely, so I can't say my practice is what it should be for turning out perfect-every-time confections. But even if they're not "perfect", they still taste good.


So, I may have made macarons 12 times in the past four years.
While they usually turn out "fine", they've never been picture perfect. Most of it has to be that they're finicky little things and they take practice. You have to get a feel for them. You have to know the textures you're looking for in the beaten whites, the ground almonds and sugar, the feel of the integrated whites and almonds. They can't be under-folded, and they can't be over-folded.
They can certainly be frustrating.


I've been trying to get these just right.  The combination of measurements and techniques, studying a bit, changing things a little in this way or that with each attempt turned out to be quite a learning experience. 
The same general recipe three times in four days... ugh.
I think I would have had to take a break before I tried again if it hadn't worked out.


But it did (third time's a charm). The batter neither mounded nor pooled into shiny little puddles, the macarons rose better than any I had worked on before, they stayed relatively round, each had a ruffly little pied (foot).


My first attempt at these was a flop. They tasted great on their own without the filling (kind of like wedding cake, and the kitchen smelled like a bakery), but they were lacy from the top all the way through- far too delicate. Too fragile, they pretty much crumbled to sugar when picked up with fingers. Looking into the problems, the textural issues could have been that I needed to pulverize things a bit more in the food processor as well as fold a few times more that I had. After some measurement and technique adjustments, round #2 was certainly better, but still not exactly what I was looking for. This time over-folding could have been an offender as the batter was more liquid than it should have been and though nice and smooth on top, the baked macarons were flat. Although each macaron DID have a pied...


Mistakes happen all the time. There's less room for error with baking than with cooking. And if you have a scale, this is one instance you would really want to use it. A scale will make measurements much more precise.


Another thing, heavy and un-warped pans help keep the macarons ROUND. It's nice that they feel comfortable, like they can relax. They want to be organic and look home-y. Great, but this is neither the time nor place.
Not to be so controlling, but they need to cooperate a little better. It's much easier to match up cookies that are the same shape.

The filling used here is a white chocolate and pistachio ganache with a touch of cardamom. Other potential fillings include chocolate ganache, raspberry, cherry, blackberry, or strawberry jam, vanilla buttercream, lemon curd, or whatever might sound good to you.


You can, of course, add a little food coloring to green things up a bit if you wish.  Remember that the color will always fade upon baking.

Pistachio Macarons
makes about 33

3 large egg whites (about 100 g)
2/3 c (85 g) almond flour (lightly packed)
1/3 c (45 g) ground pistachios (lightly packed)
2 c (200 g) confectioners' sugar
pinch of salt
3 T (40 g) sugar
1/2 t (2-3 ml) vanilla extract (optional)
2-3 drops green food coloring (optional)

*Separate the egg whites from the yolks, place in a covered container, and leave the whites out at room temperature 24 hours. If "aging" the whites ahead of time, place them in the refrigerator after they've been left out at room temperature (this can be done a few days in advance). If previously refrigerated, bring the whites to room temperature before use.*


Have two baking sheets prepared with parchment paper.

Place the ground pistachios, almond flour, and confectioners' sugar in the bowl of a food processor. Process the mixture a couple minutes to combine and further grind the ingredients.  Sift the ingredients into a medium bowl and re-process if you have an excessive amount of nuts that didn't pass through the mesh of your sifter. Set aside. 

Beat the egg whites with a pinch of salt with a hand-held electric mixer until the mixture becomes foamy. Slowly add the 3 T sugar and beat a little longer to combine. Add the vanilla and food coloring (if using). Beat until the mixture becomes stiff- thick and glossy like shaving cream.
Add 1/3 of the almond mixture to the egg whites and fold a few times to combine. Add half of the remaining almond mixture and again fold until slightly combined. Finally, add the last of the almond mixture and fold from the bottom of the bowl, up and over, and pressing the mixture against the side of the bowl. Do this about 10 times and take a look at the consistency. At this point you need to be careful not to over mix- check it, you can always fold once or twice more, but you can't go back. The consistency should be a thick and creamy, an almost liquid-y mixture. When dropped onto itself it should sink back into the mixture after a couple seconds. Fold again as necessary.

Spoon the macaron mixture into a piping bag or into a plastic bag (if using a plastic bag, cut one corner off so that the opening is 1/2 cm across). Pipe rounds of the batter about 1- 1 1/2 inches across onto the parchment paper.
Pick up the pans and hit them against the counter a couple times to release any air bubbles in the cookies. Pop any bubbles that come to the surface with a toothpick.
Set the pans aside for 30 minutes to an hour so that the piped macarons dry on the surface.

Preheat the oven to 275 F/130 C.

Bake each pan 15-20 minutes. Let cool, then using a spatula (a metal pastry spatula if you have it), remove the macarons to a rack to cool completely. If not immediately assembling the finished macarons, place in an airtight container at room temperature until ready to finish.


White Chocolate and Pistachio Ganache

1 c (160 g) white chocolate
1/4 c (60 ml) heavy cream
2 T (20 g) ground pistachios
2 pods cardamom, cracked, seeds removed and finely ground (optional)

Melt the white chocolate with the cream in a bowl set over a pot of simmering water (bain marie). Whisk the mixture until smooth and remove the bowl from the heat. Let cool a few minutes to thicken slightly and add the pistachios and cardamom and whisk to combine. 

To Finish:
Spread a small amount of ganache onto the flat side of one cookie and top with another cookie, flat side against the ganache. Set aside on a sheet pan. Repeat with the remaining macarons. 

Let the macarons sit at room temperature until the ganache is set, then place pan of finished macarons in the refrigerator for a few minutes until they are cold and the ganache is stiff. Remove the macarons to an airtight container and refrigerate at least 24 hours before serving. During this time the macarons will develop their distinctive texture and the flavors will meld. 
Bring to room temperature before serving.


Tuesday, December 18, 2012

Brown Butter Almond Cookies


I read a little story in a magazine many years ago about a woman who made a special brown butter cookie every year for Christmas. It was a painstaking project that took her a very long time, and it always occurred from start to finish after work late into one single evening. She was up all night getting everything exactly right - browning the butter to perfection, preparing the dough, chilling it, shaping cookies in the bowl of a spoon, baking, cooling, assembling little spoon-shaped sandwiches with the precise amount of strawberry jam. As fate might have it, perhaps one or seven would disappear in the process.
Then to decide who deserved these gems and who would really appreciate them (and at this point, it seemed her pool of friends diminished... maybe they suddenly became mere acquaintances or office mates). Even then, anyone who was deemed deserving was only allotted somewhere between three and five.


I think of that story every now and then, although I have no idea why.  Maybe it's because I can't imagine making myself do something like that, going to that extent all in one go and showing up at work the next morning as a zombie.


And all for cookies!
I suppose we can say it's dedication.
I never tried to duplicate the cookies and I don't know if the recipe was even included with the story.


I was trying to make a special occasion cookie, and the above story was running through my mind along with a recent David Lebovitz post on baci di dama.
Luckily after a couple attempts it paid off and the cookies worked out beautifully.
They turn out a bit like buttery, crumbly sables, but even more so because of the ground almonds included in the dough. 


Almonds do certainly have some flavor, but they work well with so many other ingredients since they are delicately understated.  They're there and recognizable, but they don't completely overwhelm.  And browned butter? Additional nutty goodness, bronzed liquid gold.


I will admit that the dough is quite crumbly, and reminiscent of not-quite-damp-enough sand that may or may not hold up in a sand castle. The castle may or may not come crashing down as soon as it's completed.
It's a bit of a challenging dough texture-wise, but that's what gives the cookies some of their charm: they're delicate, melt-in-your-mouth and only *just* holding together.


Beautiful with coffee or tea.

Brown Butter and Almond Cookies
makes about 28 filled cookies

1 c (125 g) blanched almonds, slivered if possible
4 oz (114 g) butter
1 c (140 g) rice flour
1/2 c (106 g) sugar
A pinch of salt

Raspberry jam

Preheat oven to 325 degrees F/160 degrees C. Place the almonds on a sheet pan with sides and toast about 10 minutes, shaking the pan occasionally, until the almonds are a light golden brown. Remove the pan from the oven and set aside to cool completely.

While the almonds toast, place the butter in a small saucepan and melt over medium low heat, stirring occasionally and scraping the bottom of the pan, until the butter is browned and smells nutty (you can certainly brown it to your preference or comfort level, just be careful not to burn it).  Pour the butter into a bowl to cool, making sure to scrape all the toasty and flavorful milk solids from the pan along with the butter. Set aside.

Once the almonds have cooled, process to a coarse meal in a food processor (be careful not to go so far as to make it almond butter).
Pour the ground almonds into a bowl and add the rice flour, sugar, salt.  Mix with a spoon or spatula until combined. Add the melted and cooled butter and continue mixing until everything is incorporated. When the dough becomes difficult to mix, put the soon down and use your hands to mix and knead the dough until it all comes together. The texture of the dough will almost be like that of wet sand. Do the best you can forcing it to come together in a single mass and wrap tightly in plastic or place in a large plastic sealed bag, removing all the air.
Refrigerate 1-2 hours.

Preheat oven to 325 degrees F/ 160 degrees C. Pack small amounts of dough into the bowl of a deep teaspoon measure to shape. Alternatively, use your hands to roughly and tightly form small flattened balls, using about 7 g of dough per cookie. Place the cookies on a parchment paper lined sheet about 1 inch apart (they shouldn't spread), and bake 10-15 minutes, rotating the pan after about 5 minutes.

Remove the pan from the oven and let the cookies cool completely on the pan before removing. 

Handle the cookies carefully and place a small dollop of raspberry jam on the flat side of half of the cookies. Top each with another cookie and let the jam set a bit before serving.