Monday, September 3, 2012

Seared Scallops and Beurre Blanc


Fresh, meaty scallops, sweet and tasting of the sea are a nice treat.  
They're great as an appetizer, as a first course, or as a light dinner or lunch on a bed of spring greens.

Most of the time, having one small, perfect something is better than a lot of the same. 
Moderation.  
There's some satisfaction in that, and things are certainly made more special. 


When selecting scallops, make sure they are fresh, white, firm, and practically odorless (at least they should be nowhere near "fishy" in scent.)

The key when handling scallops is keeping them fresh and cold, using them soon after purchase, and not overcooking them. Texture is superior when leaning more towards "silky" and less towards rubber
If quickly seared over a high heat, the scallops will gain a golden crust and retain their moist and tender interior.  


As fas a beurre blanc goes, it's a simple pan sauce, a classic French sauce, and great with seafood.
Like mayonnaise, beurre blanc is an emulsified sauce. However, instead of being an oil emulsion, it's a butter emulsion.
And, being a warm emulsion, the sauce can "break" (separate) if it becomes too hot. The good news is that it can be saved. A little cool water quickly whisked into the sauce should re-emulsify it.


Pan sauces are good tricks to have up your sleeve, and the nice thing is that you don't need a lot to gain great flavor.


Seared Scallops with Beurre Blanc
serves 12 as an appetizer, 4 as a light meal (maybe on a bed of spring greens)

12 large sea scallops
Salt
Freshly ground black pepper
9 T butter (127g), divided
1/3 c white wine (80 ml)
3 T white wine vinegar (45 ml)
2 T minced shallot (about 1 small shallot) (18g)
2 t fresh thyme, minced (1g)

Pat the scallops dry and remove the small ligament attached to the side of the scallop if present. Sprinkle scallops lightly with salt and pepper on both sides.
Heat a large skillet over medium-high heat and add 1 T (14g) of butter. After the butter has melted, rotate the pan so that the butter coats the bottom of the pan. Add the scallops to the hot pan and sear until golden brown. Flip the scallops and sear on the other side until just cooked through (the scallops will only cook about 5 minutes total). Remove the scallops to a platter to rest. 
To the hot pan, add the white wine, white wine vinegar, and shallot. Cook the mixture, scraping the bottom of the pan to incorporate the caramelized bits, until the liquid is reduced to about 3 T. Add the thyme and stir through. Reduce the heat to low and carefully pour any scallop juices from the platter into the pan.  Add about half the remaining butter, stirring the mixture until it has completely melted. Remove the pan from the heat. Cut the remaining butter into 4 pieces and add them to the pan. Swirl the pan to mix the butter into the rest of the sauce. Plate scallops as desired and spoon sauce over the scallops. 

Saturday, August 25, 2012

Mayonnaise


Mayonnaise is an emulsion of oil in a liquid base, and one of the classic French sauces.
To make mayonnaise, oil is added very slowly and beaten into a liquid mixture (which includes egg yolk and acid such as lemon juice). All the while it is whisked, the oil is broken down into smaller and smaller droplets. The mixture becomes thick as oil is suspended within the liquid and becomes mayonnaise.

In and of itself mayonnaise is fine and dandy. But to be honest, it's something I rarely use or crave.
As part of a thicker salad dressing, yes, but as a necessity on a sandwich? Not so much.


About a year ago out of complete necessity (trust me on this), I made mayonnaise.
Now, I knew what was in it, but had never made it before. Luckily the version I threw together turned out just fine.
On to figuring out just what I did...  and well, this isn't exactly what I did, but since this particular recipe has been successful a few times, I've got the very helpful element of reliability on my side.


Homemade mayonnaise is much different than store bought. It's amazingly different.
Perhaps life-changeingly so as far as condiments go.
Just how can a condiment change your life?
Well, it may at least change your perception of mayonnaise.
But I know many people would prefer the convenience of store bought mayo, and that's fine.


Anyway, first of all, you know this condiment is fresh and you know exactly what went into it.
Then again, when making it at home, you're technically taking a walk on the wild side since a raw egg yolk is used. If you know the chickens personally though, you may not feel like you're taking your life into your hands.  Pasteurized eggs are also an option.


Homemade mayonnaise is kind of impressive. Don't you think it would really impress your friends and relatives if you told them you made mayonnaise?
It CAN be done, and besides that, it can be said to be creamier and more flavorful than the store-bought version (as well as a lovely soft shade of pale yellow due to the egg).
Since homemade mayonnaise is much more perishable than store bought I suddenly wonder just what is in the bottled mayonnaises that makes them last as long as they do.


One nice thing about mayonnaise as a sauce is that it's versatile.
It can be spread onto a sandwich.
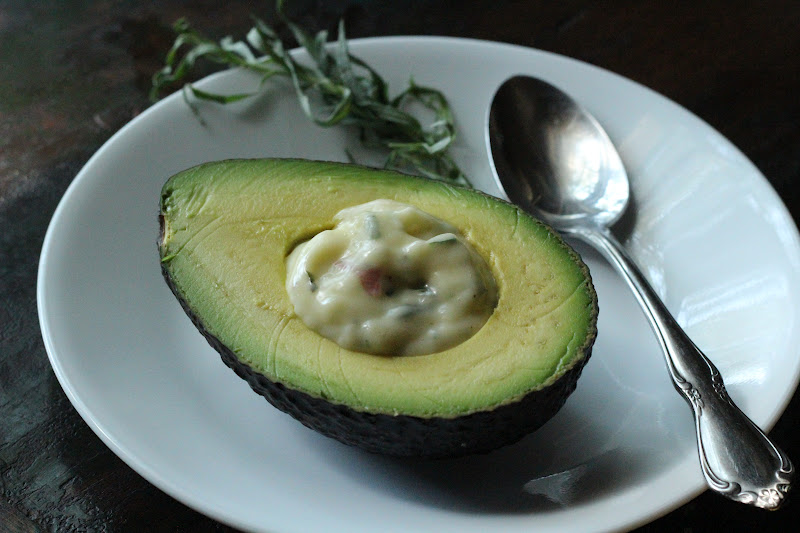
It makes a nice little dressing when spooned into halved avocados (I think this is my favorite use).
Fresh mayonnaise can become a great dip for crudités or shrimp cocktail.
Or use it as part of a potato salad perhaps.

(Aioli is a version of mayonnaise, often served with seafood or vegetables, but by definition it has to have garlic.)


The reason we use something like canola oil (vegetable oil, sunflower oil) for the mayonnaise is because it is a neutral-tasting oil (as compared to olive oil, sesame oil, walnut oil). Also, while it may sound like a good idea to use it, olive oil will apparently not always provide you with a stable mayonnaise: it can separate. 
Perhaps you could try making mayonnaise with half canola and half olive oil for some of the flavor, but I don't know that I would add more olive oil than that.


Mayonnaise can be flavored however you would like: garlic, herbs, spices... the variations could be practically endless.
But this is how I like it- the light licorice flavor of tarragon with the bite of raw shallot.


Shallot and Tarragon Mayonnaise
makes about 1 1/3 cups 

1 large egg yolk, room temperature
1/2 t Dijon mustard (5g)
1 T freshly squeezed lemon juice (15 ml)
1 t white wine vinegar (5 ml)
1 c canola oil (240 ml)
1 T minced shallot (10g)
1 T minced tarragon (4g)
1/2 t salt (3g), plus more to taste
1/4 t freshly ground black pepper (1g), plus more to taste

Whisk together egg yolk, Dijon mustard, lemon juice, and vinegar until combined. Slowly whisk in the oil, in a very thin stream, beginning a few drops at a time. Continue very slowly drizzling in the oil, whisking all the while, until all of the oil is combined and the mayonnaise is very thick (this could take 10 minutes). If at any point you add a little too much oil, stop pouring, and whisk the mayonnaise mixture until the oil is fully incorporated, then resume the slow addition of oil with the whisking. Once the mayonnaise is completely emulsified, whisk in the shallot, tarragon, salt, and black pepper. Taste the mayonnaise for seasonings and add more salt and pepper as necessary. 
Refrigerated mayonnaise kept in a tightly closed container will keep for a week at most.

Thursday, August 16, 2012

Cherry Clafoutis


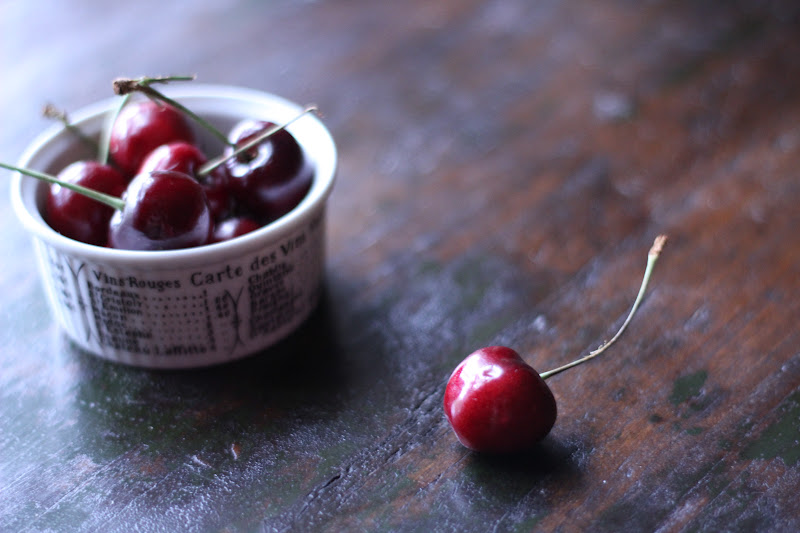
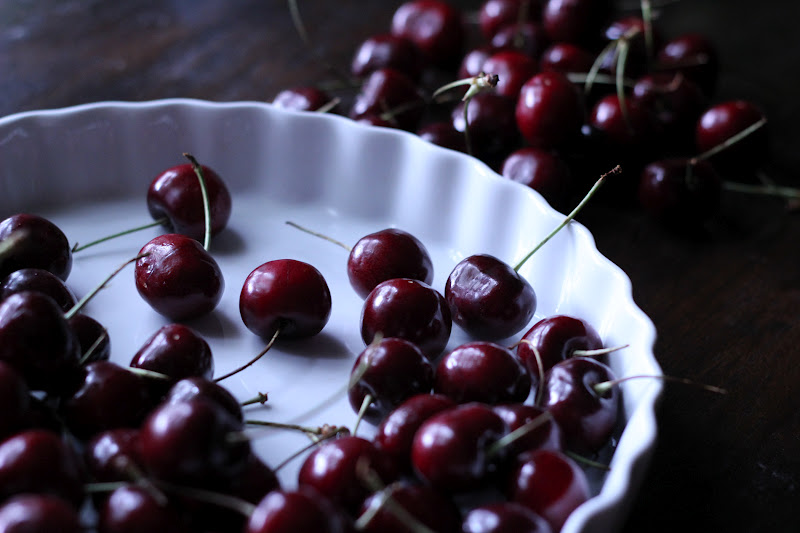
The other day I was at the grocery and saw there were lots of cherries, so I thought it might be a good idea to buy some and do something with them.

Cherries are all well and good as they are fresh, but I prefer them at least a little cooked.
Because when cooked, I think the flavor intensifies and the cherries become juicy, more cherry-flavored.


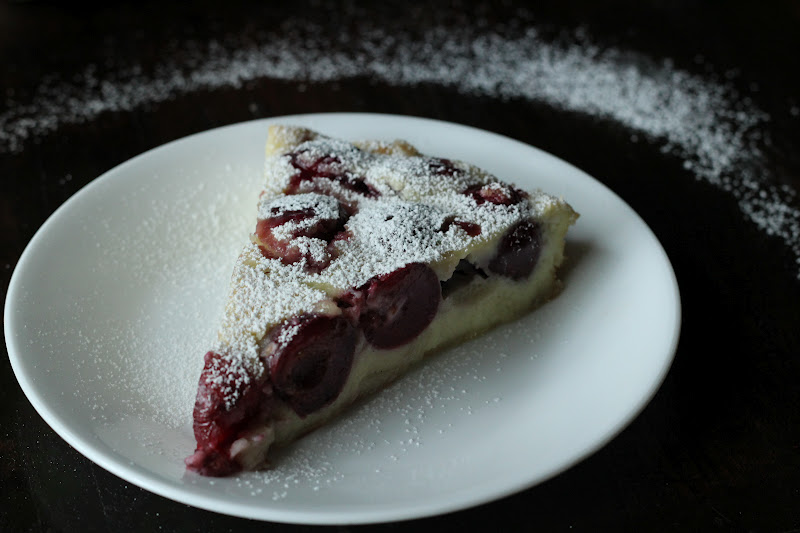
Clafoutis is a custardy, cakey French dessert made with fresh fruit. Of course, any fruit can be used- seasonal changes can be nice, but cherry is classic.
And late summer is the perfect time for the cherry version.
Like I said, the good news (if someone doesn't like cherries) is that you can make the dessert with other fruits. I wouldn't have thought it possible that cherries might not be liked, or even just tolerated, but a roommate I once had hated them. Cherry haters do exist. As do chocolate haters.


It's just a simple batter- rich, creamy, and eggy (very similar to crepe batter), with cherries bobbing about until they whole thing is baked and the warm sweet-tart little jewels become suspended.
The batter is a perfect medium to showcase the cherries.
It's not dull, not boring, but it's sort of neutral, comforting, and wonderful in the same way vanilla ice cream might be described. It's a perfect partner.


No machines needed for this one, just a bowl and a whisk.


If you don't have a cherry pitter, it's not a problem. A knife will certainly work just as well, and I know some people use a bent paperclip to remove cherry pits, but I can't really tell you how that's done.


You are welcome to leave the pits in for the added benefit of extra flavor, but I don't because I'm concerned for people's teeth and there's no real delicate way to spit out cherry pits at table.


One of my favorite flours is almond flour. I like the bit of texture and flavor that it offers, and it's one that I've kept around for several years because it was an integral ingredient for making lovely macarons. 
At one point I read or heard somewhere that clafoutis was traditionally made with almond flour, but I haven't found this statement anywhere (yet), so don't quote me on it. Then again, why not have another good reason to keep almond flour handy?


And yes, I started weighing the ingredients. It's more exact this way.
(It's a habit I would like to get into, but I don't know how consistent I'll end up being.)


Cherry Clafoutis
serves about 8

Butter, for greasing dish
1/2 c sugar, plus extra for dish (116g +)
1/4 t salt (1g)
1 1/2 c half and half or light cream (350 ml)
2/3 c almond flour (50g)
1/4 c tapioca flour (38g)
4 large eggs
1 t vanilla extract (5g)
Scant 1 1/2 lb. cherries, pitted (645g)

Preheat oven to 350 degrees F.
Grease the bottom and sides of a 6 cup (1.4 l) capacity dish (a deep dish pie pan, 10 inch quiche pan, or 9 inch square baking dish will all work). Sprinkle the buttered dish with granulated sugar and turn to coat, knocking out excess sugar.
Whisk together half and half, sugar, and salt until the sugar is dissolved. Add the almond and tapioca flours and whisk until incorporated and no lumps remain.
Add eggs, one at a time, whisking between each addition.
Whisk in vanilla to combine.
Pour a thin layer of batter over the bottom of the dish (it should be less than 1 cm deep). Place the dish in the oven for 5 minutes or so until the batter is set.
Remove the dish from the oven and scatter the cherries over the batter in a single layer.
Re-whisk the remaining batter and pour over the cherries.
Place the dish back in the oven and bake for another 30 minutes, or until the batter is set and puffed, the edges golden.
Remove the finished clafoutis from the oven and let rest and cool at least 20 minutes before serving.
Serve warm or at room temperature, dusted with powdered sugar (and perhaps a little whipped cream).
Refrigerate any leftovers.

Saturday, August 11, 2012

Tomatoes


This time of year, many are inundated with an overflow of garden-fresh tomatoes.

Think of it as a good thing.
The good news is that they're like money in the bank.
You don't have to do too much to or with them and they can add a lot to a meal.


What to do with them?
First, do not refrigerate them, they'll lose their intense tomato flavor and the texture can become mealy.
That would be the reason tomatoes fresh from the garden taste better than those from the grocery store- the tomatoes from the store were most likely refrigerated to keep them from going bad since they probably travelled a distance to get to you.
Tomatoes should be stored at room temperature, not stacked up, not packed in.
They're delicate, give them some space. Air will circulate better, you've left a little less chance for rot, and if they're not stacked they won't be smashed so easily.


Tomatoes are crucial components in many recipes.
Of course, they're at their best when raw, fresh from the vine and warmed by the sun (especially when they don't have a future in the oven or a frying pan). They're sweeter, more tomato-y.
Even if the looks or the color isn't completely magazine perfect, they still taste better.
In fact, I think they taste best when they don't look perfect.
Fighting the elements must do them good.
Heirloom varieties offer different flavors and textures as well as colors and patterns.
And the flavor hasn't been engineered out of them in favor of perfectly circular tennis ball-sized orbs with a just so shade of tomato red and a satiny sheen.


Frequently, things that grow together, go together.
Another way of putting it would be that things that are stereotypical to a certain location or style of food are pretty much that way for a reason.
Tomatoes/basil/Italy.
However, as ubiquitous as tomatoes may be when we think of Italy, they're not really Italian.  Like potatoes and corn, they're an originally imported New World crop.
The good news is that they can go with just about everything, and though normally used as a vegetable, they can become switch hitters and work for the fruit team (to which they really belong anyway).
The strict tomato/vegetable issue must be a mindset thing.
But think about it: what do tomatoes add to a dish?
Sweetness and acidity, which seem like very fruity things to do.


So, what to do with tomatoes?


Sweet and easy to handle, garden-ripened cherry, grape, and pear tomatoes are wonderful left out in a bowl, ready for snacking.

If I use fresh tomatoes, I prefer to use a variety all at once, and I like to cut them differently, too.
The larger ones sliced into rounds, the medium ones quartered or cut into sixths, smaller ones halved or left whole. This way, the tomatoes are more visually appealing with their shapes and textures as well as color and personality (well, as far as tomato variety goes).
There is more involved in eating than just the sense of taste.


Here's a little list to get things started:

Sauces, whether cooked or fresh
Tossed fresh into hot pasta
Soup, such as gazpacho or roasted tomato
Salsa
Tomato salad
Caprese salad
Compote, confit
Roasted
Sauteed
Eaten out of hand
Added to quinoa
On pizza
Tomato tart
In sandwiches
As a relish
Drizzled with olive oil, sprinkled with salt and pepper
Cored and stuffed with tuna salad, chicken salad
Smaller tomatoes stuffed with chevre and fresh herbs


Perhaps an internet search for any of these ideas or including several on-hand ingredients might be helpful if brainstorming isn't fruitful...

Wednesday, August 1, 2012

Fish Tacos- Updated


This is an updated version of fish tacos. 
It's a little more appropriate for the summer since it involves grilling instead of the steaming version in the original recipe. 

The fish has also been made a little more flavorful. 
That's one really nice thing about tilapia: it soaks up whatever flavor you give it. It's sort of like a blank canvas. 

And the black beans...? Well, those pretty much remain the same. 
But they're good enough as a side any time, though I could sometimes just eat black beans as a main and supplement with other things like salsa and some good tortilla chips.
I also think they'd be good with a fried egg (sort of semi-huevos rancheros). 

Fish Tacos and Black Beans
Yield: 6 servings

1 pound dried black beans
7 cloves garlic, divided
6 cups water
2 tablespoons extra virgin olive oil
1 large white onion, peeled and sliced
2 teaspoons kosher salt
3/8 teaspoon cayenne pepper (divided)
2 cups roughly chopped cilantro leaves, stems reserved (divided)
2 pounds fresh tilapia fillets
4 tablespoons soy sauce
1 jalapeno pepper, minced (see note)
3 to 4 tablespoons vegetable oil
salt and black pepper to taste

12 six-inch corn or flour tortillas
1 cup thinly sliced green cabbage
1/2 cup thinly sliced red onion
1 medium tomato, diced
1 avocado, sliced
1 cup sour cream (optional)
1 cup shredded cheese; Monterey jack, cheddar or Mexican blend (optional)
3 limes, quartered lengthwise


Prepare the black beans 2 to 3 hours ahead of the fish. Rinse black beans and sort, removing any small pebbles or particles. Peel and mince 3 garlic cloves. Place rinsed beans, minced garlic, water, olive oil, onion and salt in a 5-quart pot with a tight-fitting lid. If desired, add 1/8 teaspoon cayenne pepper. Bring to a boil. Lay cilantro stems over beans if desired. Reduce heat to low, cover and simmer beans, stirring gently a few times. Simmer beans about two hours, until the beans are soft and most of the water has been absorbed. Test for doneness after an hour, then check every fifteen minutes.


Remove pot from heat. Remove cilantro stems. Using a potato masher or the back of a large spoon, partially mash and stir the beans. Cover until ready to serve. The beans will thicken as they sit. 


When the beans are nearly ready, arrange tilapia fillets in a single layer in a shallow pan or tray. Peel and mince remaining 4 cloves garlic. In a small bowl, combine garlic, soy sauce, jalapeno and cayenne pepper. Pour over fish and turn to coat. Refrigerate fillets for 20 minutes, turning once or twice in the marinade


Prepare to grill fillets. Heat grate over medium heat. When the grate is hot, brush with vegetable oil and place fillets on grill. Cook about 5 minutes on one side, the flip the fillets. Grill about 2 minutes on the other side and check for doneness (continue cooking as necessary). The fillets should be opaque and will flake easily when done.


Remove fillets to a plate. Season to taste with salt and pepper. Using a fork, break fillets into large flakes. Warm the tortillas


Assemble the tacos with fish on the bottom. Add shredded cabbage, sliced onion, tomatoes, avocado slices, sour cream and cheeses in any combination desired. Squeeze with lime juice and eat. 

Note:
Remove jalapeno seeds and ribs for a milder marinade. 

Photo by David Carson of the St. Louis Post-Dispatch.
(So, I completely forgot to take a photo until the tacos had been completely demolished. Too late... but it can be blamed both on negligence and lunch time.)

As to the recipe, it's an update of my fish taco recipe from April of 2011, and was part of an article in the St. Louis Post-Dispatch by Pat Eby published on August 1, 2012. 

Tuesday, July 10, 2012

Lavender Syrup


Kakao Chocolate has been serving ice cream since this past April or so. And because we would be serving ice cream in the Maplewood Kakao store, we needed toppings to go with it.
Serendipity makes the ice cream, we make the toppings.
A chocolate shop would require a good chocolate sauce, of course. Caramel (burnt and salted) is also necessary.
Additionally, seasonal fruit sauces and compotes are necessary when offering ice cream, and with a farmers' market right down the street a couple days a week, why not utilize the convenience of fresh fruit?
Strawberry-rhubarb, fresh peach, there's been a blackberry sauce...


Lavender syrup is a little different. I'm aware it's not going to be one of the first things that comes to mind when one thinks of ice cream.  I know it's not everyone's cup of tea- but it could be if you would give it a chance. Sometimes you need to try something different, folks.
Be a little adventurous!


We normally have plenty of dried, food-grade lavender buds in the shop for the lavender truffles.
As I am a fan of lavender and like to find different things to do with it, I wanted to try using it to make syrup to offer for ice cream. It took a couple tries, mostly for texture and technique, but it ended up working out.


In the end, lavender is infused into a simple syrup and yields a delicate and flavorful, clear, pale mauve syrup.


While corn syrup isn't going to be everyone's most favorite ingredient, it does serve a purpose. In the confectionery world corn syrup helps to inhibit crystallization. Not much is needed, but it keeps the syrup in a free-flowing state. Who wants grainy syrup?
As long as it doesn't end up growing sugar crystals, the consistency of this syrup is similar to a light honey.


Syrup is a versatile ingredient in the desert world.
It can be used over pound cake (perhaps with some whipped cream and fresh strawberries), as the syrup for an Italian soda, drizzled over fresh fruit (blueberries?), as part of a trifle, or between layers of cake.


My favorite, however, is spooned over good vanilla ice cream and with a sprinkle of delicate flakey salt on top, such as fleur de sel or Cyprus black lava salt. However, if I had to choose, I would go with the black salt since it offers a visual treat in addition to the gustatory.
Yes, salt on ice cream.
The contrast is amazing, and the bit of salt makes all the flavors really stand out.


I will caution that if you've never done something like this before, do be careful when adding the salt. It's easier to add more than it is to take it away.


Dried lavender can be found at Dean & Deluca as well as at Penzey's. Certian gourmet grocery stores may carry it with the herbs and spices.


Lavender Syrup
makes about 1 1/4 c


1 1/4 c sugar
1 c water
2 T corn syrup
1/3 c food grade dried lavender buds (preferably organic)


Place all ingredients in a saucepan. Stir over medium-low heat until the sugar has completely melted. Once the sugar has melted, stop stirring. Continue cooking the mixture and bring to a boil. Wash down the sides of the pan with a pastry brush dipped in a small dish of cool water as necessary (it should probably be done a few times during the course of cooking). This will help prevent sugar crystals from forming in the syrup.  
When the syrup mixture reaches 223 degrees F, remove the pan from the heat and cover with a cocked lid. Let the lavender buds steep in the syrup for 15 minutes. 
Strain the finished syrup through a fine mesh strainer into a bowl (if you want the syrup to be completely clear, without little lavender specks, place a few layers of cheesecloth into the strainer before pouring the syrup through). Do not scrape the sides of the pan after pouring the syrup through the strainer- this is another bit of insurance against crystallization. 
Press on the lavender buds in the strainer to extract as much flavor and syrup as possible. 
Let the syrup cool completely and use or store for later use. 
Lavender syrup can be stored in a glass jar in the refrigerator at least a month. 

Wednesday, July 4, 2012

Rice Bowls


Rice bowls can make a fun and economical dinner.
Not that "economical" and "fun" belong in the same sentence very often, and they certainly should not be confused. However, we must consider that they're not mutually exclusive.


Just make a big pot of basmati or jasmine rice, saute whatever fresh vegetables are available- maybe add a nice helping of garlic to the veggies, possibly offer some sort of protein (chicken, beef, shrimp) as well as condiments like soy or tamari sauce, chili paste or sriracha, and toasted sesame oil- and think about making some lime wedges available for those so inclined.
Perhaps a fried egg could be offered for the top of the rice and vegetable mountain, sort of like a bibimbap. This way, when the yolk is broken there's an impromptu silky sauce to go with the rice.
Fresh basil, cilantro, and sliced scallions would be flavorful finishing accompaniments to include.

This type of meal can be tailored towards dietary restrictions or preferences, too. Vegetarian, low sodium, gluten free, low fat...


Once everything is together, serve people a nice steamy bowl of rice, then everyone is welcome to put together his own dinner.


For example, for a recent rice dinner, the choices available as rice bowl toppings included:
  • Sauteed (hot and quick) red and green bell peppers
  • Sauteed garlic, onion, zucchini, and mushrooms, 
  • Shrimp sauteed with lemongrass, ginger, and garlic
  • Fried eggs
  • Soy sauce, sesame oil, chili paste, and torn basil leaves. 

It's sort of like the rice version of a salad bar- a rice bar.
And it's a dinner for which an actual recipe is unnecessary.


Personally, I think it's important to use real rice. Nothing quick-cooking here, nothing that's been processed.
Good basmati or jasmine rice has much more flavor, and takes little more than 20 minutes (probably 30 at most). Can't people take that small amount of time? It's not that big a deal, and the flavor/texture and potential nutritional benefits outweigh the time "disadvantage".... and there are plenty of other things you could work on during that time period. 
Rice is so easy, too.
And one really nice thing is that the measurements don't need to be exact in terms of grams, ounces, cups or whatever you happen to use. Ratios, yes. Nitpicky numbers, no. You just need double the liquid (water or stock) to the amount of rice you plan to use.
I will, however, give a recipe as an example.
Aim for making more rice than you need as opposed to just enough- leftover rice can be a very good thing to have around.

Basmati Rice
probably good for about 4 rice bowls


1 c basmati rice
1 T olive oil
2 c water
1/2 t salt


Rinse the rice thoroughly in cold water. 
In a medium saucepan, heat the olive oil over medium heat. Add the rice and saute a few minutes, until each grain of rice is coated in oil. Add the salt and water, stir, and increase the heat. When the rice comes to a boil, stir again, reduce the heat to a simmer (low/warm), and cover. If the rice and water remain too hot for a while and start to boil over, pull the pan off the heat a little so it's only partially on the burner. 
Simmer the rice 20 minutes, then remove from heat. Keep the pot covered and let the rice rest and steam at least 5 minutes... but it can sit for longer as it will stay hot.