Friday, February 25, 2011

Sparking White Wine Fondue


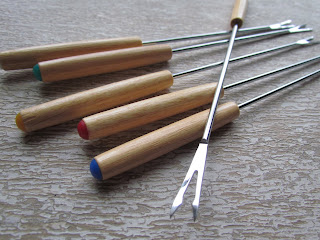
A cool and rainy day is a great day for fondue.
And it's an activity dinner where people have to participate to eat.


This particular fondue recipe piqued my interest.


I like fondues with flavor. Not that the cheese doesn't have it's own flavor, but I like something that's more bold and savory.
Garlic certainly helps this, but a little acid from vinegar or lemon helps cut richness and adds some brightness.


Apparently the acid in both wine and lemon will help keep the fondue from curdling.
Hopefully I can safely assume no one wants a curdled cheese fondue?


One different thing to me was the addition of corn starch. It's supposed to create a stable emulsion so the cheese and wine don't separate easily. However, if there's a little separation, it's ok with me. Garlicky, cheesy wine sauce happens to be great for bread dipping.


I've know some people use a little fresh nutmeg in anything that has cheese in it to enhance the flavor.
I would have never initially thought to grab the nutmeg for a cheese omelette, but some people do, and it's pretty good.

So, in it goes (since I like it).


Of course, a crusty and slightly dry baguette is the classic pair for the cheese sauce, but I like to have something green to go along with it, too.
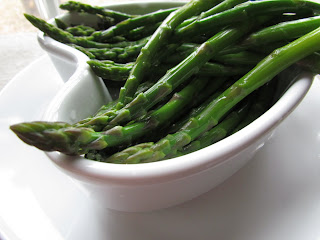
Quickly blanched and shocked asparagus and broccoli are perfect.


No fondue pot? You'll probably survive. Dinner might have to be stationed near the stove though.


Sparkling White Wine Fondue
Adapted from Saveur, December 2010

2 1/4 c sparkling white wine
1 T cornstarch
2 garlic cloves, minced
1 lb. Emmental cheese, grated
1 1b. Gruyere cheese, grated
2 T brandy
1/4 t baking soda
1 T fresh lemon juice
1/4 t freshly grated nutmeg
1/4 t freshly grated black pepper

Whisk together 2 T sparkling wine and cornstarch in a small bowl. Set aside.
Pour the rest of the wine in a large pot and add the minced garlic. Bring to a boil over medium heat and whisk in the cornstarch mixture. Reduce the heat to low and add the cheese in increments, stirring until melted (about 10 minutes). Stir together the brandy and baking soda in a small bowl, add to the cheese mixture, and stir until smooth. Add the lemon juice and stir to combine. Transfer the fondue to a pot set over a lit Sterno cup and serve.

Monday, February 21, 2011

A Little Sweet Potato Quiche


This recipe was an adaptation from Donna Hay's book Entertaining.
Her photos and recipes are always beautiful things. I suppose she might be the Australian equivalent of Martha Stewart.
Only, there seems to be a certain casual effortlessness...


I own a couple Australian cookbooks and I've given several as gifts.
I must say there's something I love about the photography, food, and food styling.
It's so... fresh!


I've started doing some teas, and this was one of the offerings on the first day.


I thought it would be easiest to handle them in regular-sized muffin tins, this way they're all uniform in size, a perfect single serving, and no new kitchen equipment is necessary.


Everyone has a muffin tin, right?


Although the puff pastry is a great time-saver and looks beautiful, I think I'd like to try a variation of this combination in a large quiche with a regular pastry crust...


Little Sweet Potato Quiches
makes 6

1/2 lb. sweet potato, peeled and cut in a medium dice
olive oil
kosher salt
1 sheet frozen puff pastry, (gently!) thawed overnight in the refrigerator
2 lg eggs
1/2 c half and half or whipping cream
1/4 t freshly ground black pepper
1/4 t freshly grated nutmeg
1/3 c freshly grated Parmesan cheese
Fresh sage leaves, torn or chopped

Preheat oven to 400 degrees F.
Grease a 6-hole regular-sized muffin tin.
Toss the sweet potato with about 1 1/2 T olive oil, a few grinds of black pepper, and a sprinkling of kosher salt. Place on a baking sheet and bake about 15 minutes, tossing once during baking.
While the sweet potato cooks, roll out puff pastry with a rolling pin on a lightly floured surface until approximately 11 x 13 inches in size. Cut the pastry into 6 equal pieces. Line each muffin cup with a piece of pastry, pleating the sides as necessary so the pastry fits the tin. Dock the bottom and sides of the pastry and place the muffin tin in the freezer about 10 minutes.
Bake the pastry cups at 400 degrees F for about 10 minutes, or until the sides puff and begin to turn golden brown.
While the pastry cups bake, combine the eggs, cream, nutmeg, pepper, a sprinkle of kosher salt, and Parmesan cheese. Whisk until blended and set aside.
When the pastry is done, remove the pan from the oven and turn the oven temperature down to 375 degrees. Using the back of a spoon, "deflate" the puff pastry on the sides of the muffin cup to make room for the filling. Divide the egg mixture between the muffin cups, being careful not to overfill. Place roasted sweet potatoes in each cup with the eggs and top with sage leaves.
Bake for approximately 20 minutes, or until the filling is set. Let the quiches cool slightly and remove from the muffin tin. You may need to run a sharp knife along the edge between the tin and the pastry.
Serve warm.

Thursday, February 17, 2011

Salted Caramel-Dark Chocolate Truffles


A long time ago, our dad used to read us a story about a little girl who broke her arm and had to spend the night in the hospital. Susie (I think) seemed to be quite a happy child for having a broken arm bad enough to require a hospital stay.
Anyway, because she was spending the night in this big and scary hospital, the nurse in charge of Susie gave her a hospital tour. The message? Kids, hospitals aren't that bad at all! They're actually quite nice.


Before the nurse puts Susie to bed, she hands Susie the call button and tells her that if she needs anything during the night, she'll be at the nurses' station.
However, when Dad read the story, the nurse had a voice very much like a horrible Julia Child impression. And to make things worse, instead of "working" in the original version, Dad would amend it to "at the nurses' station eating chocolates."


Well, we KNEW this was absolutely not true and NOT the way the story went. We'd say something like, "Da-ad! Nooooooo! Say it right!" Occasionally we'd have to implore him not to do the "ladies' voice," as it was called. But it didn't work so well.
Be assured we were certainly not as amused by the whole thing as he was.


I'm sorry to say that since I've grown up, I can say with certainty that some nurses' stations really are like they were in my dad's version of the story. I'm not pointing fingers, I'm not naming names... but I also know that Dad had reasons for telling the story as he did since he has spent quite a bit of time in hospitals- both as a patient and as a physician.


Anyway, "chocolates" make me think of this story. And when I imagine someone to be eating "chocolates" I think of something akin to bonbons and truffles. No mere Hershey's bar would do in this situation.

These truffles are incredible.

But please, please, please start with the best chocolate you can find and/or afford. You'll be happier in the long run.


And the texture? Melt-in-your-mouth incredibly smooth creaminess.


Specific salt flavor is also important.
Yes, really. Salts do have flavors.


Caramel and chocolate are favorites, especially together, and the bit of salt makes the combination that much better.

The caramelly sweetness is tempered by the deep, dark chocolate, and the crunchy salinity adds a little interest.


You'd never add regular iodized table salt to the top of a truffle, it wouldn't be right!

Fleur de sel is a finishing salt, not a cooking salt, and has a delicate and clean, non-chemical flavor.


One important thing about truffle making: warm hands and the center of truffles are a bad combination. Be forewarned, your hands will probably become chocolate coated. Work as quickly as possible. The same goes for dipping the finished truffles into the melted chocolate. The hot chocolate will start to melt the cocoa coated truffle center as soon as the two collide. Don't let the truffle sit in the chocolate!


P.S. Thank you, hand model.

Salted Caramel Dark Chocolate Truffles
Adapted from Bon Appetit, January 2004
Makes 30-32 truffles

20 oz semi-sweet or bittersweet chocolate (60-70% cacao), separated
2 T unsalted butter
1/3 c granulated sugar
2 T water
1/4 t (rounded) fleur de sel, plus extra for sprinkling
1/2 t pure vanilla extract
2/3 c whipping cream
Unsweetened cocoa powder

Chop and melt 8 oz. chocolate in a heatproof bowl set over a pan of simmering water. When the chocolate has melted add the butter and stir until melted and incorporated.
Over medium-high heat, cook the sugar and water in a small saucepan. Do not stir, but swirl the pan occasionally so that the sugar melts and heats evenly. Keep a brush and cup of water near the stove to wash down the sides of the pan as necessary. As the sugar syrup begins to caramelize, continue swirling the pan until it is a deep amber color. Off the heat, carefully pour in the cream. The caramel will bubble and steam, and solidify. Place the pan back on the heat and continue to stir the caramel and cream until it's smooth, then add the vanilla. Pour the caramel into the melted chocolate, add the fleur de sel, and stir to combine. Refrigerate at least 3 hours.
Scoop 1 T of chocolate ganache (a heaping scoop using the large end of a mellon baller works well), roll into a ball, and coat in cocoa powder. Place on a baking sheet lined with parchment paper or aluminum foil. Continue with remaining chocolate and refrigerate all truffles on the pan overnight.
Line a sheet pan with aluminum foil.
In a heatproof bowl set over simmering water, place the remaining 12 oz. of chocolate- do not allow the bottom of the bowl to touch the water. Stir occasionally until the chocolate is smooth and completely melted. Remove the bowl from over the simmering water. Quickly submerge a cocoa-coated truffle in the melted chocolate. Lift the truffle from the melted chocolate with a fork and gently tap the fork on the side of the bowl to allow excess chocolate to drip off. Transfer the truffle to the foil-lined pan. Repeat with all remaining truffles. Sprinkle the finished truffles lightly with fleur de sel. Let stand until the coating sets (at least an hour) and transfer to the refrigerator for at least an hour before storing in an airtight container.
Bring to room temperature before serving.
Can be made a week in advance.


What to do with extra melted chocolate if you have it?
I like to make chocolate bark with any nuts and dried fruit I have around.


Tuesday, February 15, 2011

Caramel Corn


We've been making this forever (forever is a long time), and it's one of those recipes from a grandma.
A grandma who seemed to have had quite a way with confections...


So, it's been around a while and we have no idea where it came from.
The only thing I did to this recipe was to increase the amount of caramel a bit.
Caramel has a way of bringing wayward pieces of popcorn together. How nice.


I was one of the kids who would look (not paw through, but shake the bowl around and look) for the most caramel-coated pieces and stuck-together chunks of popcorn (most probably to the disappointment of others).


See, at our house, we were (and are) not to choose in this manner. You take what you get.
In other matters it's known as "luck of the draw."


I've always liked caramel, and those were just the best pieces!
Caramel was my thing. If we had ice cream, I would always choose the caramel sauce over the chocolate sauce.


If you've got an air popper and popcorn kernels laying around, great. It makes things fairly easy.


If not, and you've never made plain popcorn from loose kernels, you can find a technique or five here. Whether in a brown paper bag or on the stovetop, you can still make popcorn- just don't add butter or salt for this recipe.


The easiest way to deal with sticky syrups such as maple, corn, molasses and such, is to grease or spray the measuring cup prior to measuring the liquid. This way it should just slide out of the cup without leaving a difficult to manage mess.

Finished caramel can also be a mess, but it's good to remember that hot water will help to melt it!

The "approved" way of cooling the caramel corn is cutting open a large brown paper bag so it lays flat and pouring the finished corn from the sheet pan onto the paper. The bag helps to soak up any excess oils and the caramel corn doesn't stick!

Caramel Corn

4 heaping qt. (16+ c) freshly popped popcorn (kept warm if possible)
10 T unsalted butter
1/2 t (slightly heaping) salt
1 1/4 packed brown sugar
1/3 c corn syrup
1/2 t (slightly heaping) baking soda

Preheat oven to 200 degrees F.
Place equal amounts of popcorn in two large bowls.
In a medium saucepan, combing the butter, sugar, salt, and corn syrup. Cook on medium heat until the sugar dissolves and the mixture begins to bubble. Add the baking soda and stir until it is incorporated and the mixture begins to foam.
Pour the warm caramel evenly over the two bowls of popcorn and quickly toss/fold until all the pieces of popcorn are coated.
Place the popcorn on two baking sheets with sides and bake approximately 1 hour- stirring every 15 minutes. Rotate the pans from to to bottom halfway through the baking process.
Let the caramel corn cool to room temperature, stirring occasionally to help it cool evenly.
Store in an airtight container.